How to Make the Book Button on Instagram and Facebook
Last modified:
DIKIDI Business users can add the Book button to their Instagram and Facebook business accounts.
1. Activate Online booking on the DIKIDI Online platform.
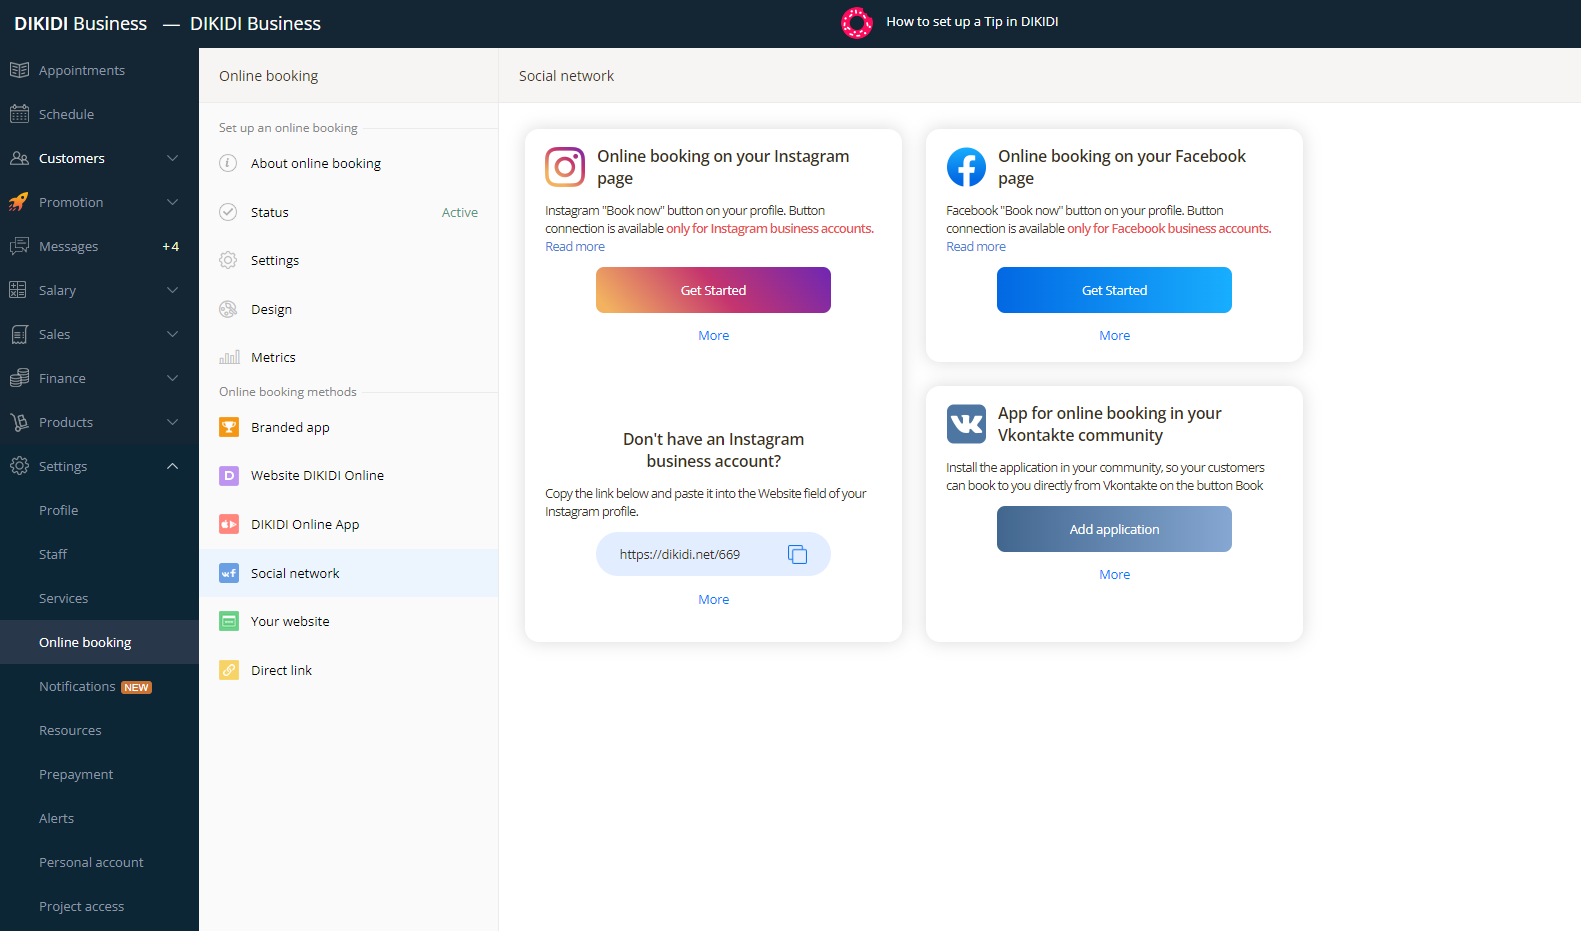
2. Go to "Online booking" — "Social Networks" and click the "Get started" button near Instagram or Facebook integration.
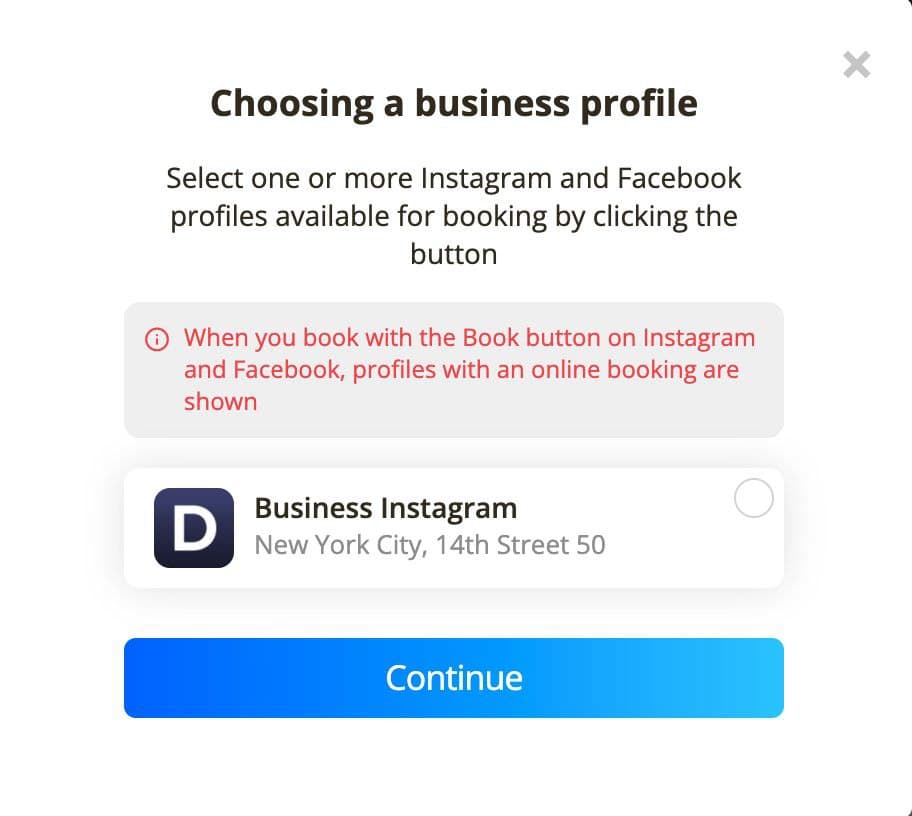
3. At this stage, select your project or several projects that will be available by clicking the "Book" button in Instagram or Facebook.
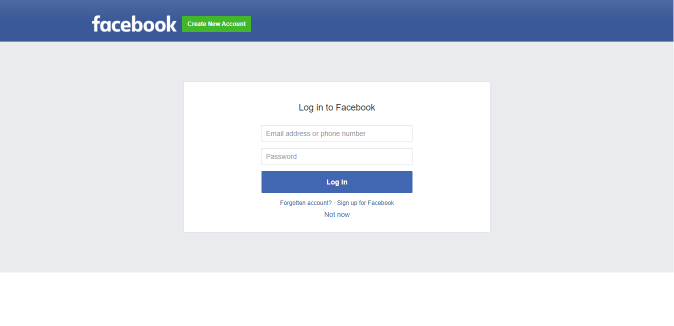
4. You will be redirected to the Facebook login page, log in with your account, or register a new one.
Important: Please note that you must have a Facebook business account. If not, then you need to register here: business.facebook.com
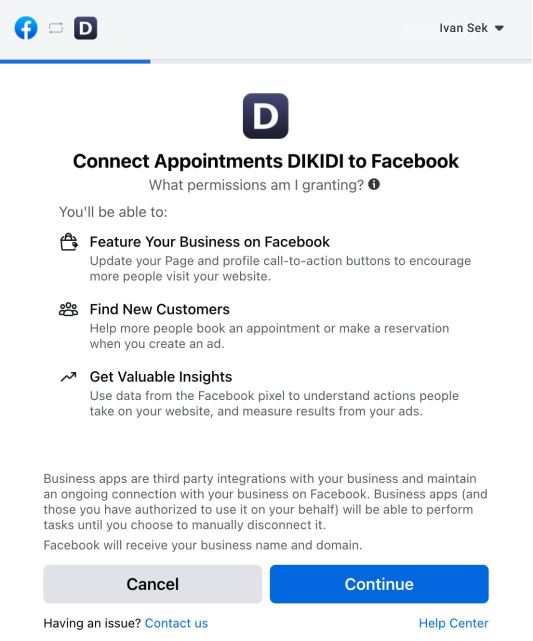
5. Grant access to the DIKIDI Appointments app.
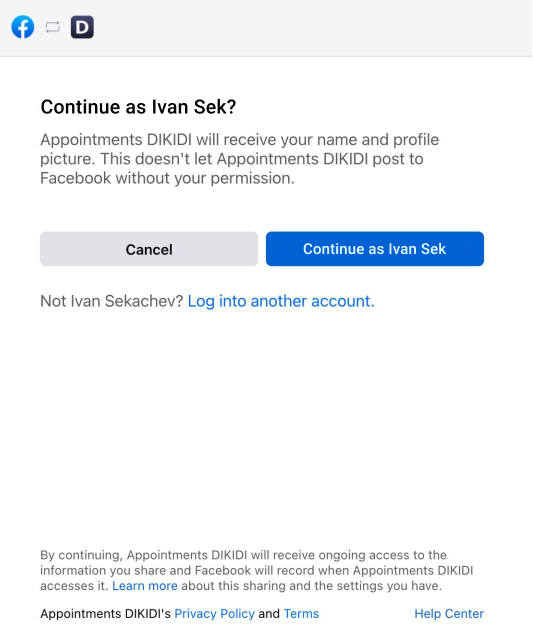
6. Connect the app by clicking the Continue button.
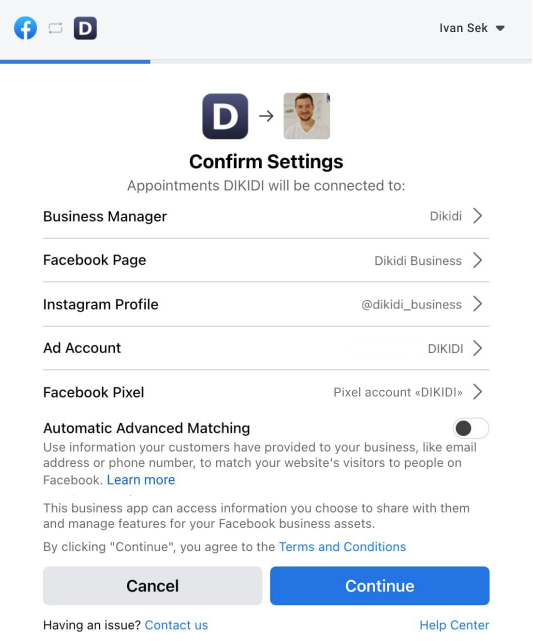
7. Confirm the settings, select a business account, select a Facebook page, select an Instagram profile, select an Advertising account and Facebook Pixel, click "Continue".
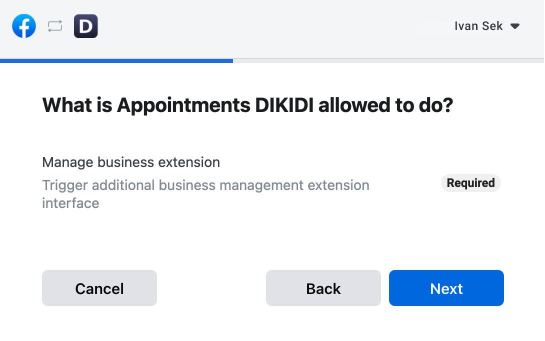
8. Give permission to the DIKIDI Appointments app.
9. Do not close the page until the end of the application connection. Click the "Finish" button.
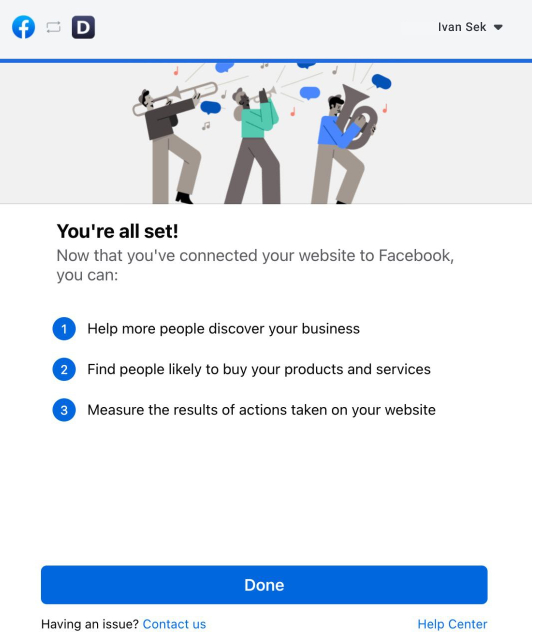
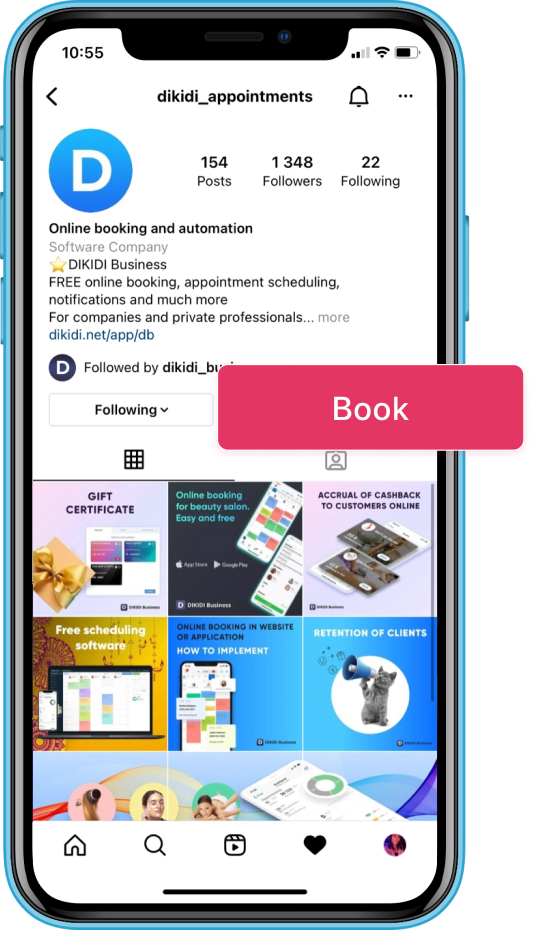
10. Done! You will now have a "Book" button on your attached Instagram and Facebook pages.
How to disable the button
In the "Online booking" — "Social networks" section, you can disable available integrations by clicking on "Disable".