Creating a Package in DIKIDI
Last modified:
Packages allow you to sell a package of visits to clients in advance – this is convenient for regular clients and helps increase return rates. The functionality is available in the PRO and VIP plans.
Begin your study with a short video:
How to create a package
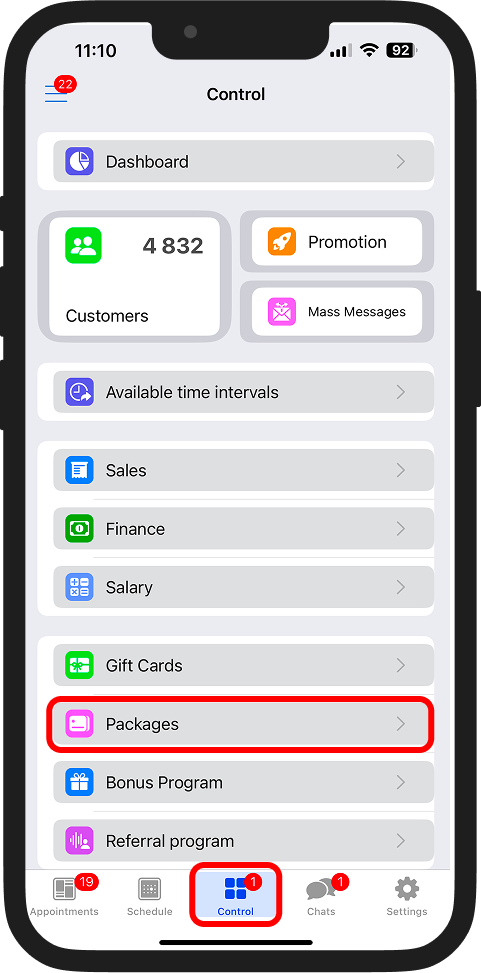
1️⃣ Go to the "Control" → "Packages" section;
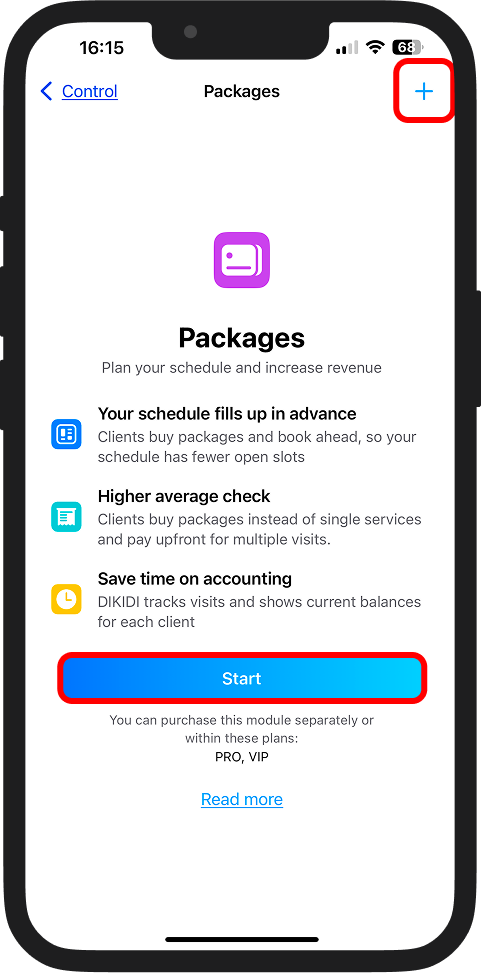
2️⃣ Click "Start", "Create" in the web version or "+" in the top right corner;

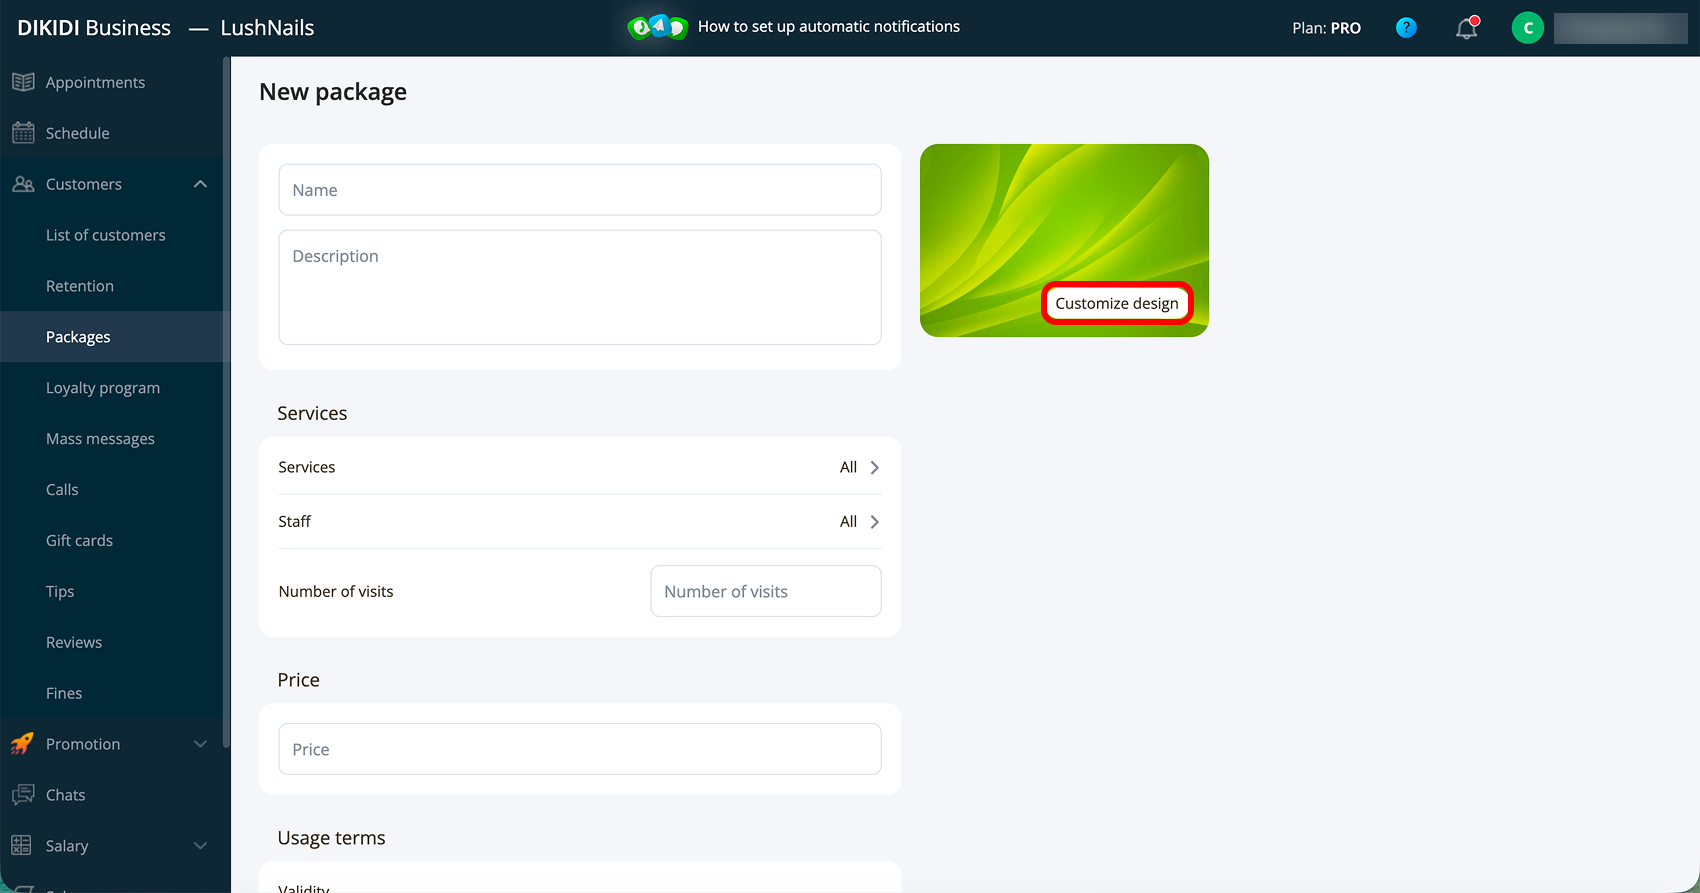
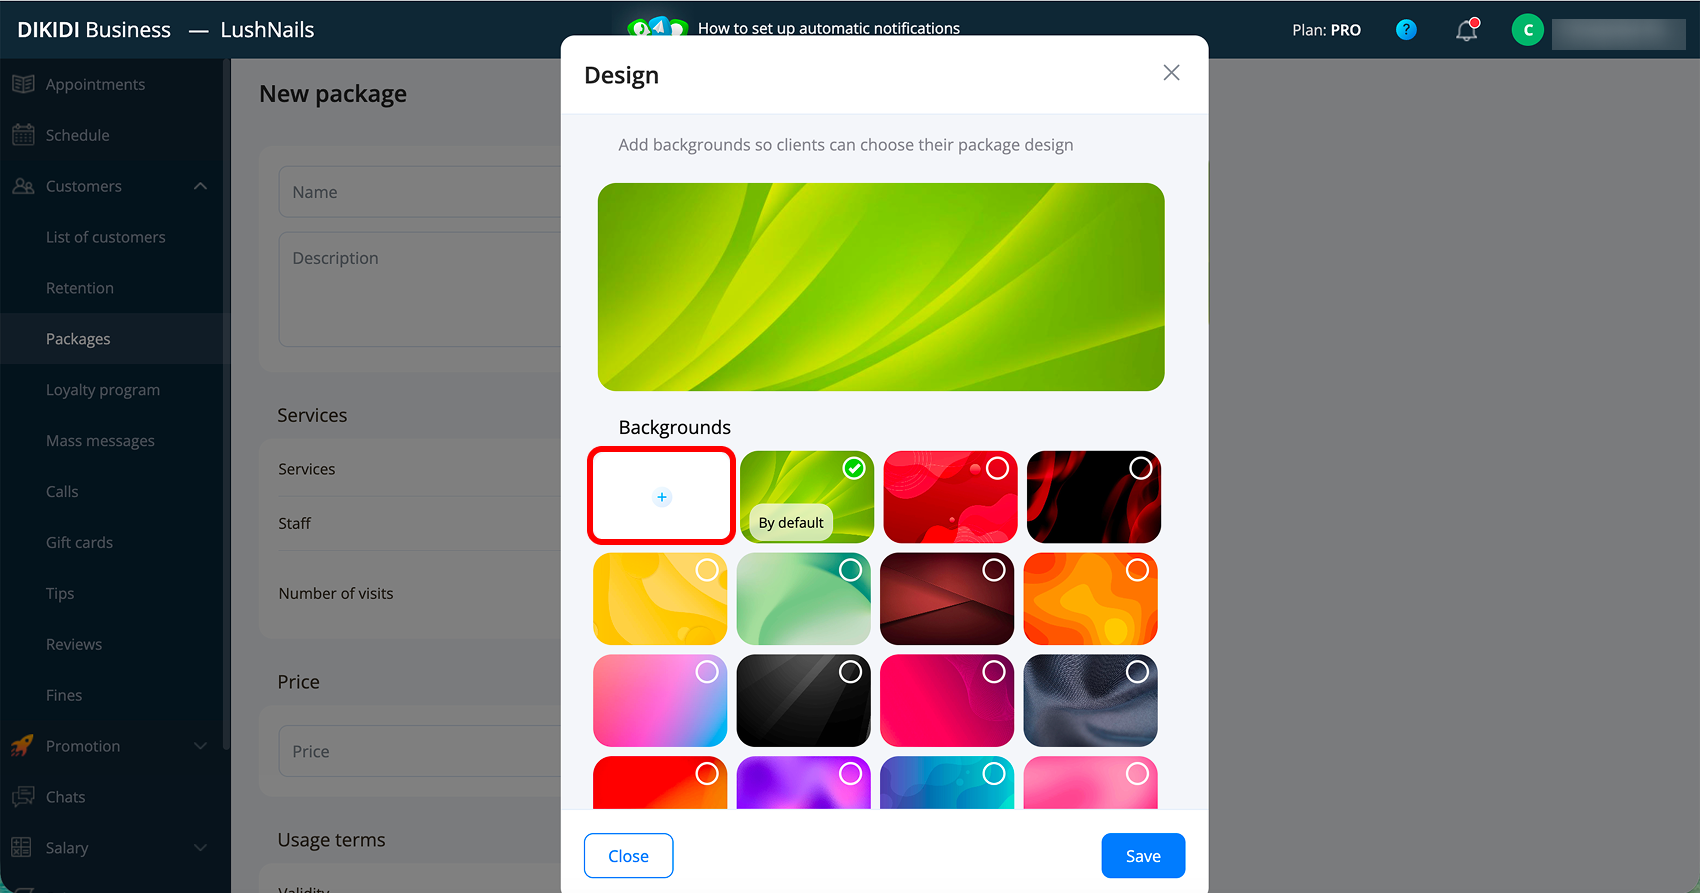
Design
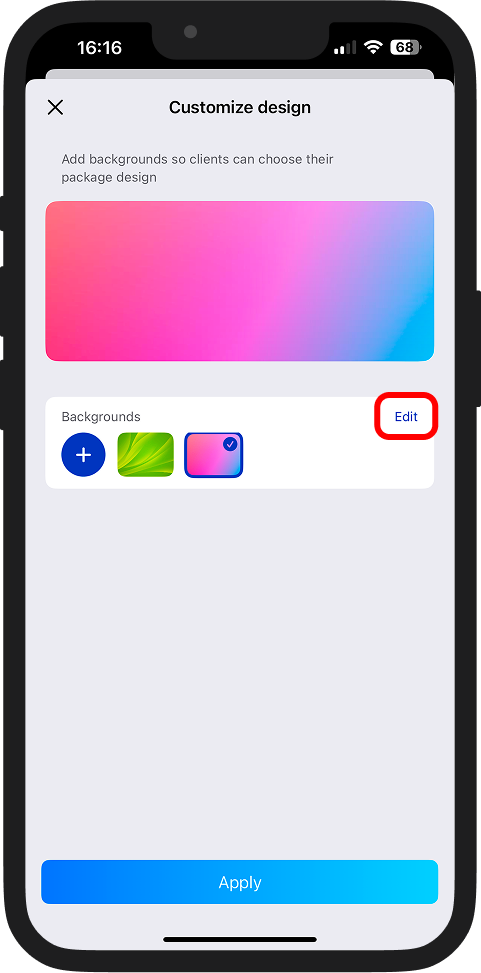
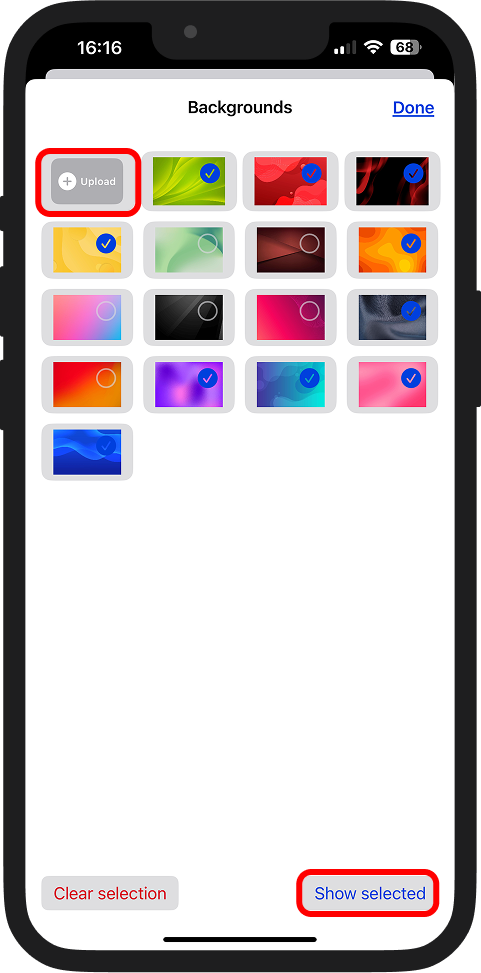
3️⃣ Click "Customize design", then "+" or "Edit" to proceed to the image selection. Choose a ready-made image or upload your own via "Upload". To check the result, click "Show selected". When everything is ready – click "Done" and "Save";


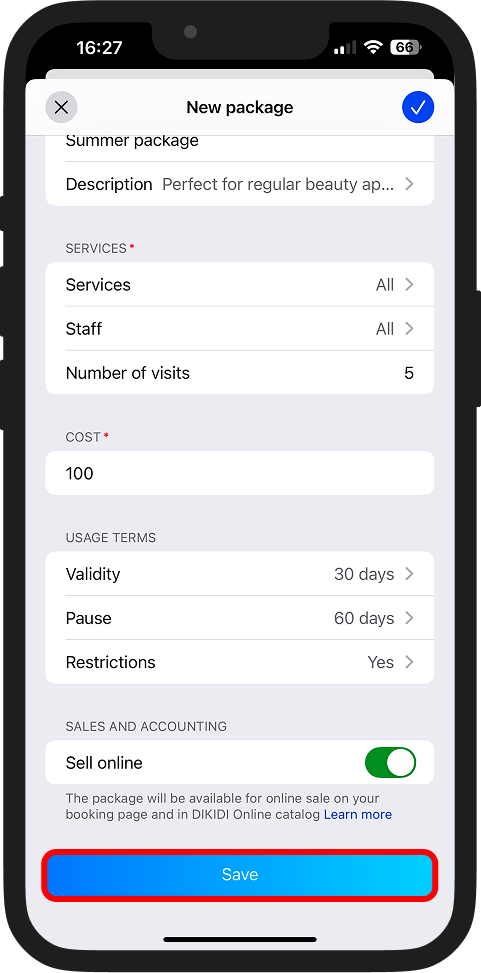
Basic Information
4️⃣ Enter the name of the package;
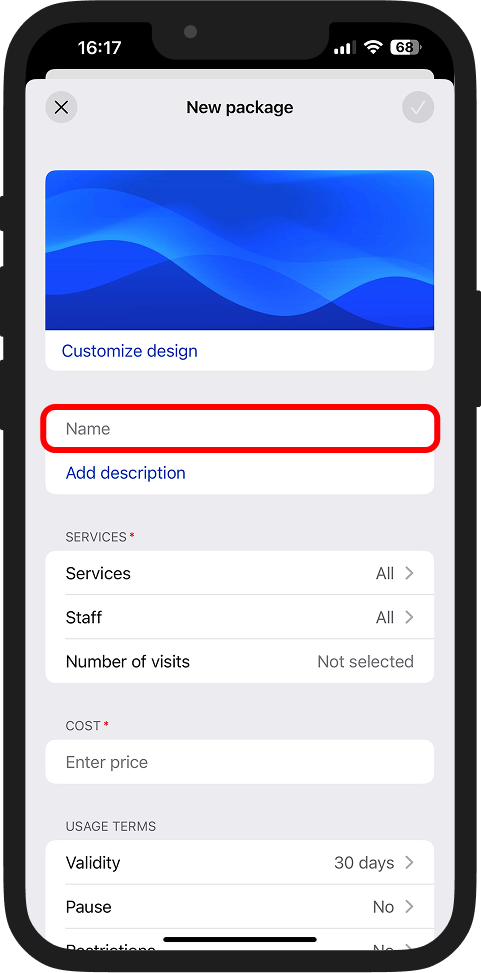
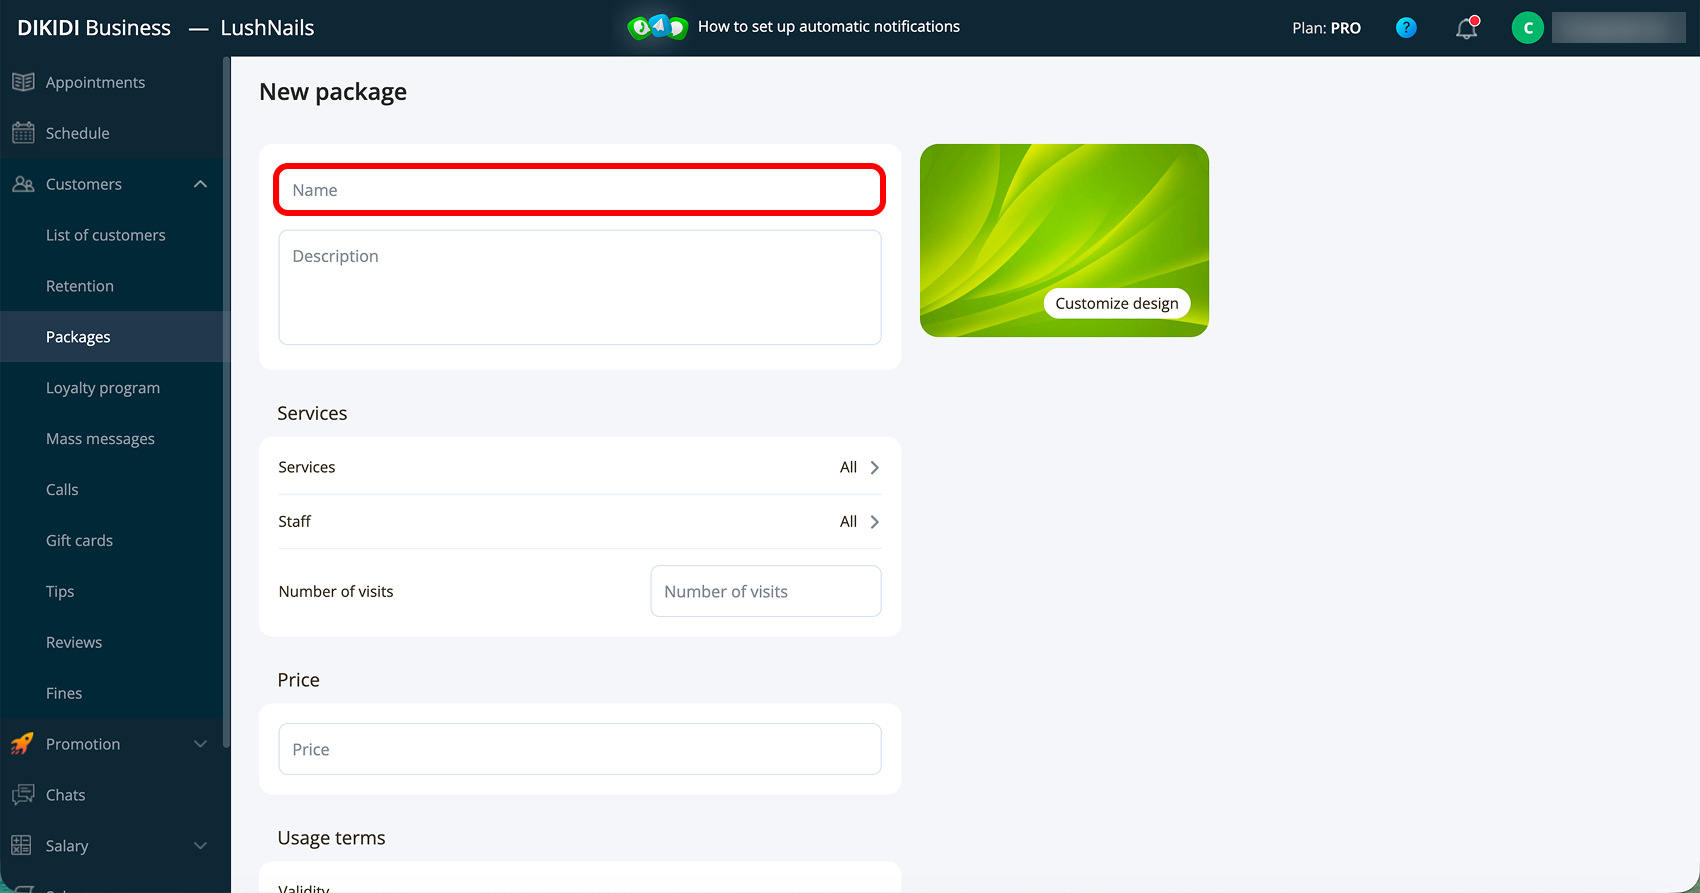
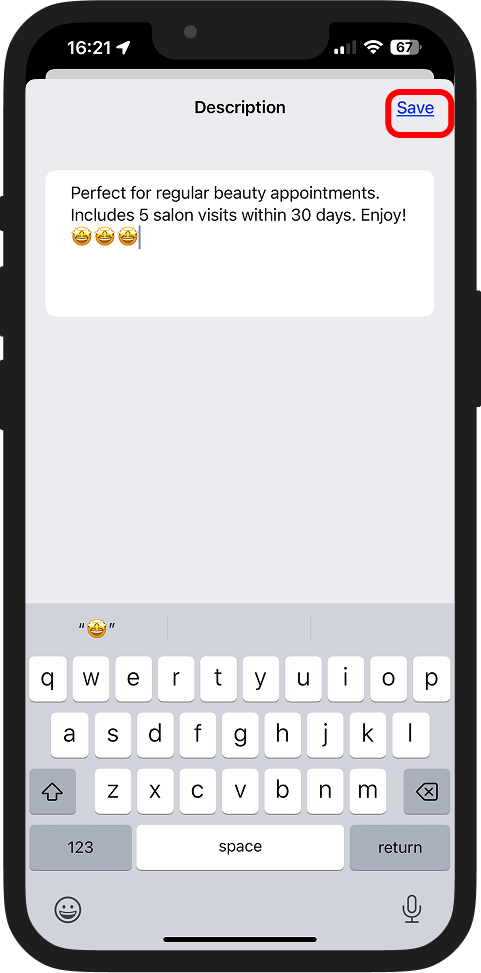
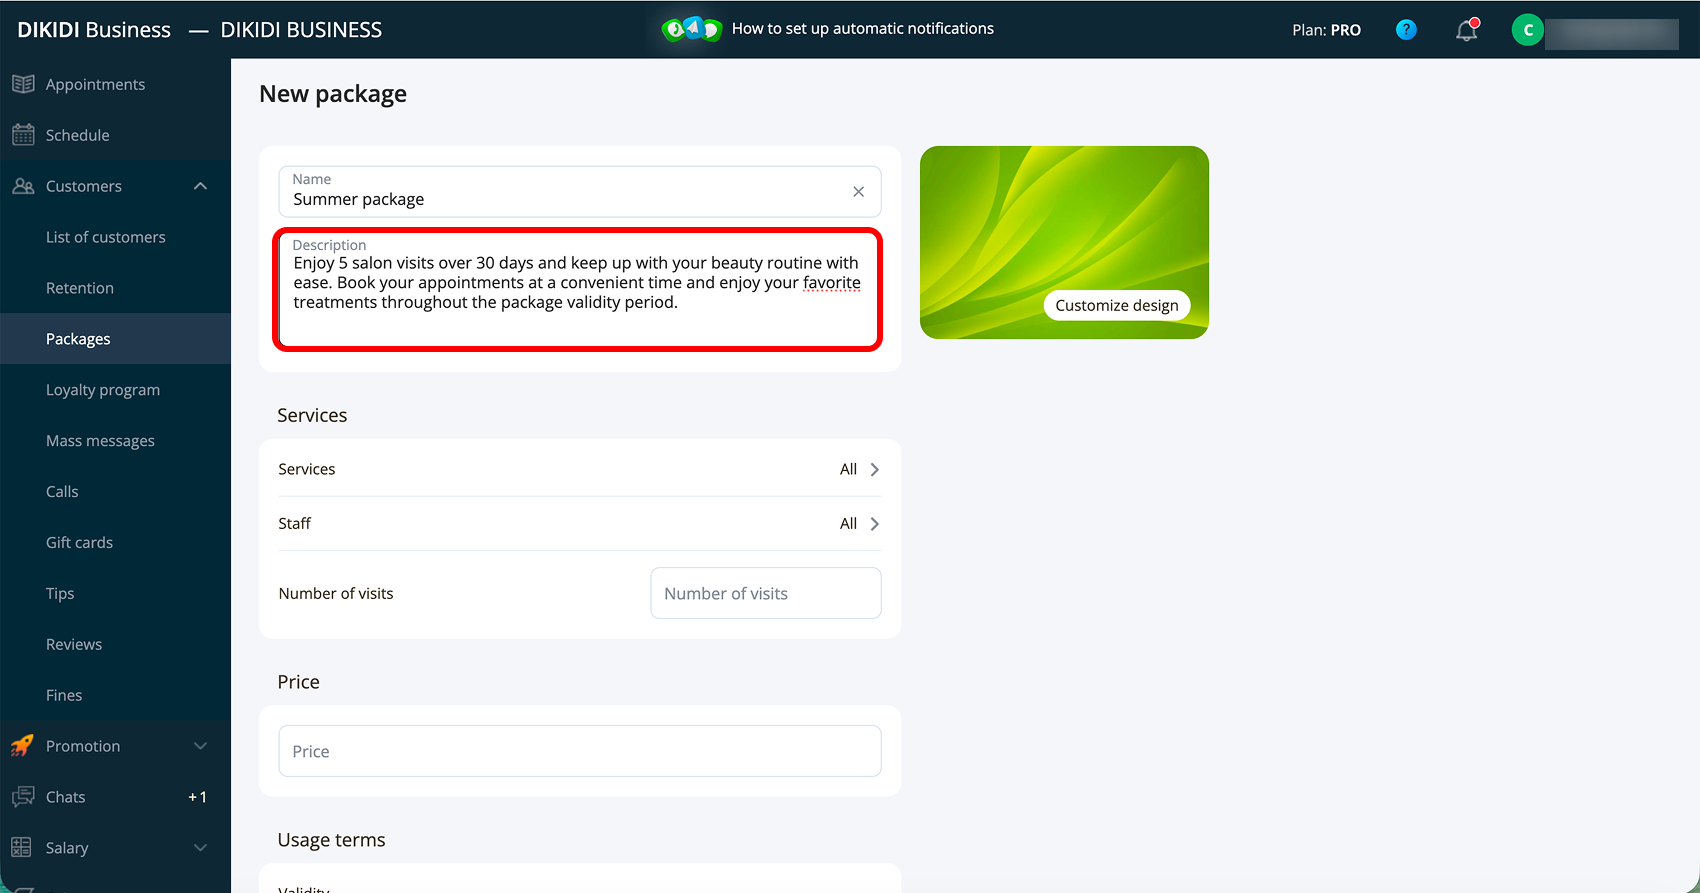
5️⃣ Click "Add description" and add text – it will be visible to the client upon purchase. Click "Save";

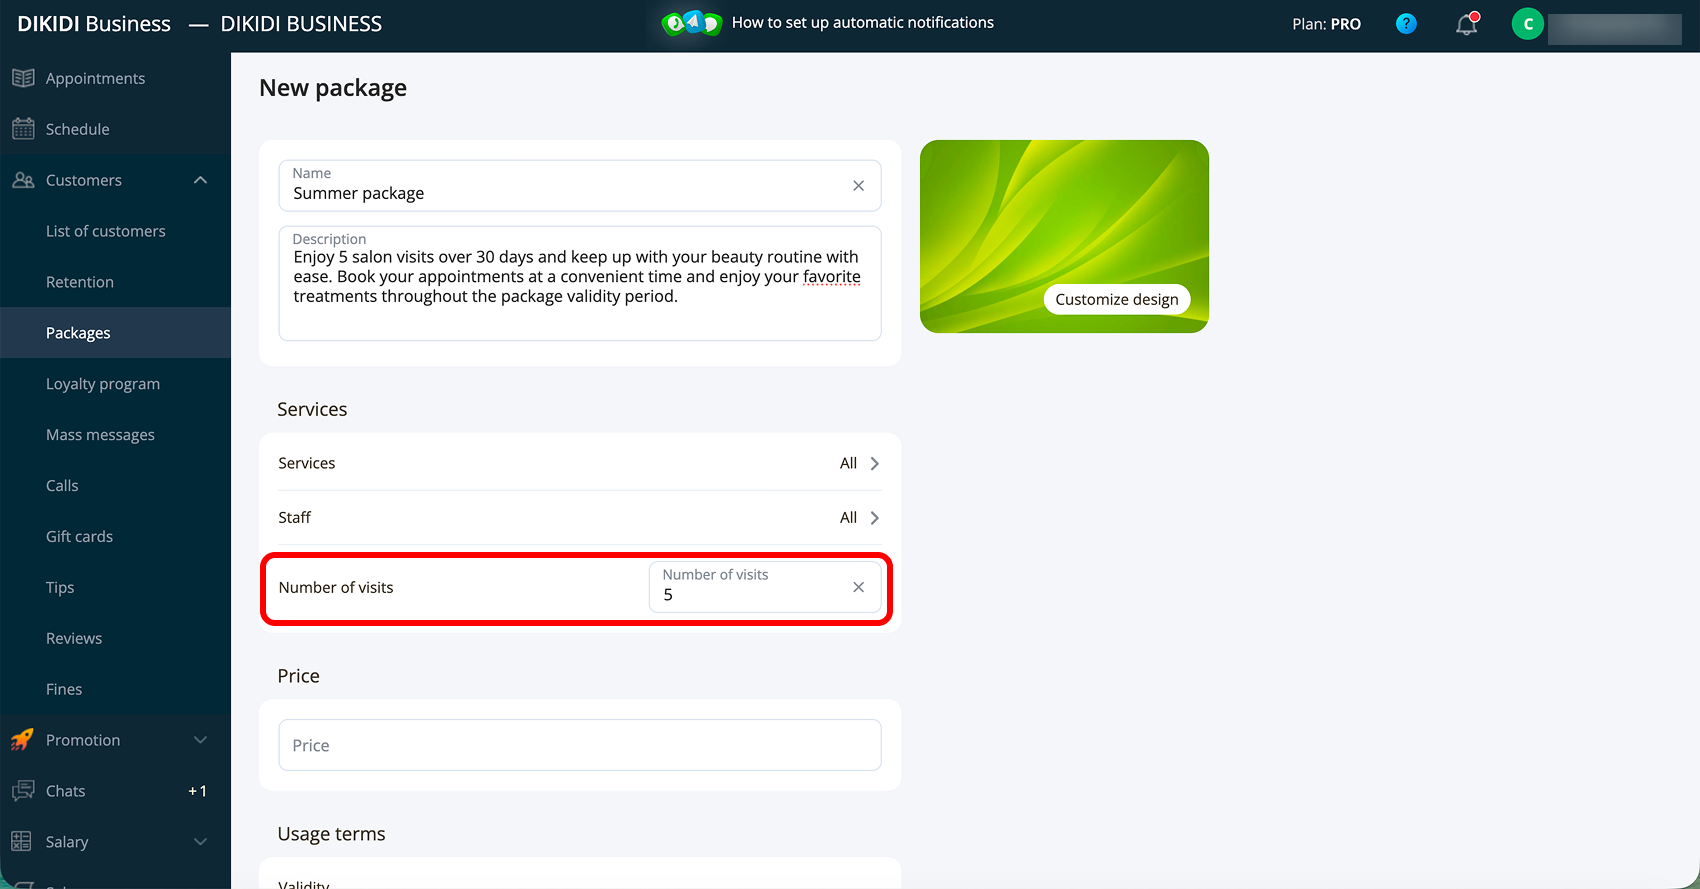
Services and Employees
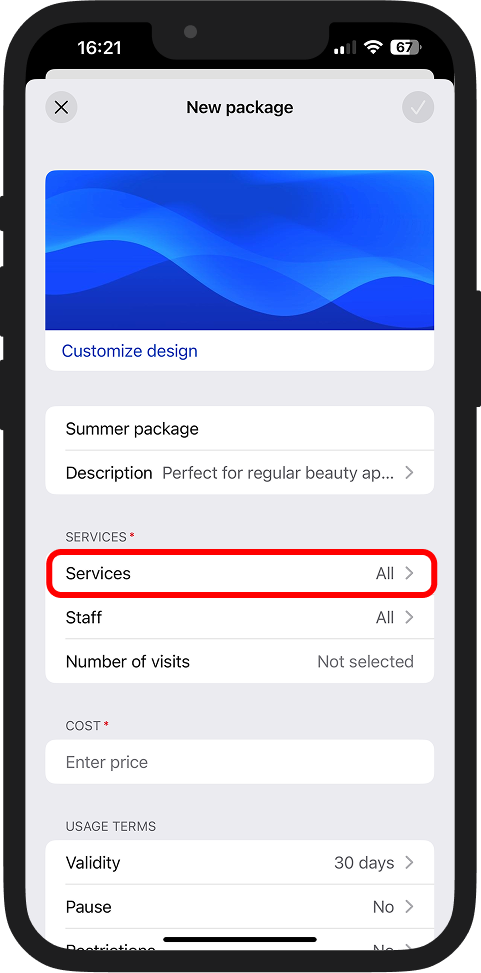
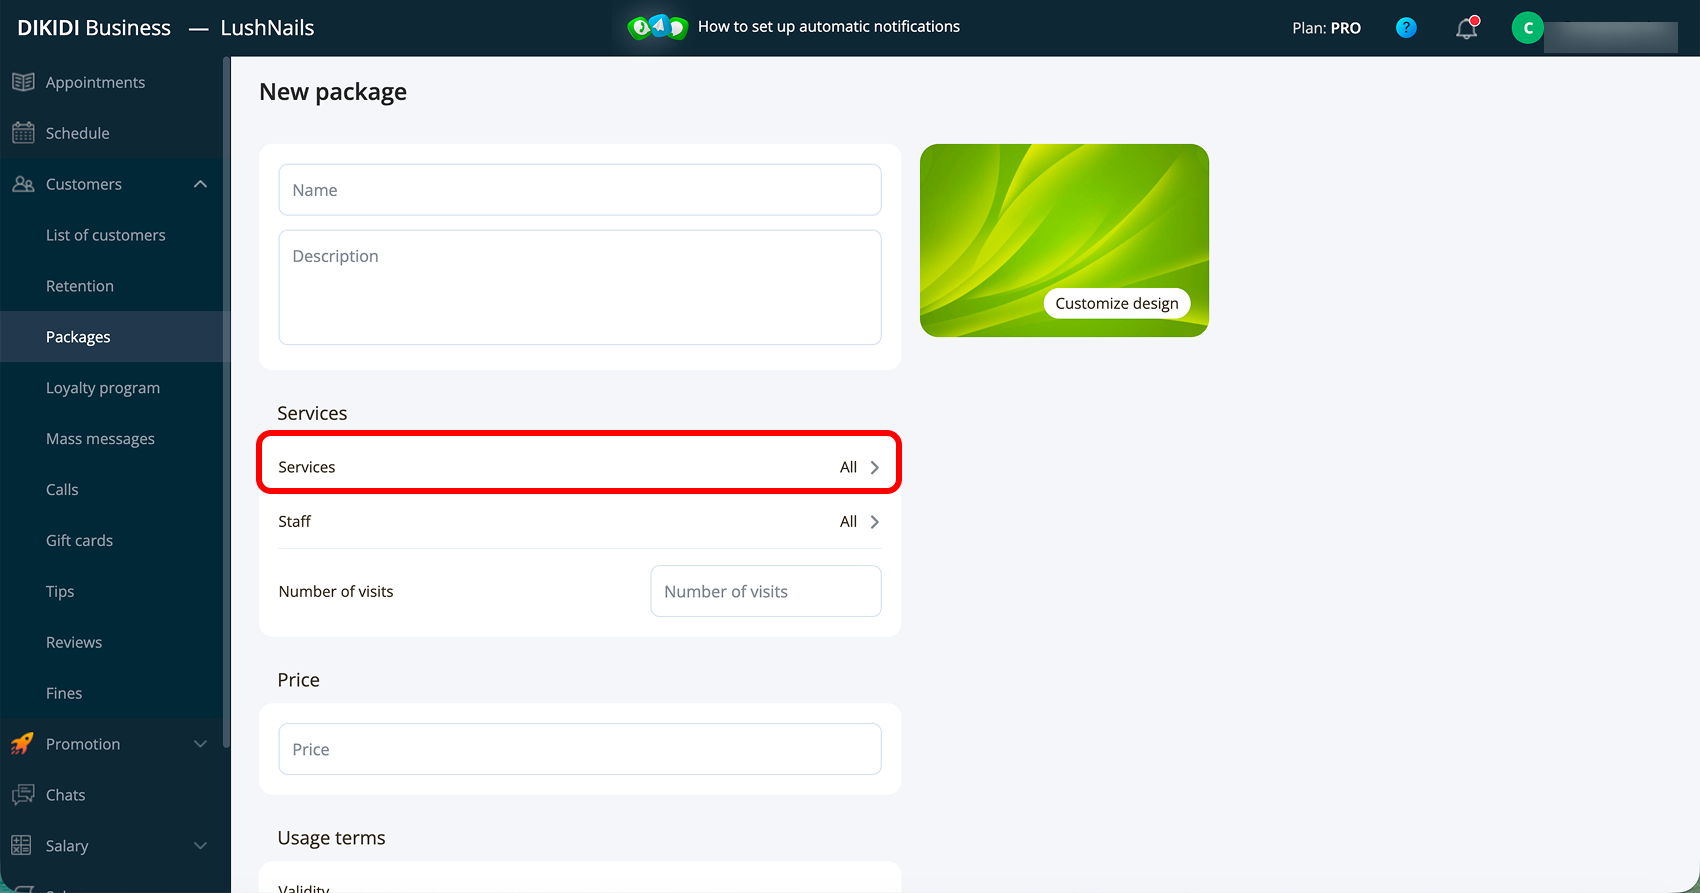
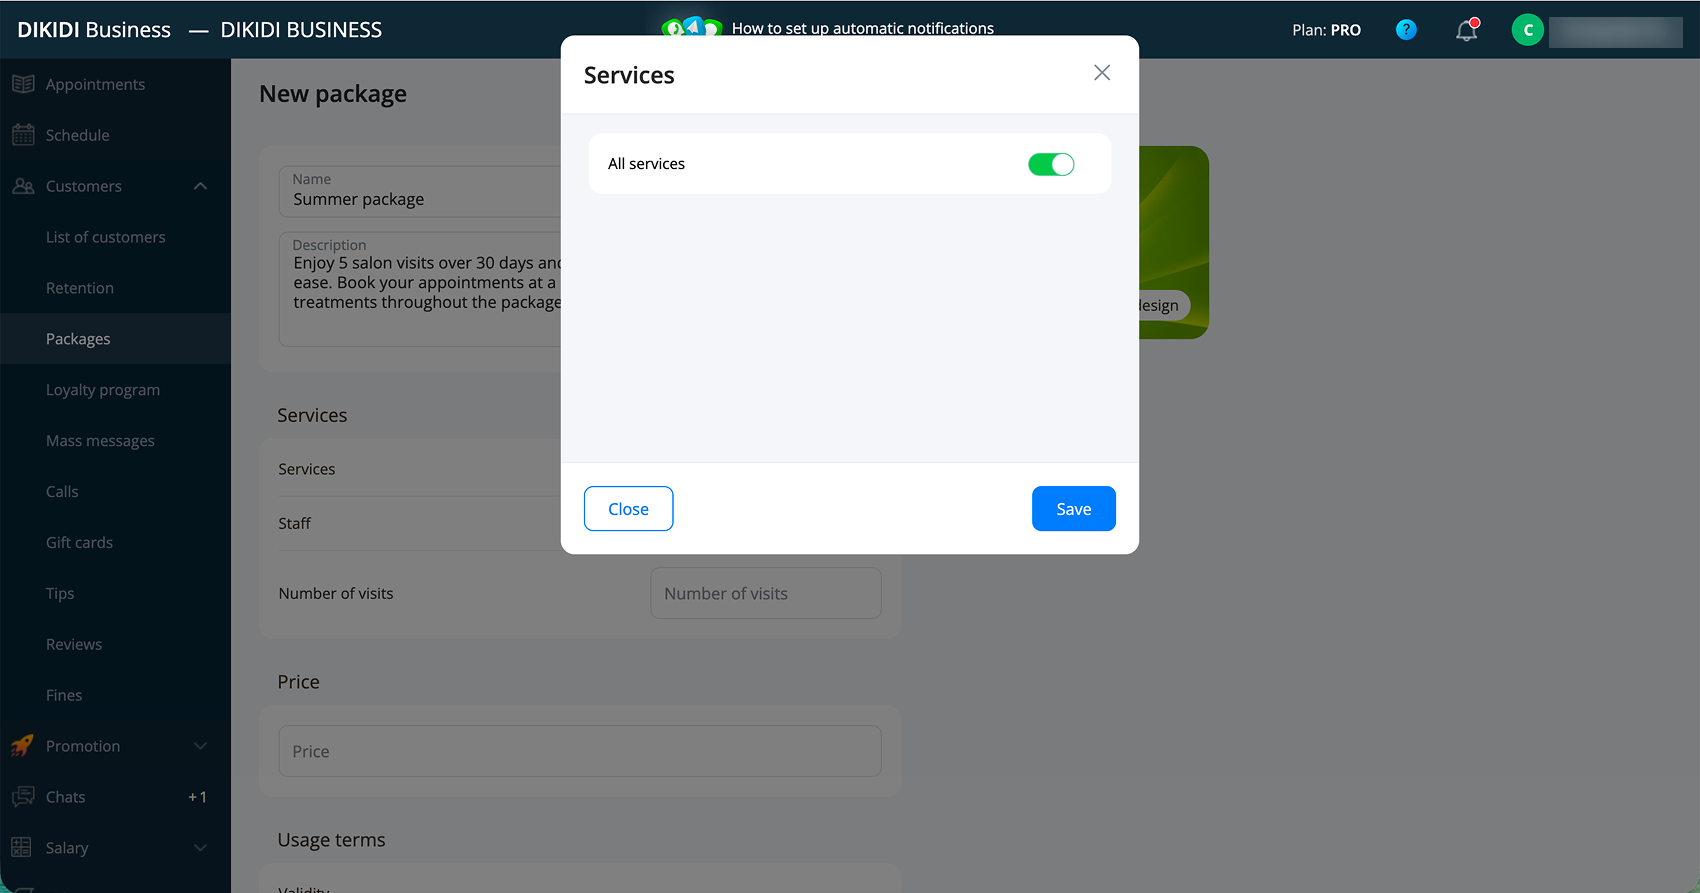
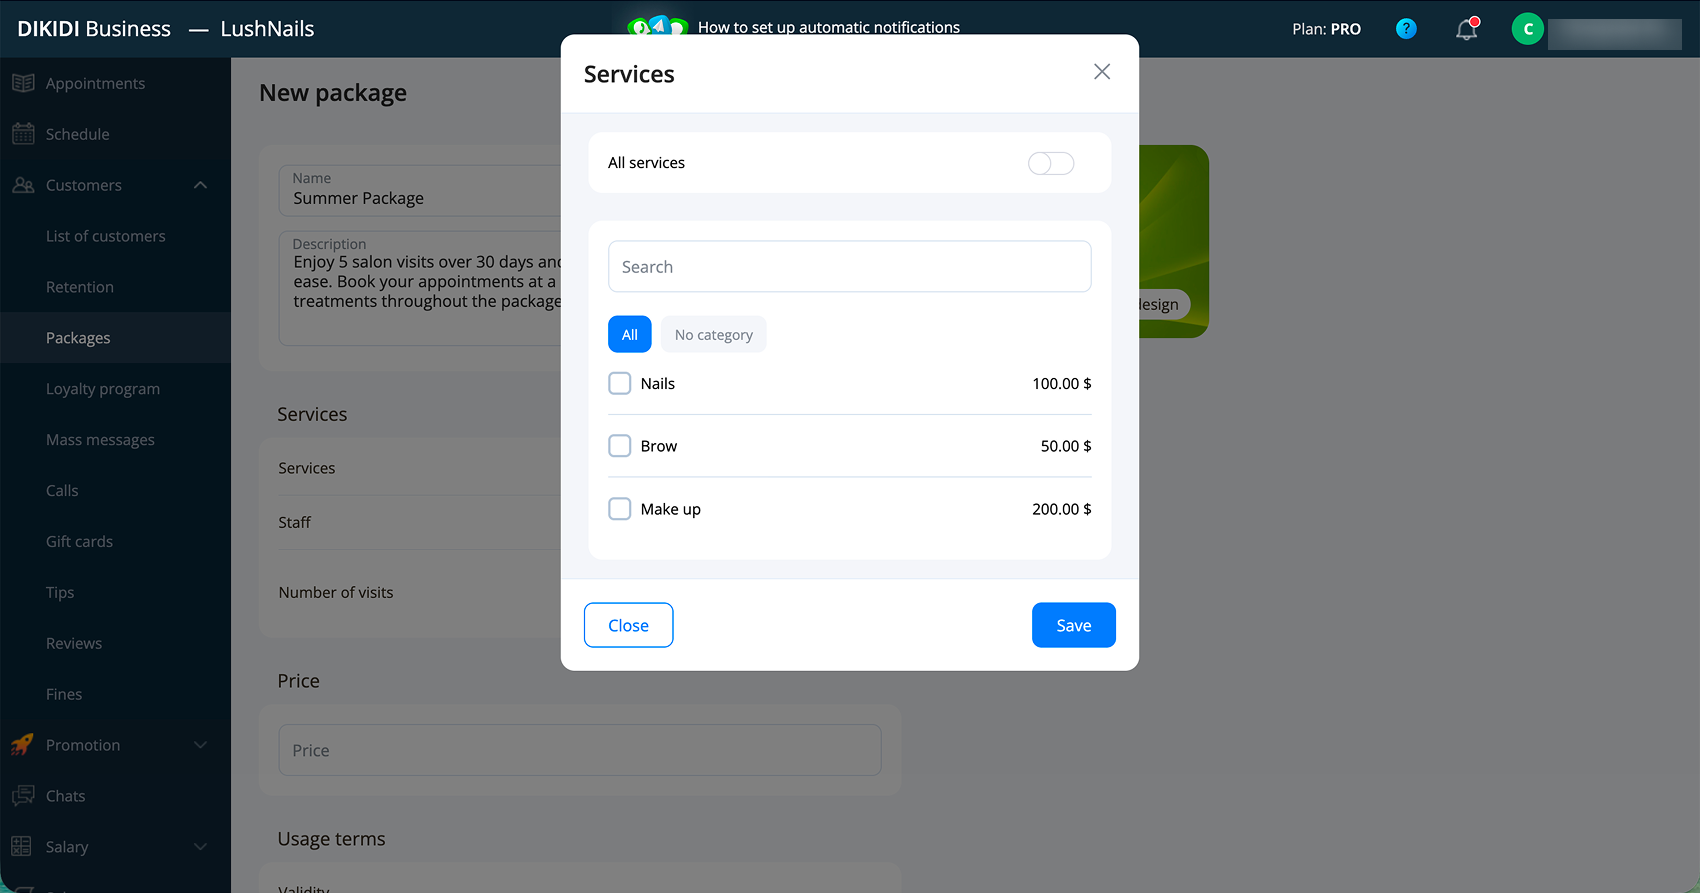
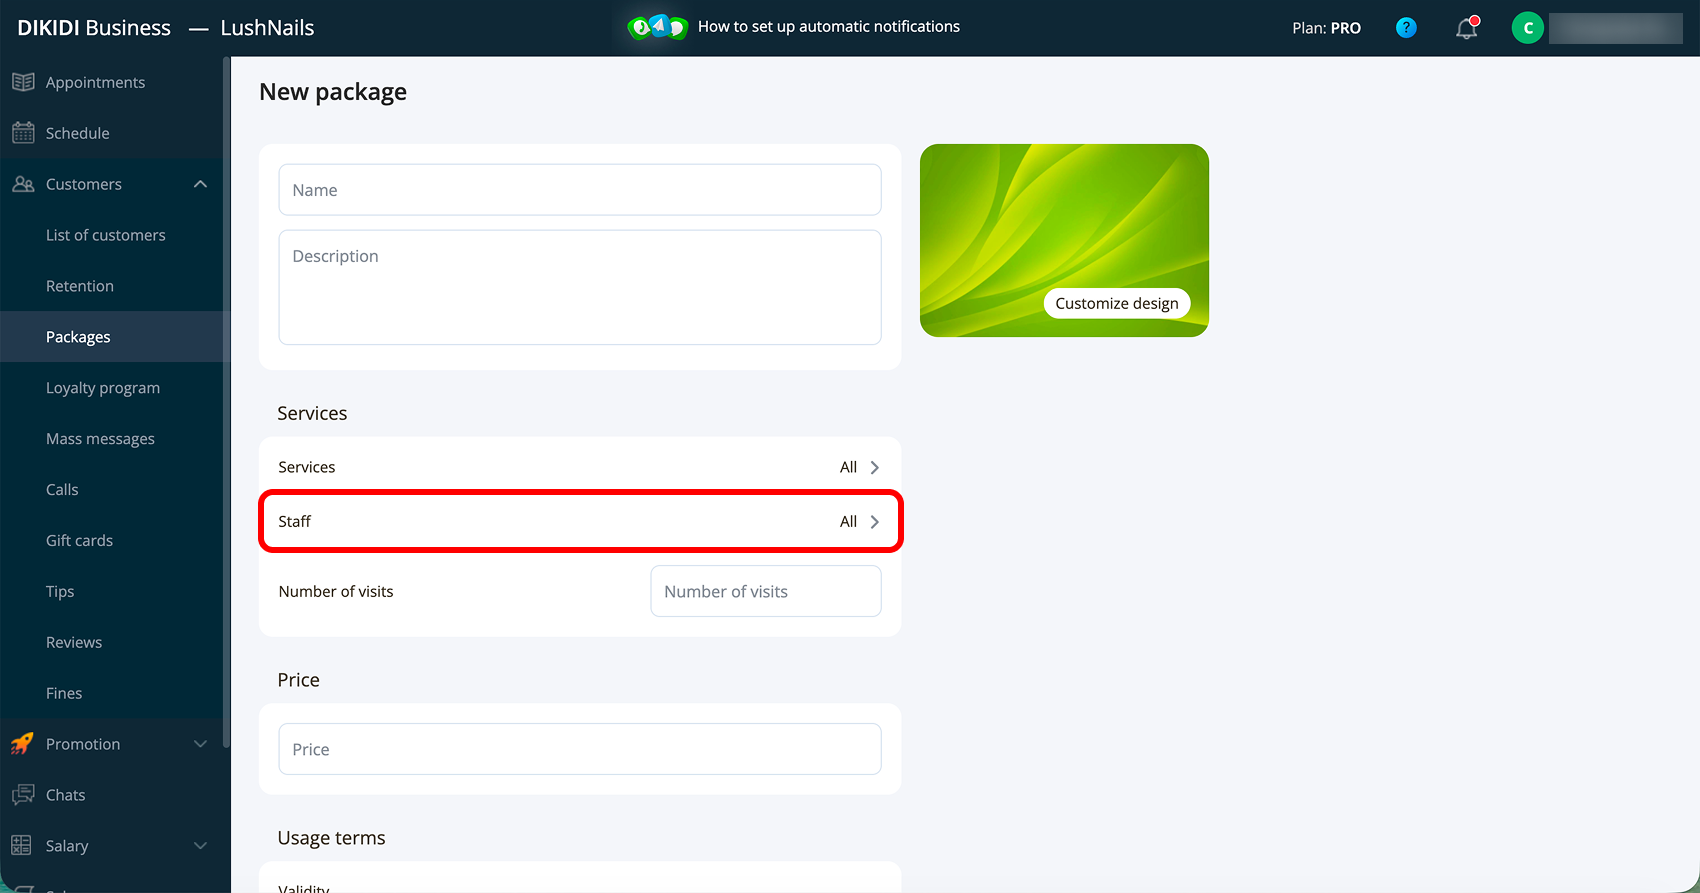
6️⃣ Go to the "Services" section. By default, the package applies to All services. If you want to change this – turn off the toggle switch, click "Add" and select the services the package will apply to;

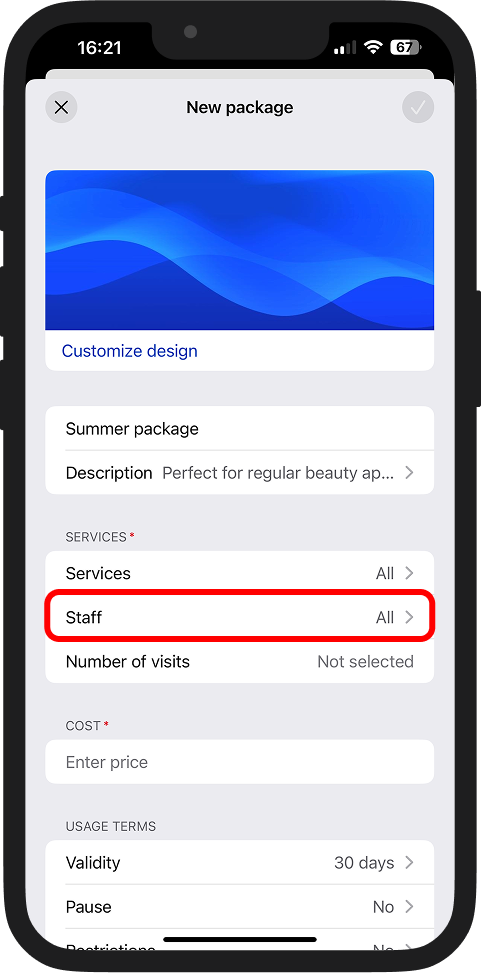
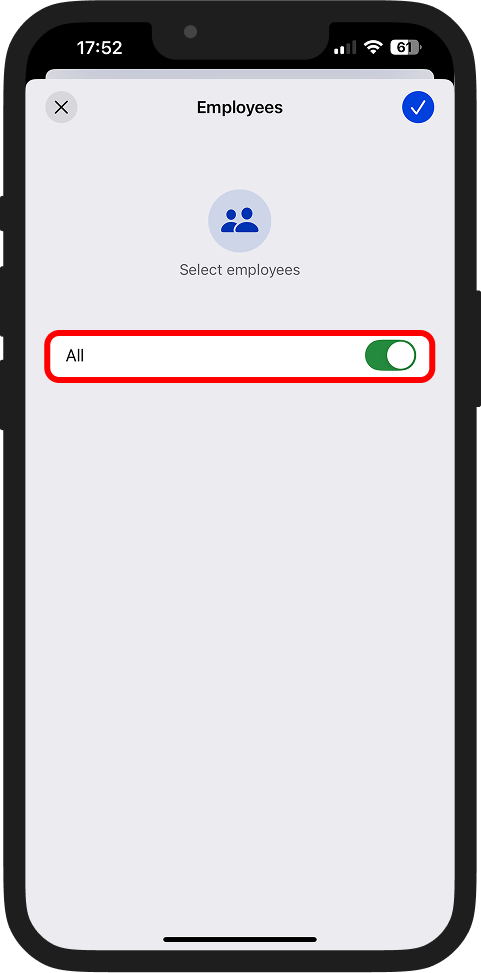
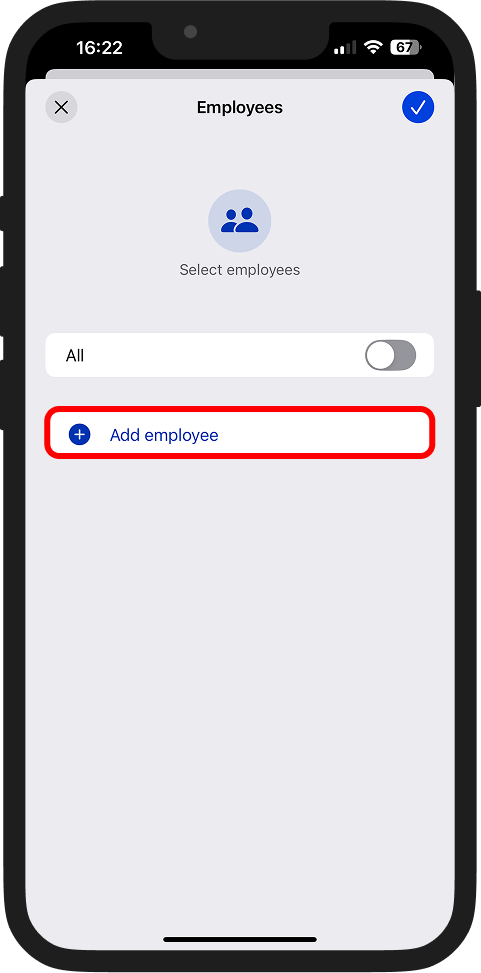
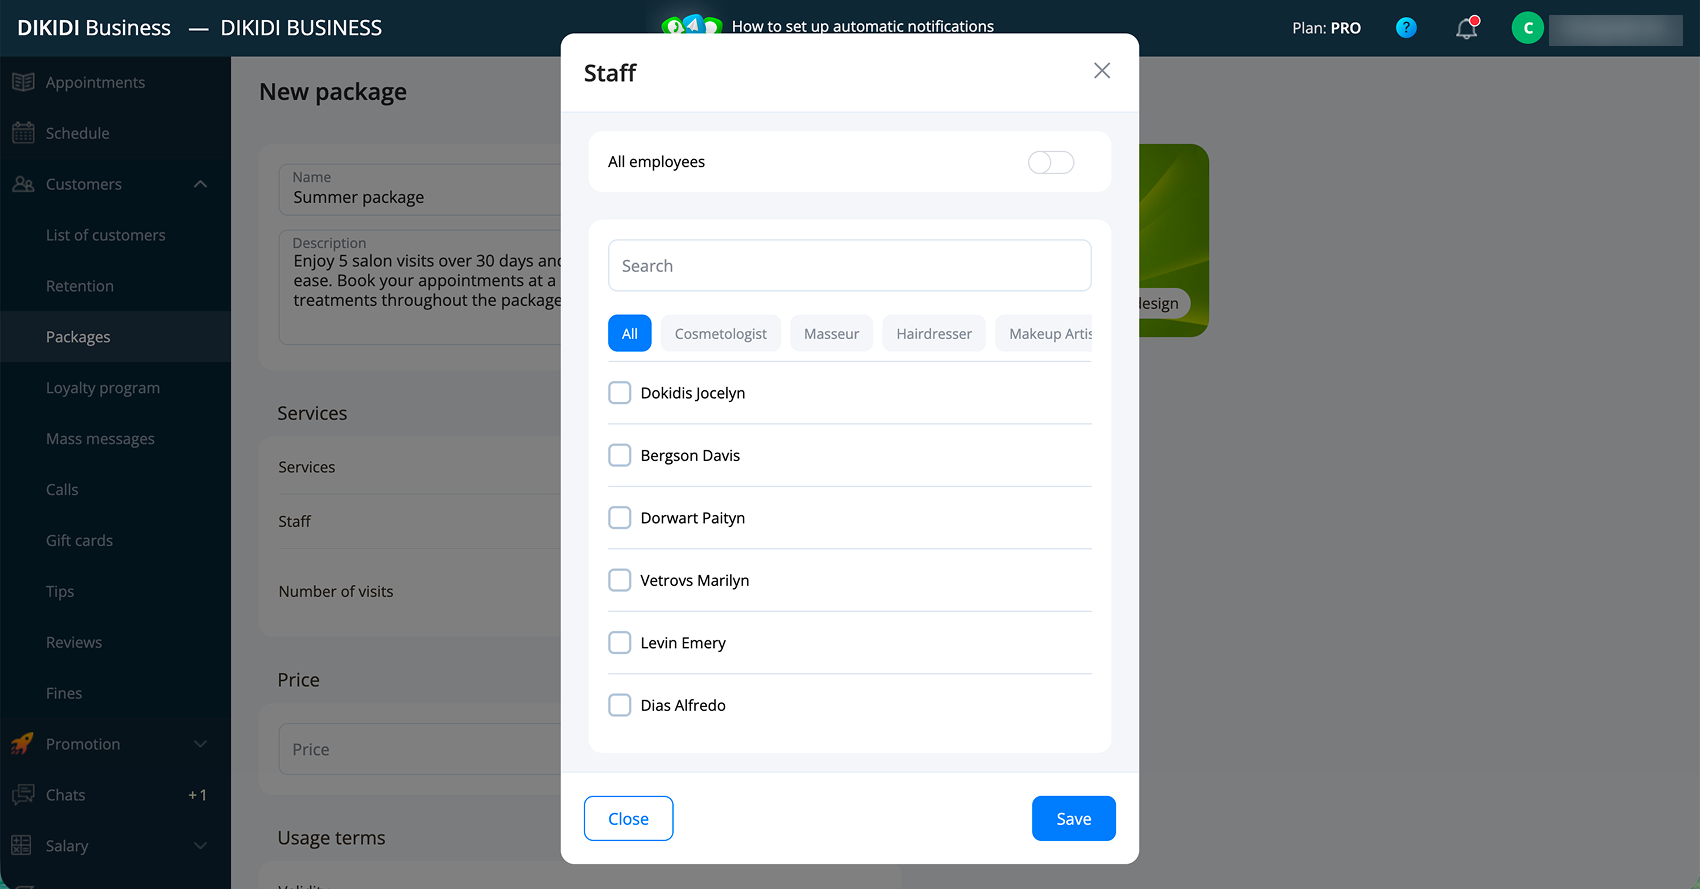
7️⃣ Go to the "Staff" section. By default, services under the package can be provided by all employees. If you want to change this – turn off the toggle switch, click "Add employee" and select the staff who will work under this package;

Parameters
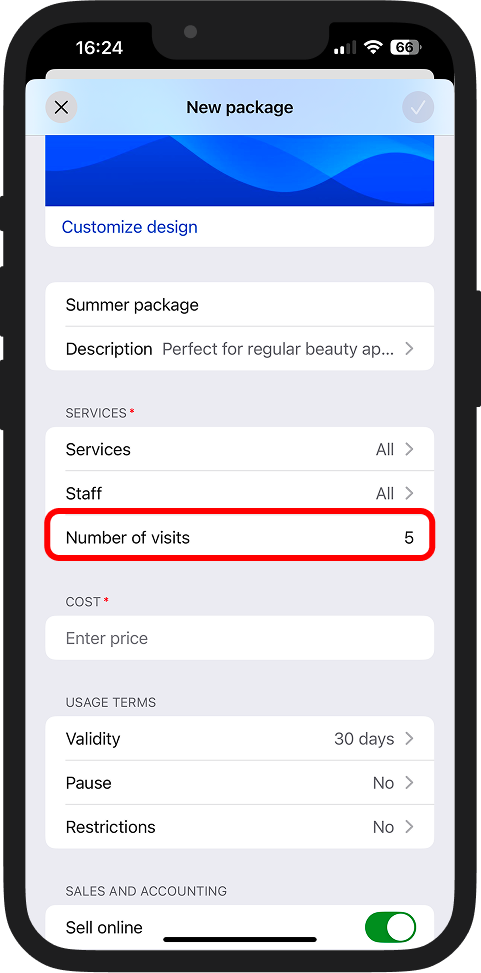
8️⃣ Specify the number of visits the client can make under the package;
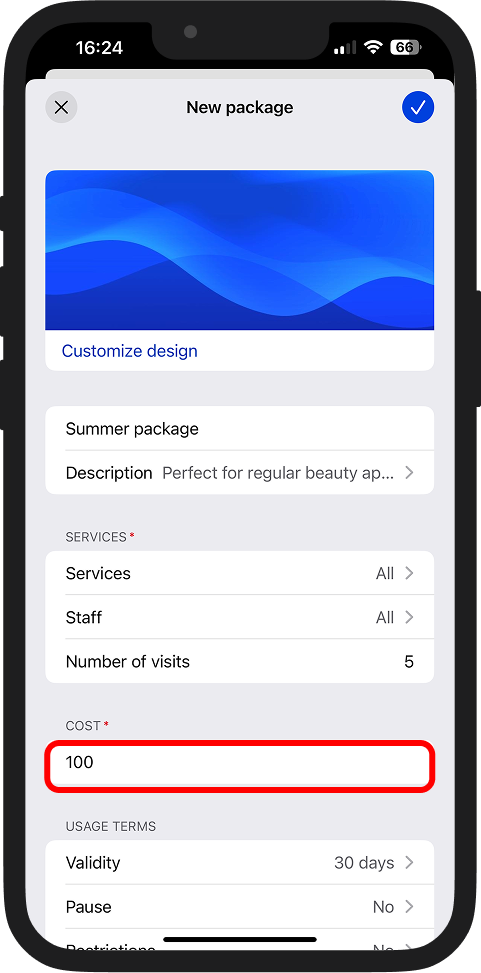
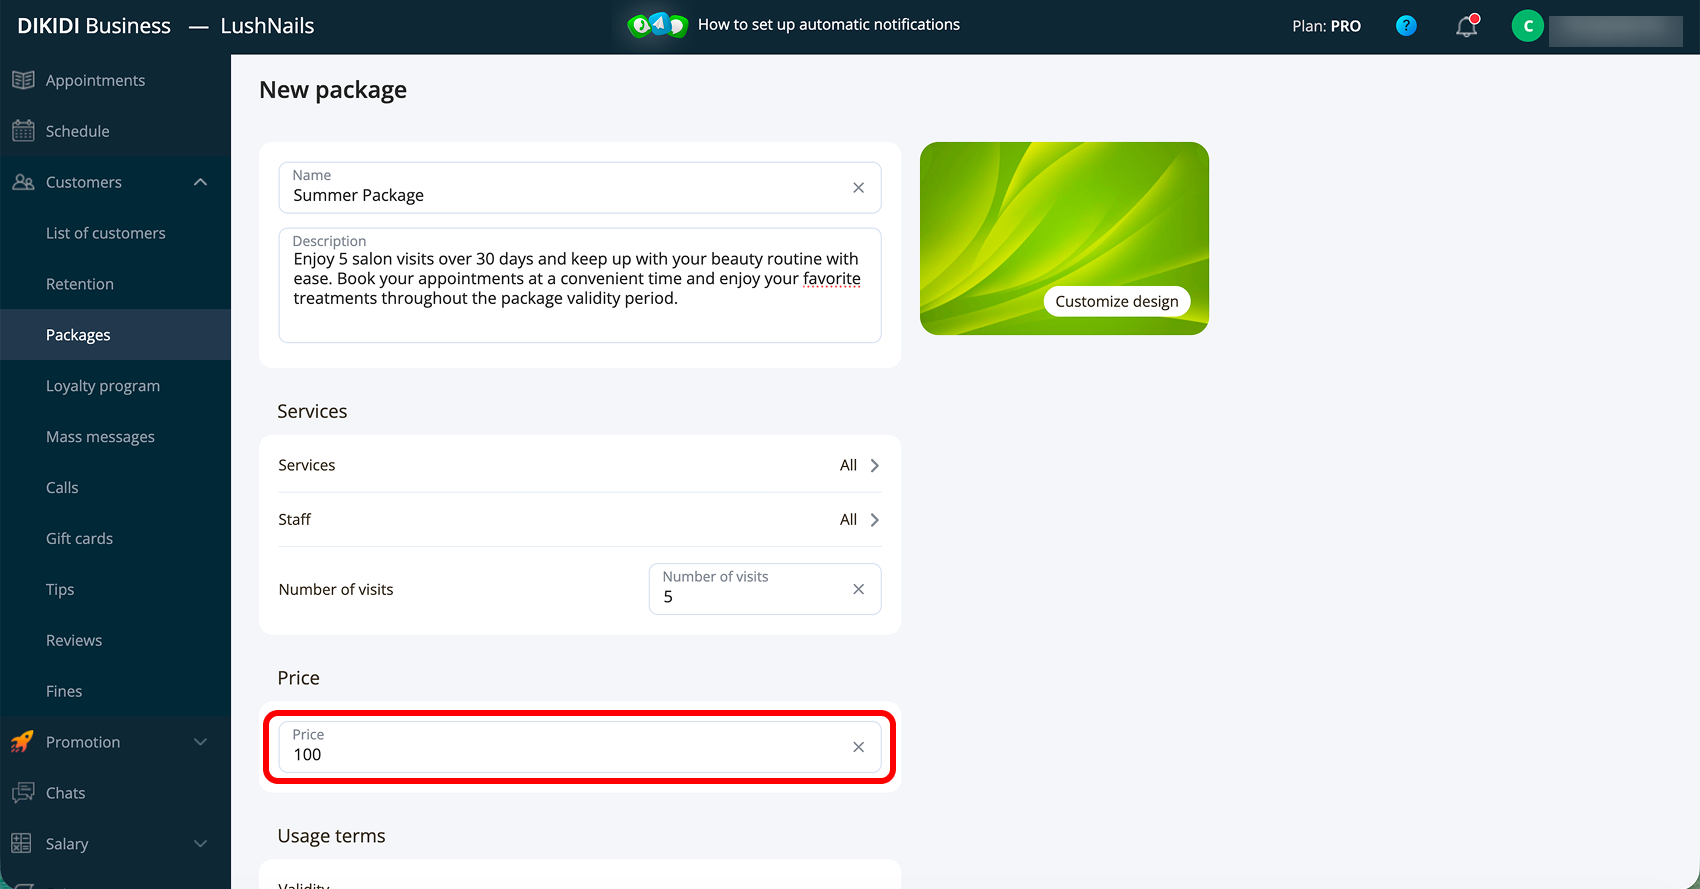
9️⃣ Specify the price at which the package will be sold;
Usage terms
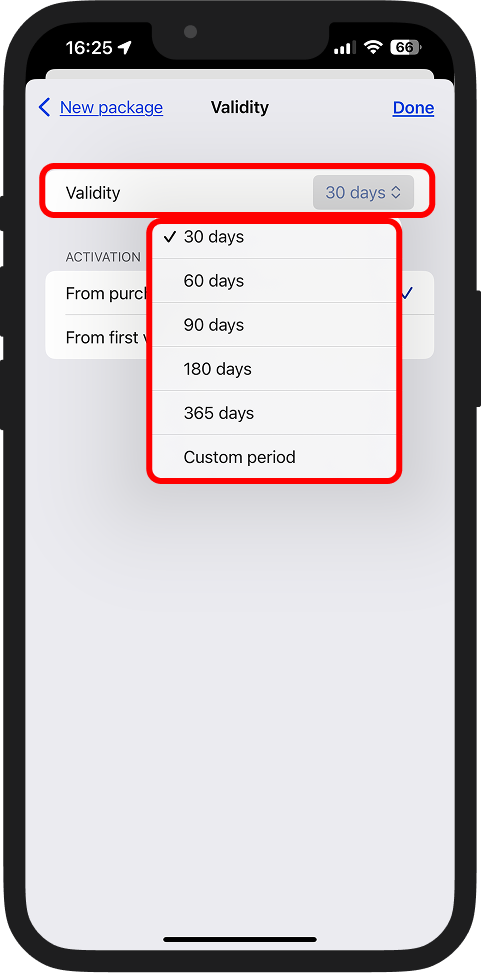
1️⃣0️⃣ Specify the validity period of the package – the period during which it can be used;
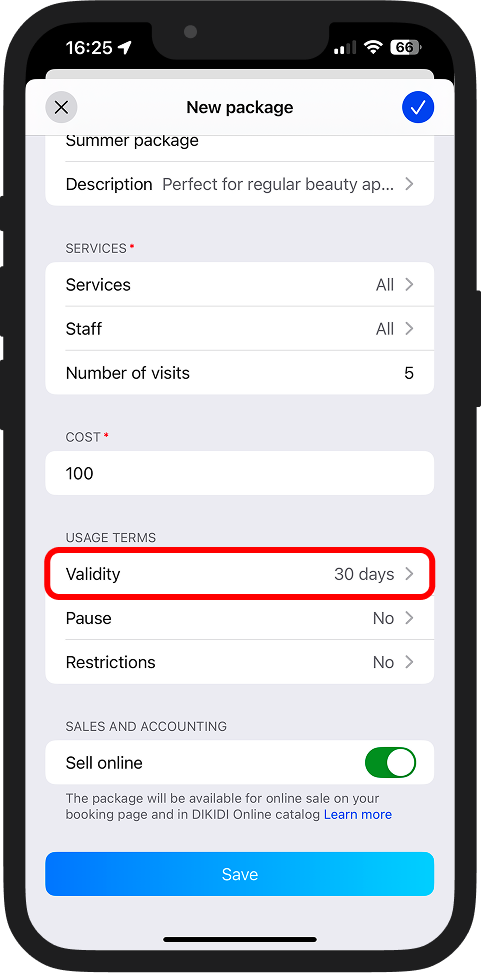
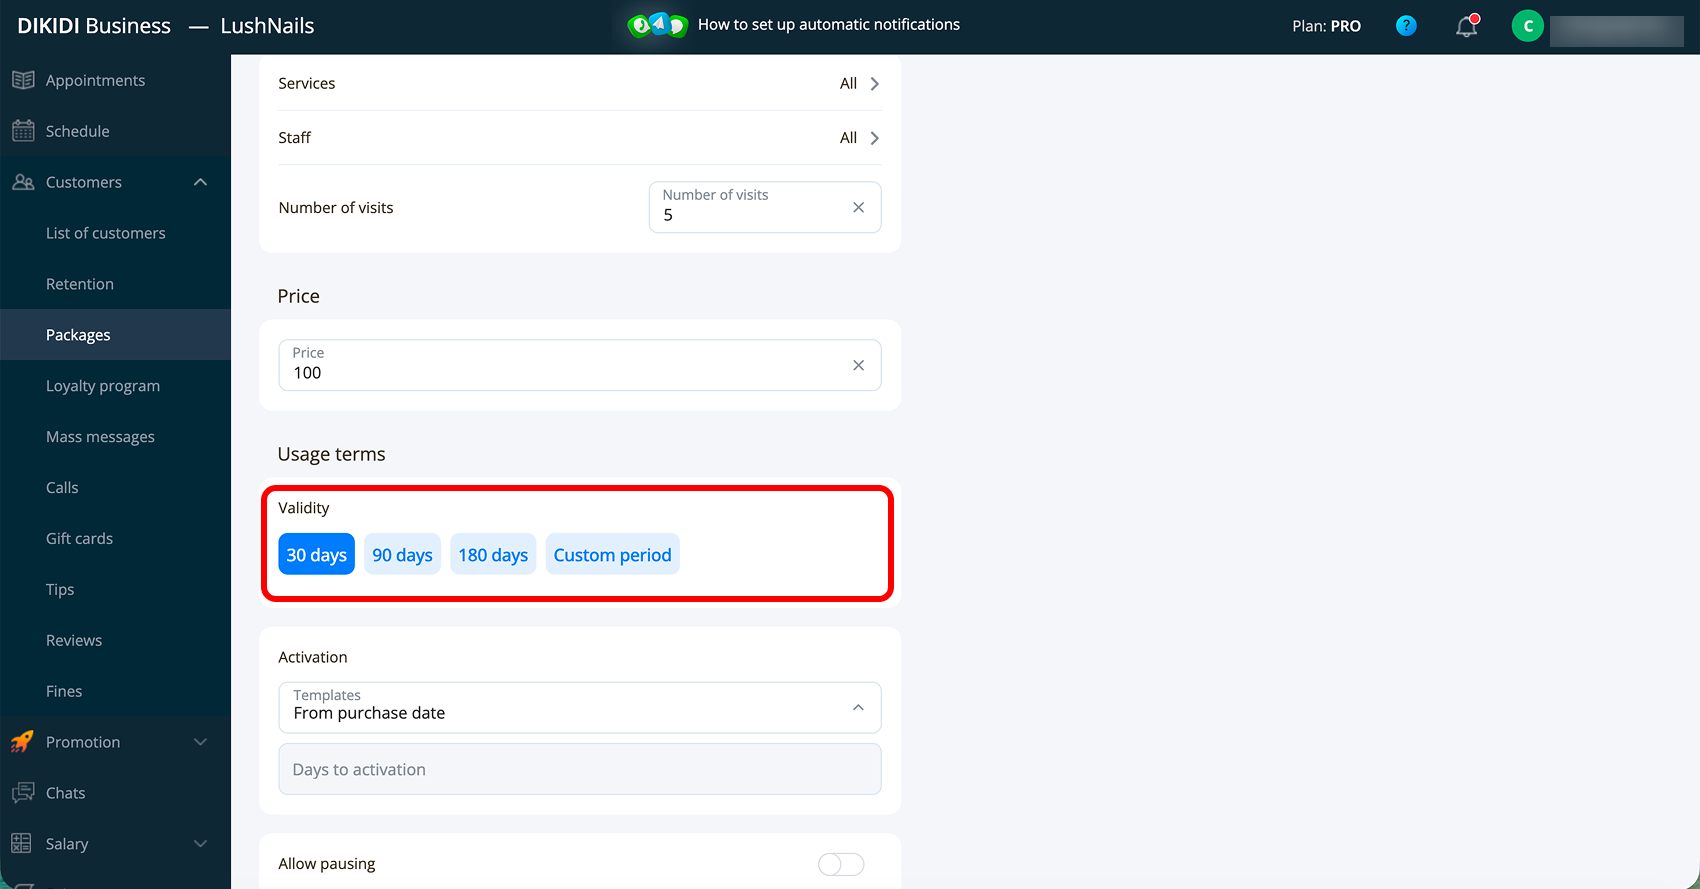
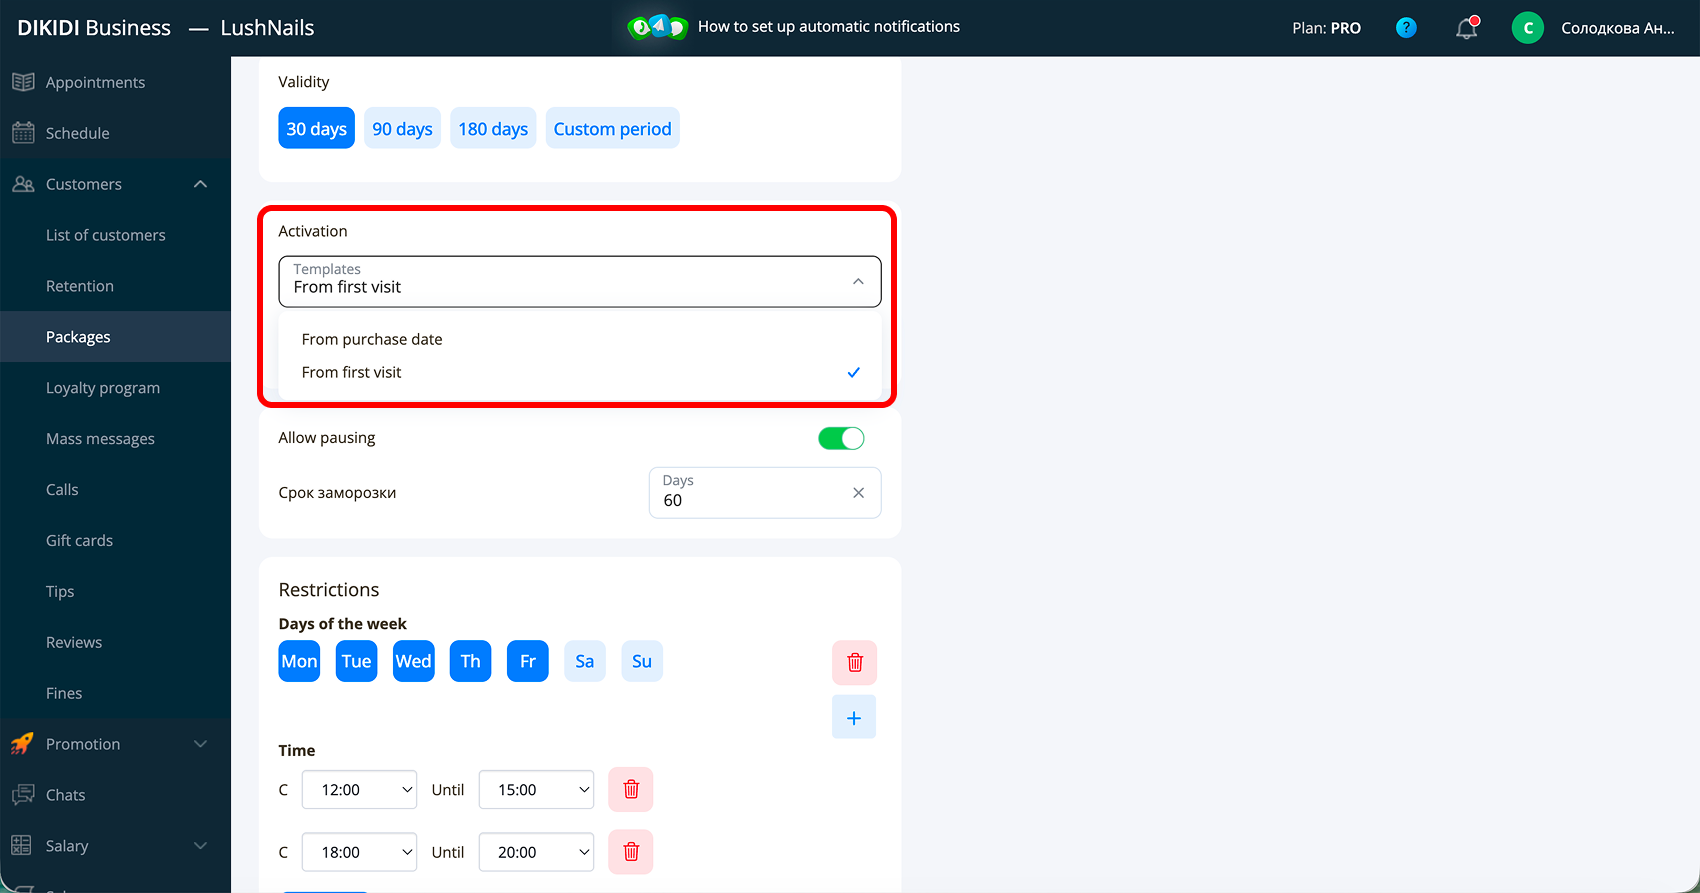
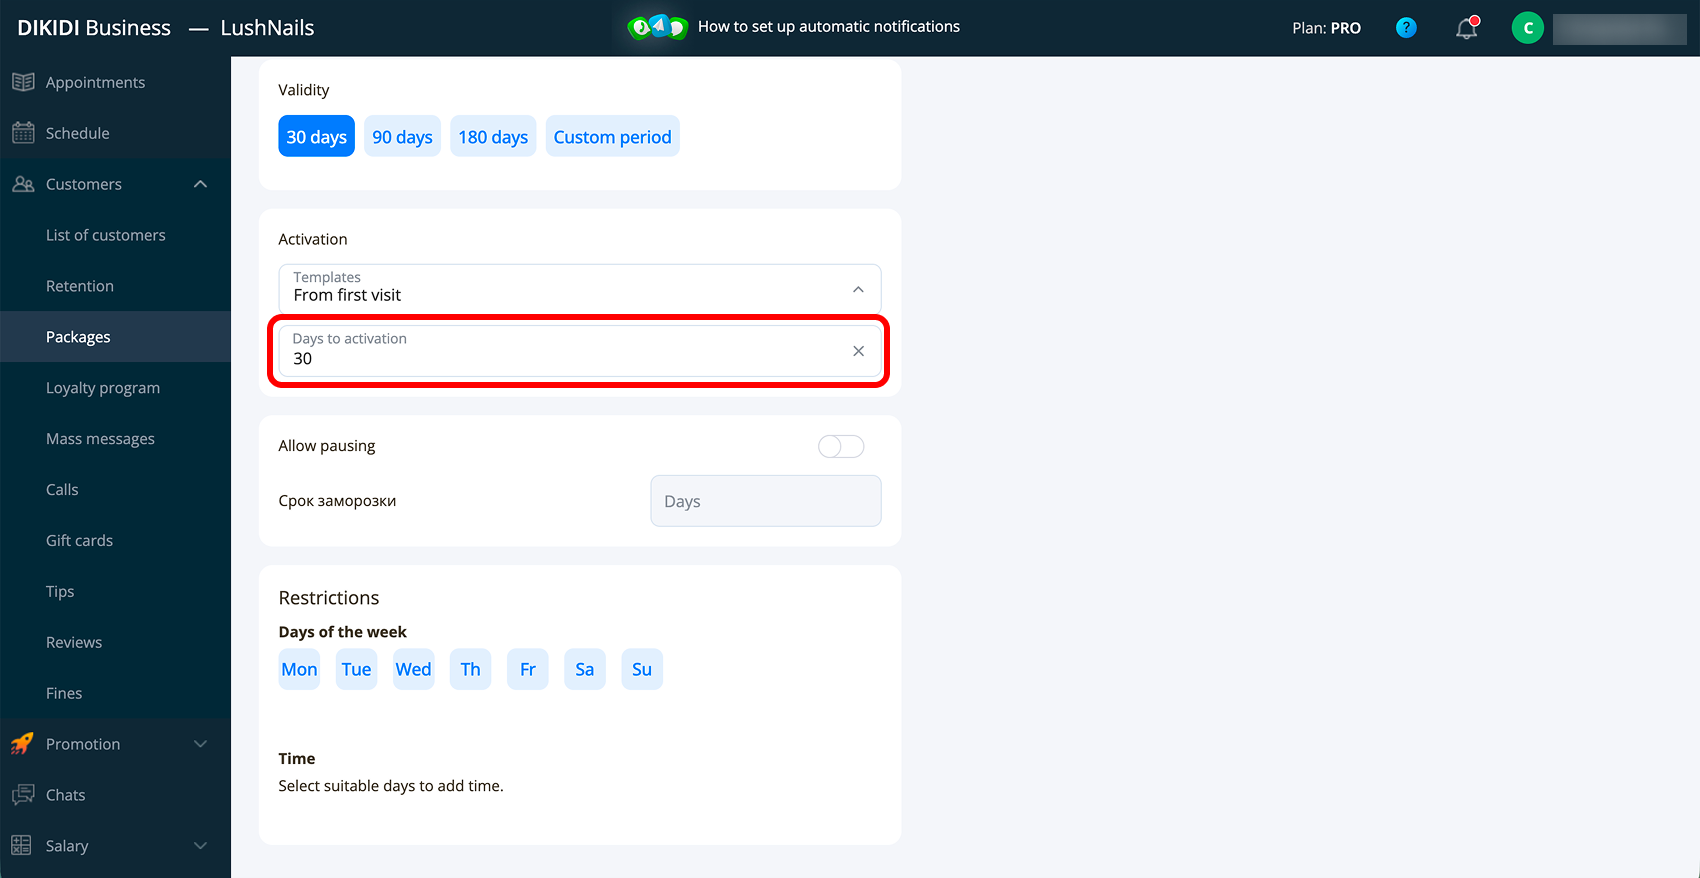
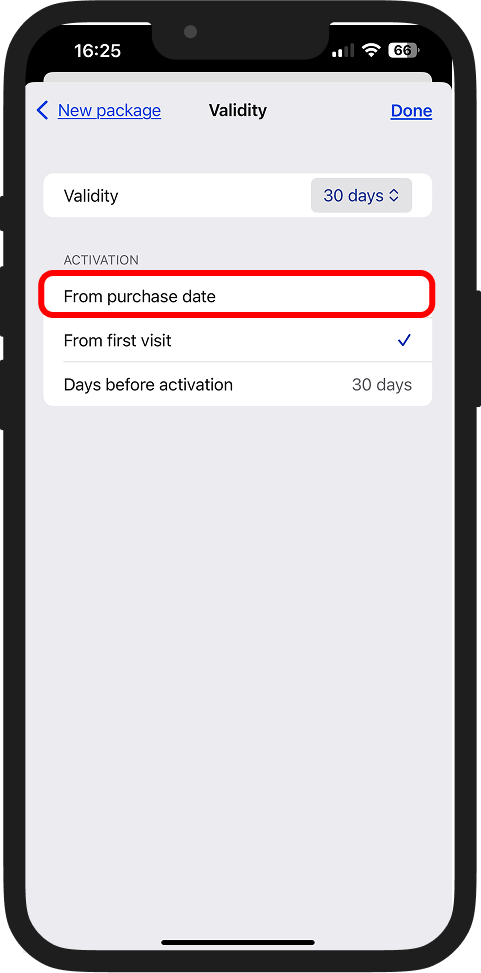
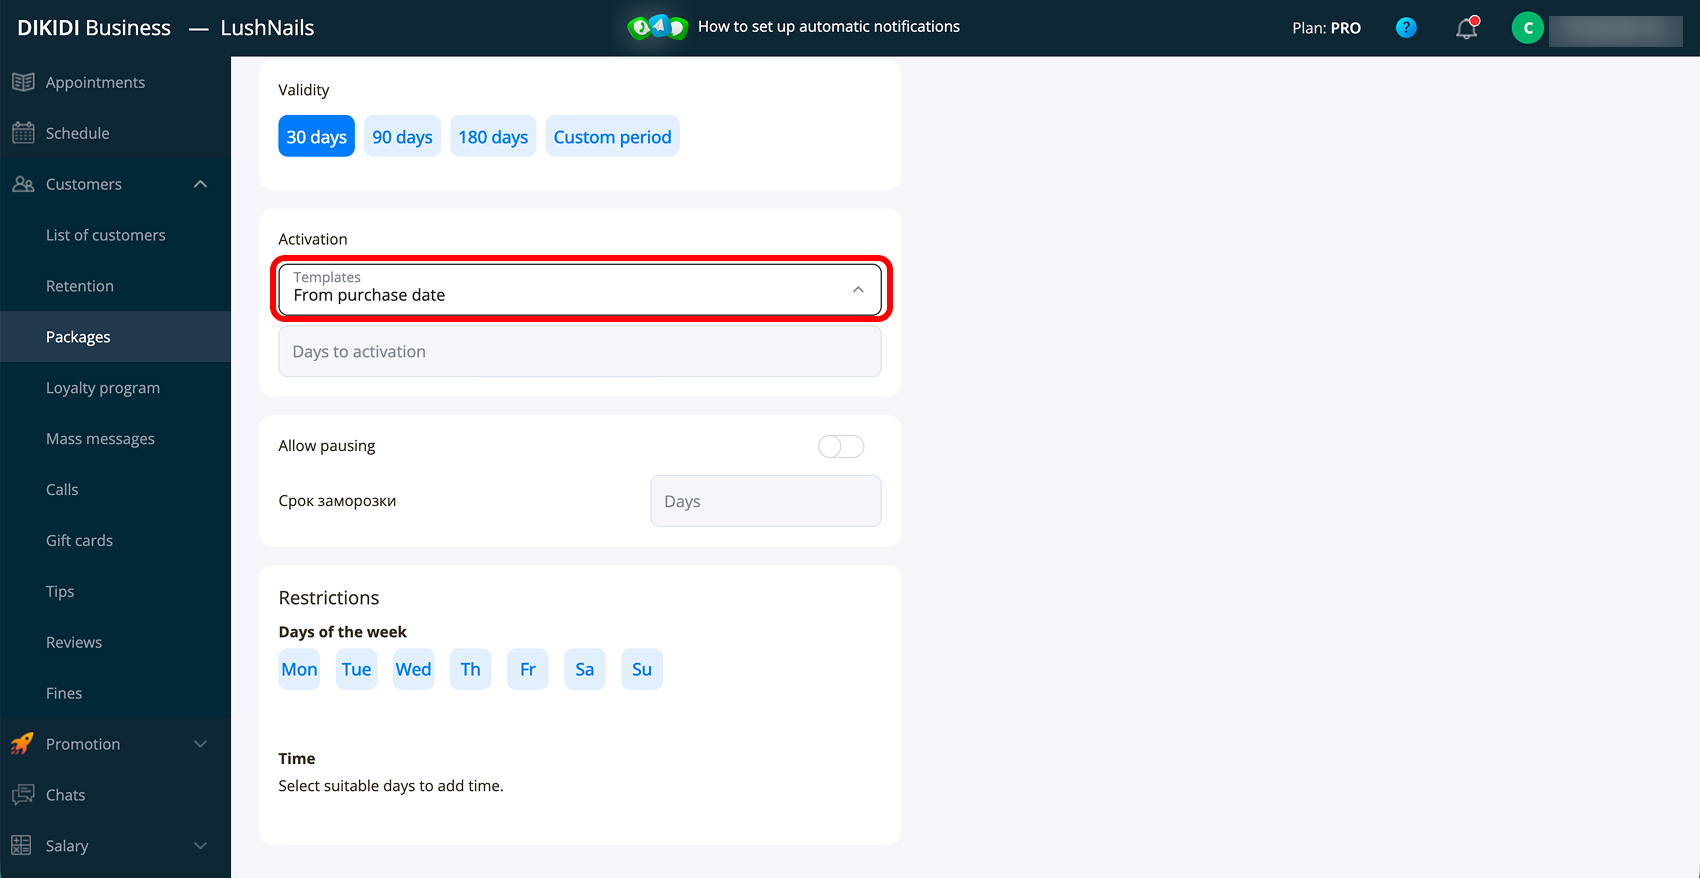
1️⃣1️⃣ Choose the activation moment of the package:
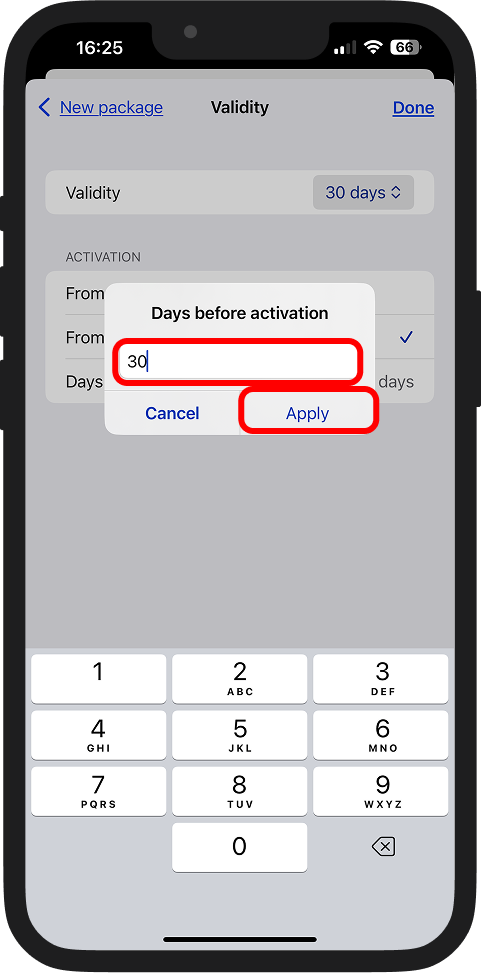
🔹 From the first visit – the package is activated at the first visit. Additionally, specify how many days the client has to activate it – if they do not manage in time, the package will expire;
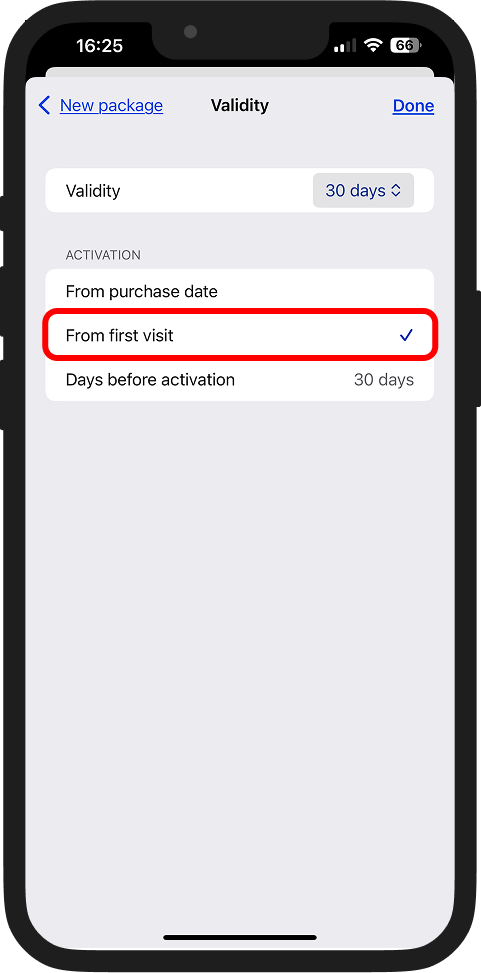
🔹 From the purchase date – the package is activated automatically on the day of purchase.
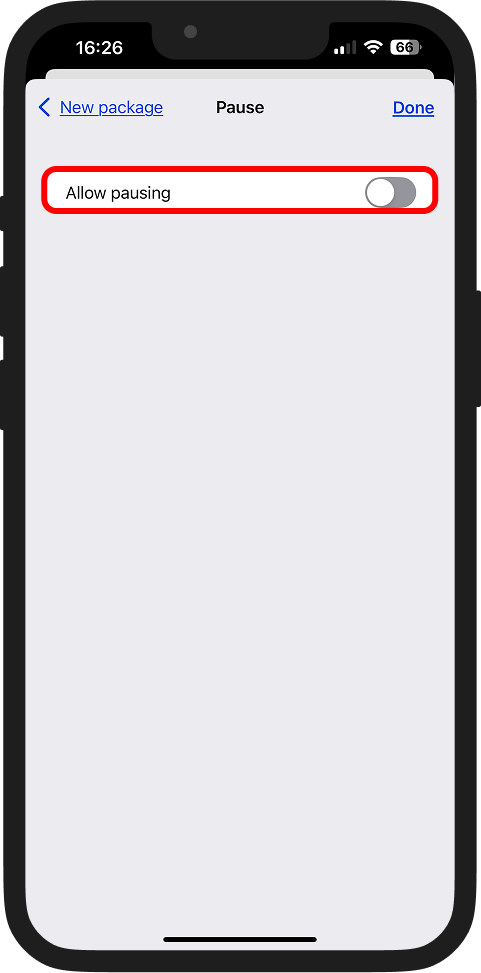
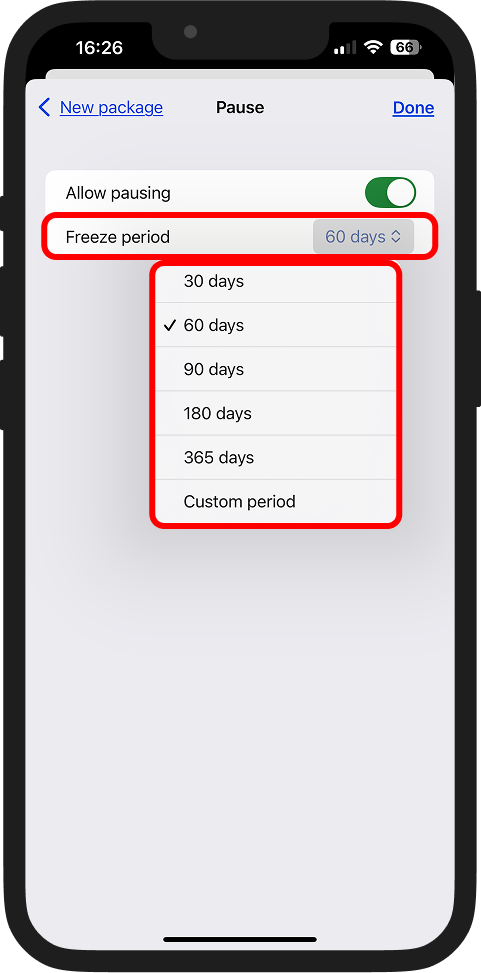
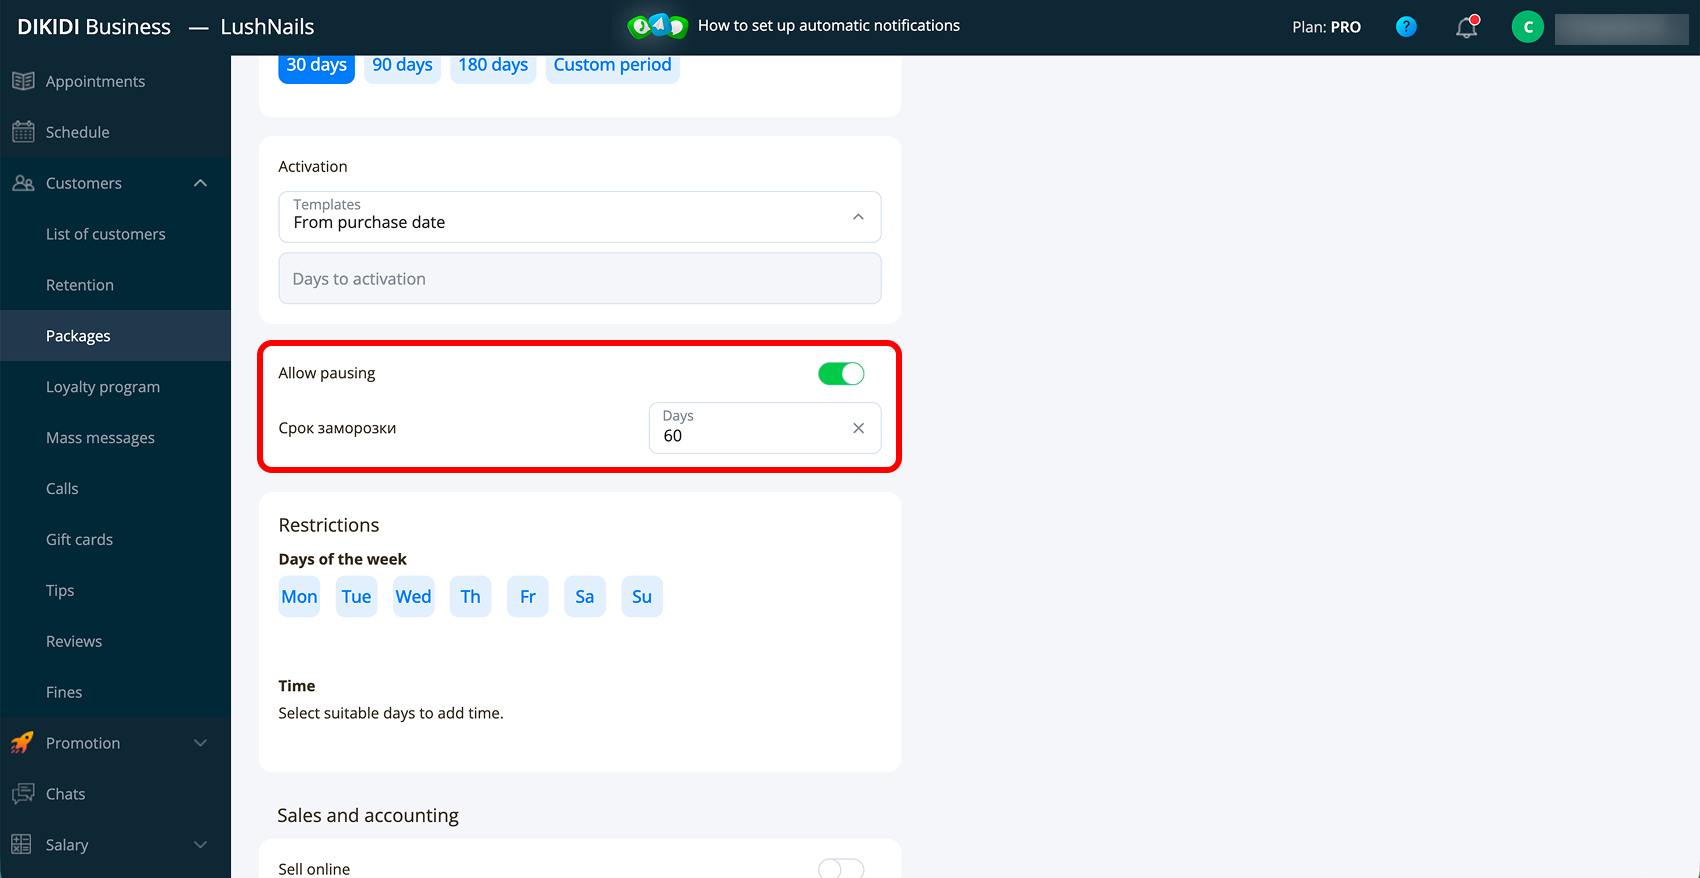
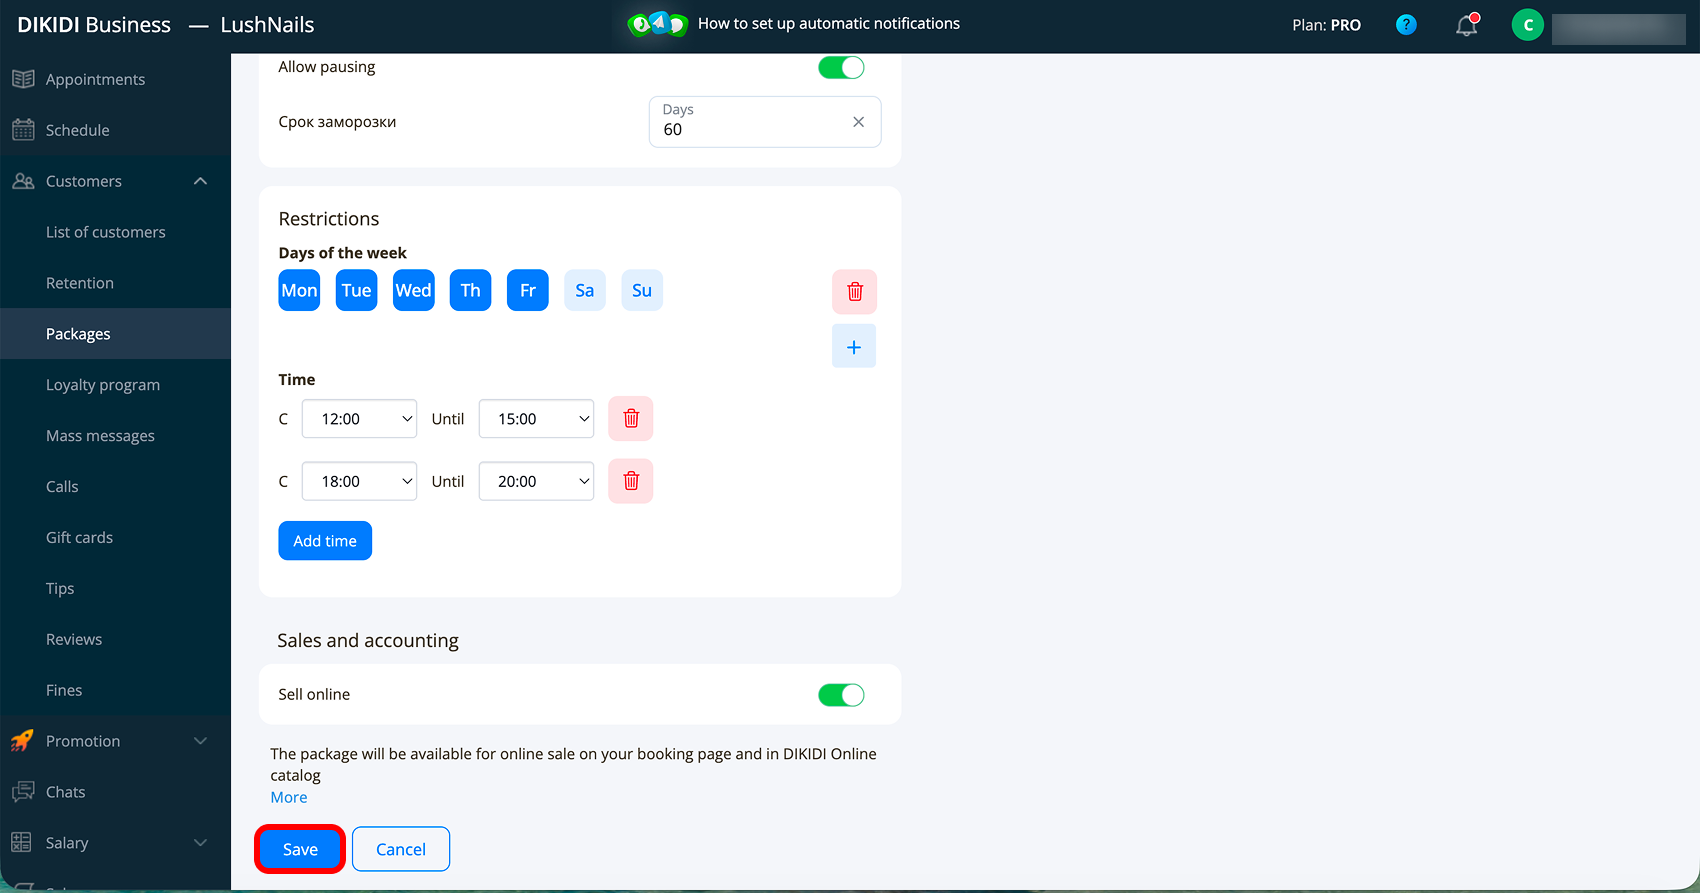
1️⃣2️⃣ If you want to give clients the opportunity to put the package on pause – Allow pausing ❄️ and specify the maximum period for which it can be issued. This is convenient, for example, if the client gets sick or goes on vacation;
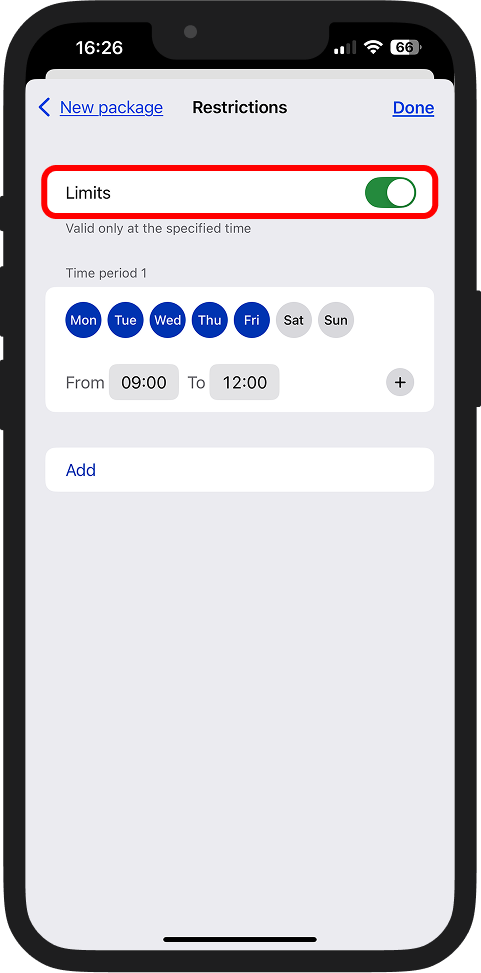
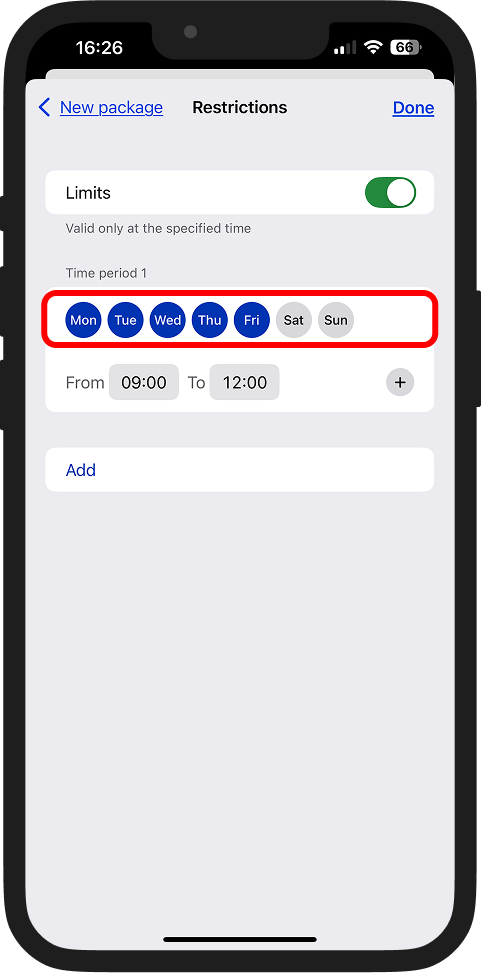
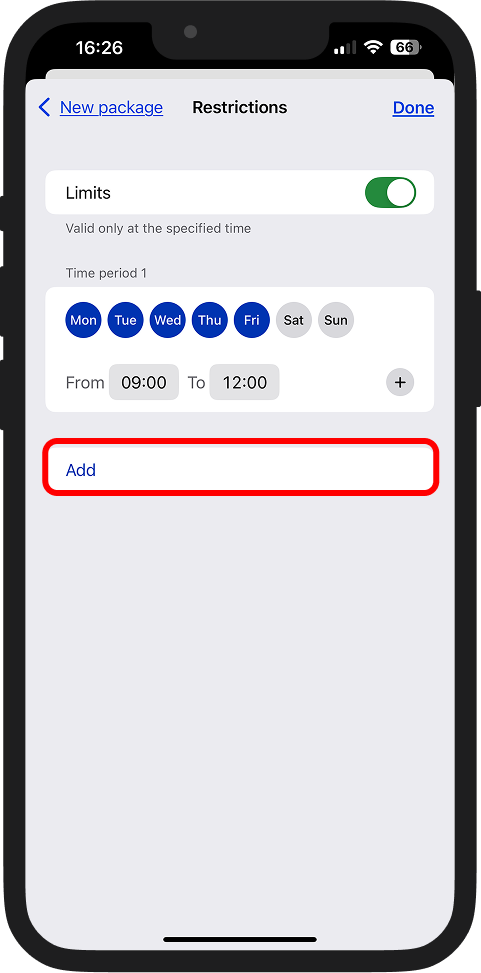
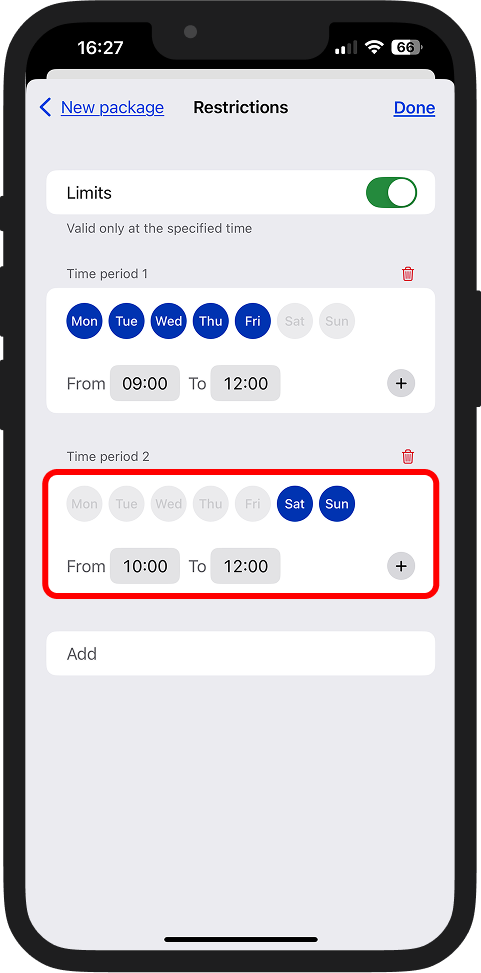
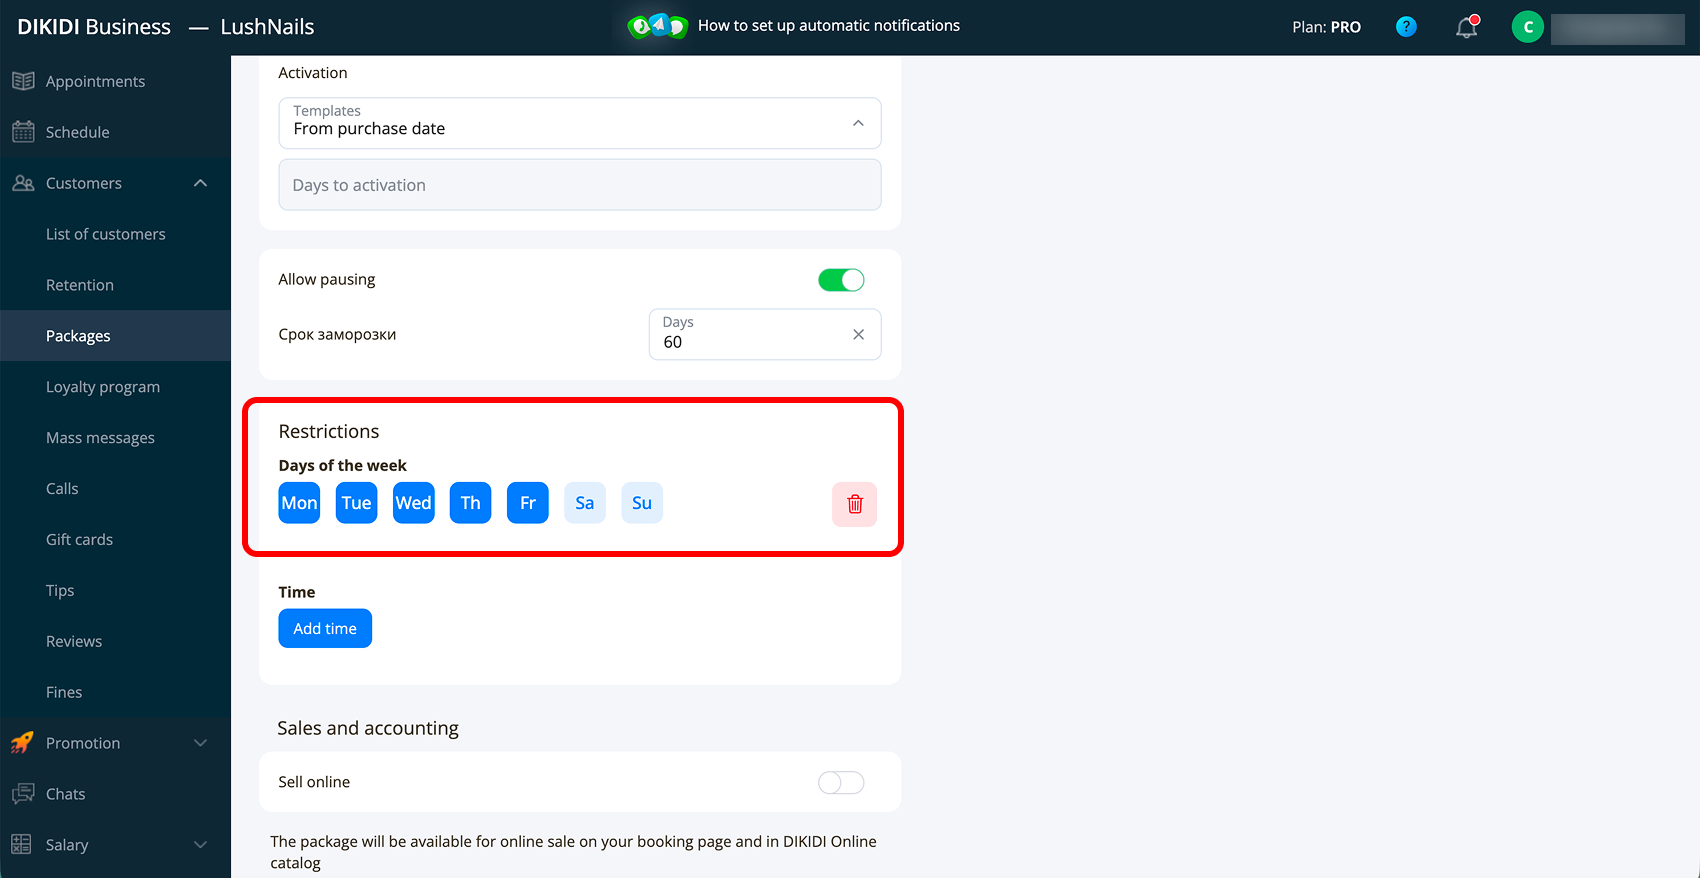
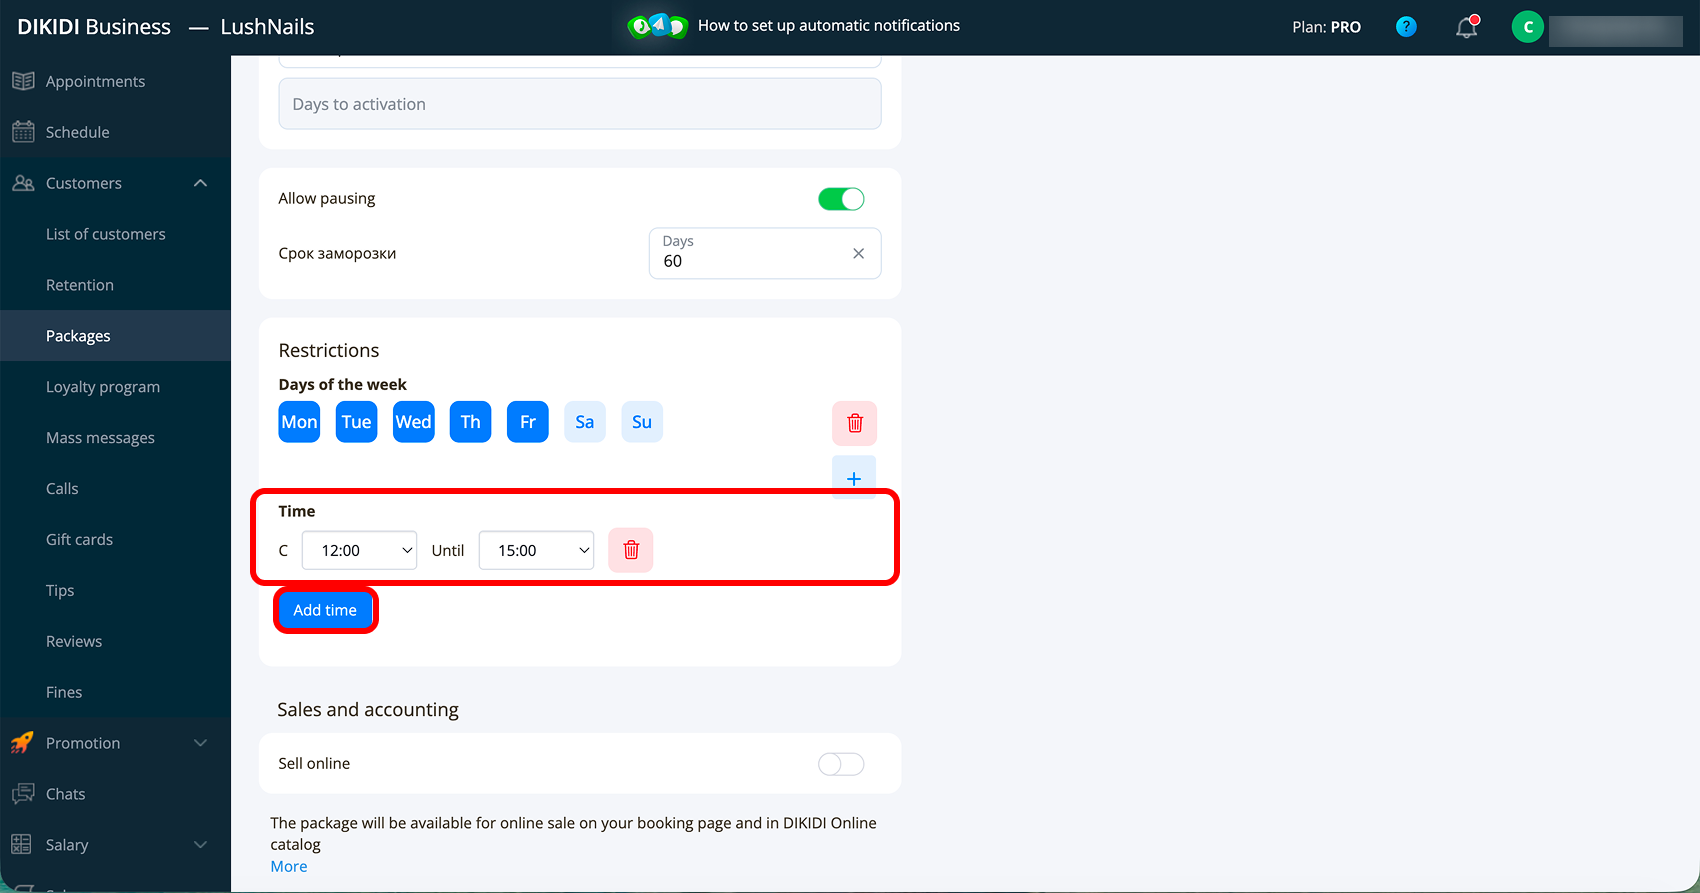
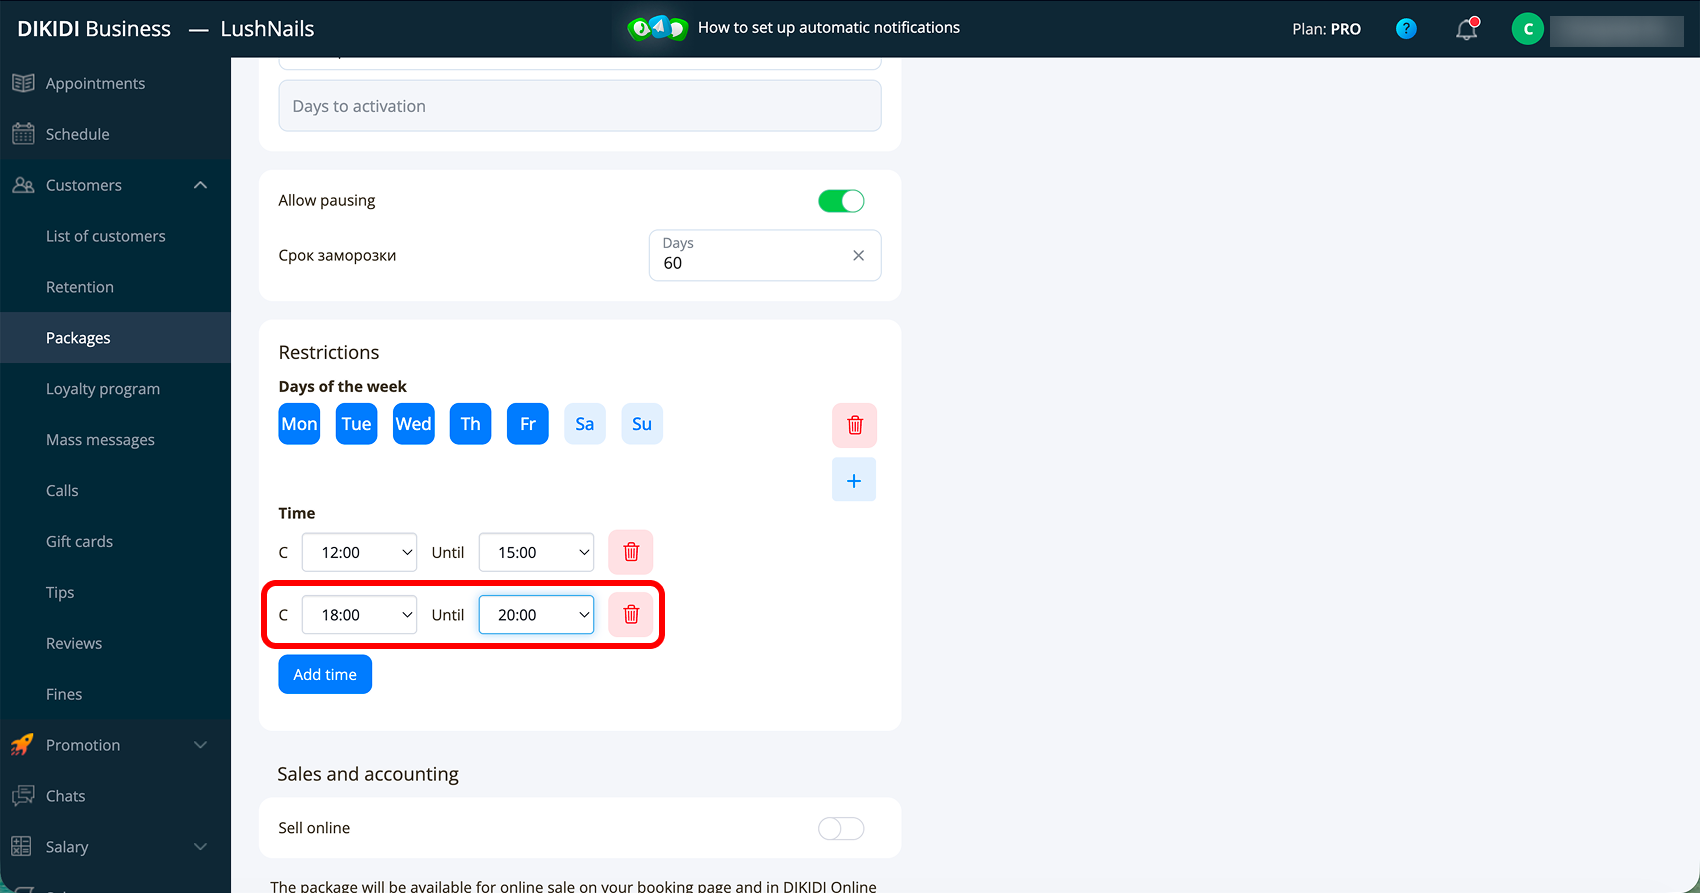
1️⃣3️⃣ If you want to limit the time of using the package – Add restrictions 🚫
For example, you can make the package valid only in the morning hours or only on certain days. Click "Add", select the days and specify the time intervals. If necessary, you can add several time intervals, as well as several restrictions;


1️⃣4️⃣ If you want to sell the package via online booking – turn on the "Sell online" setting. After that, the package will be available for purchase in DIKIDI Online and on your online booking page;
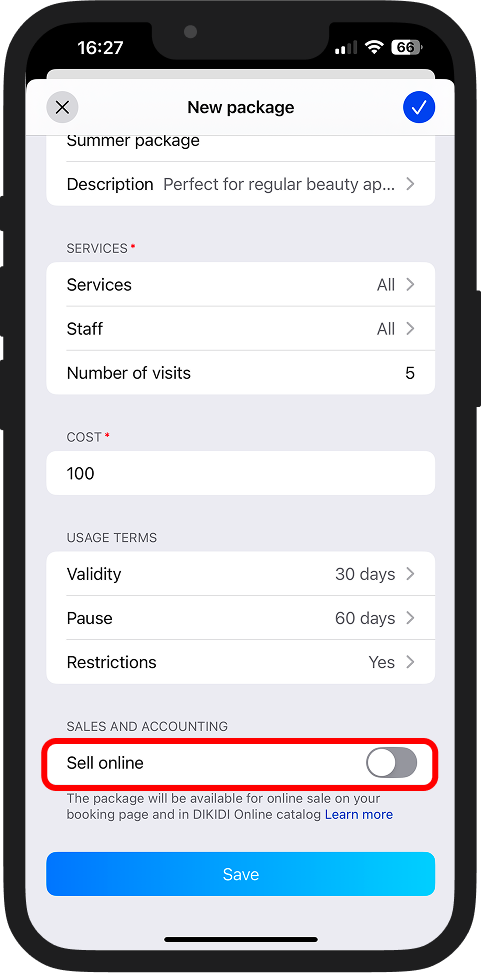
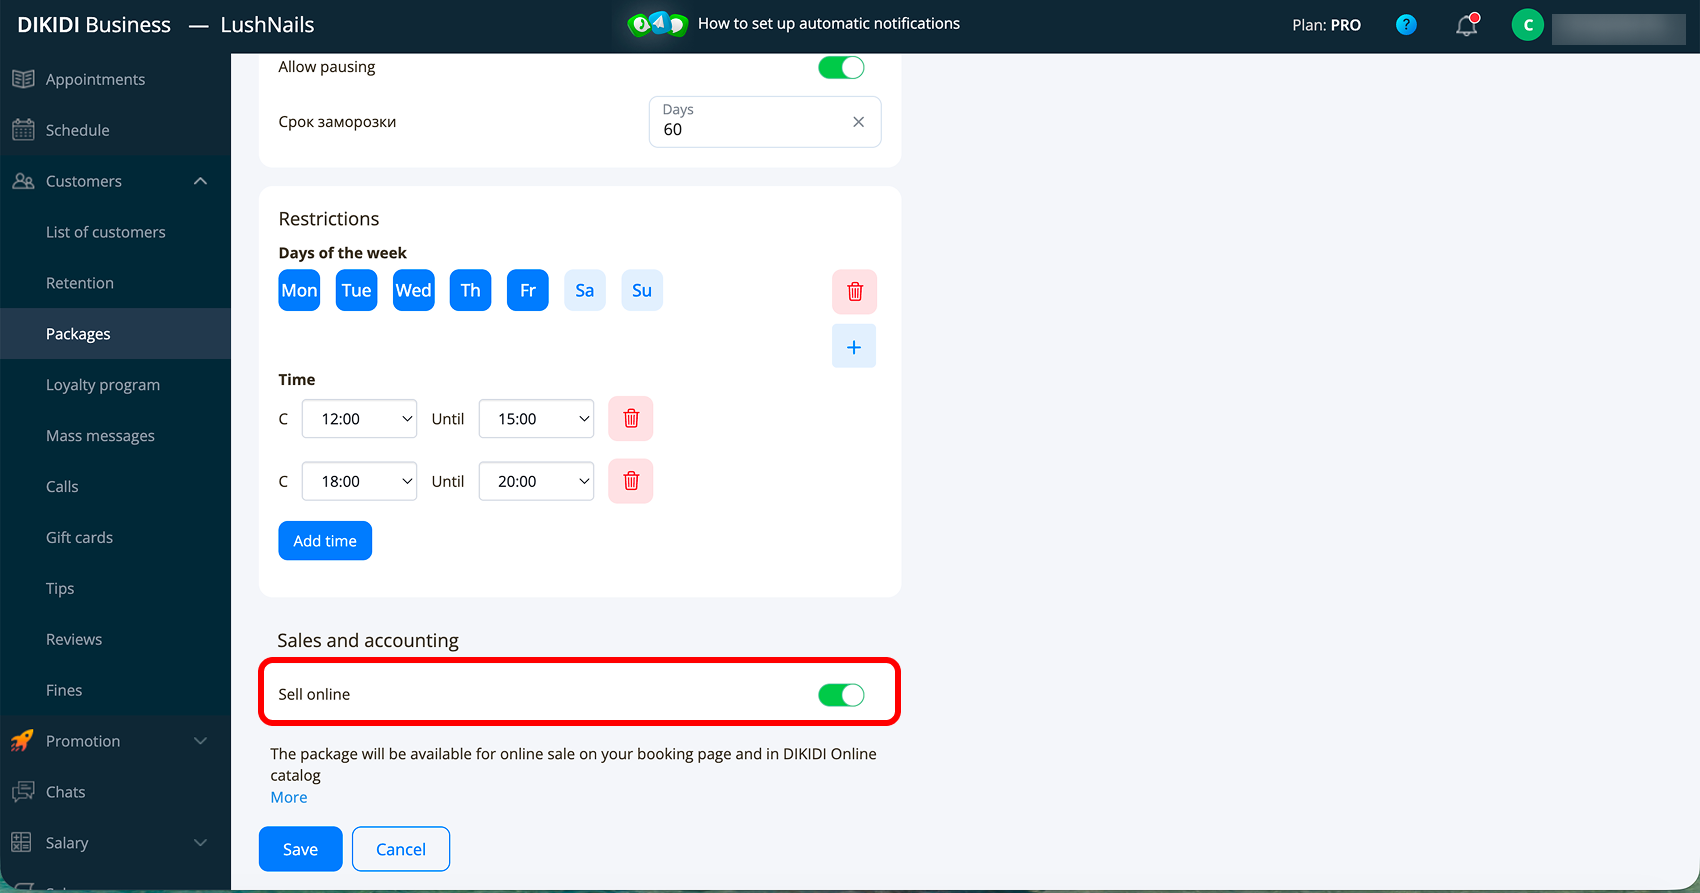
⚠️ 📚Important! For clients to be able to purchase a package in this way – you must have active online booking and connected internet acquiring to accept payments online. Payment acceptance methods. Cash registers📚
1️⃣5️⃣ Click "Save".
Managing the Package
After creation, click on the three dots in the top right corner of the package card. Available actions:
🔹 “Duplicate” – create a copy of the package with the ability to edit. Convenient if you need similar packages, but with a different number of visits or cost;
🔹 “Edit” – change the package parameters;
🔹 “Delete” – delete the package template.
Statistics
Click on the package to open its card. All conditions, the list of services, and statistics are displayed here. By default, statistics are shown for the current month, but you can select another month or view for all time. The statistics display:
🔹 “Total sold” – the total number of sold packages for the selected period;
🔹 “Active” – how many activated packages available for use the clients currently have;
🔹 “Total revenue” – the amount of sales for this package template for the selected period.
📚 Read also:
● How customer can buy a package