Integration with Google Calendar
Last modified:
DIKIDI supports synchronization of the “Appointment Journal” with Google Calendar:
🔹 Individual specialists can connect and configure two-way event synchronization;
🔹 For companies, the integration is currently available in the mode for exporting appointments from DIKIDI.
Please note that users with “Creator” and “Administrator” access to the project can access the integration.
The integration is available in all paid plans starting from LITE.
How to connect the integration
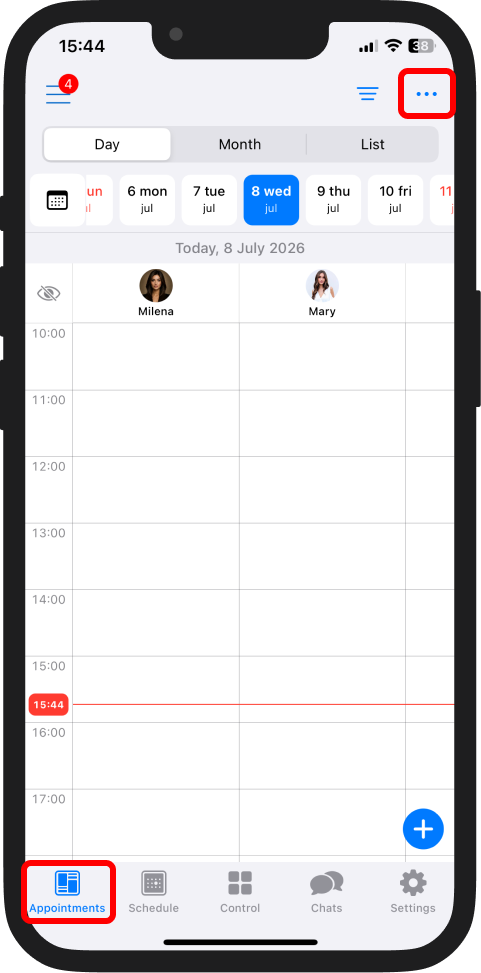
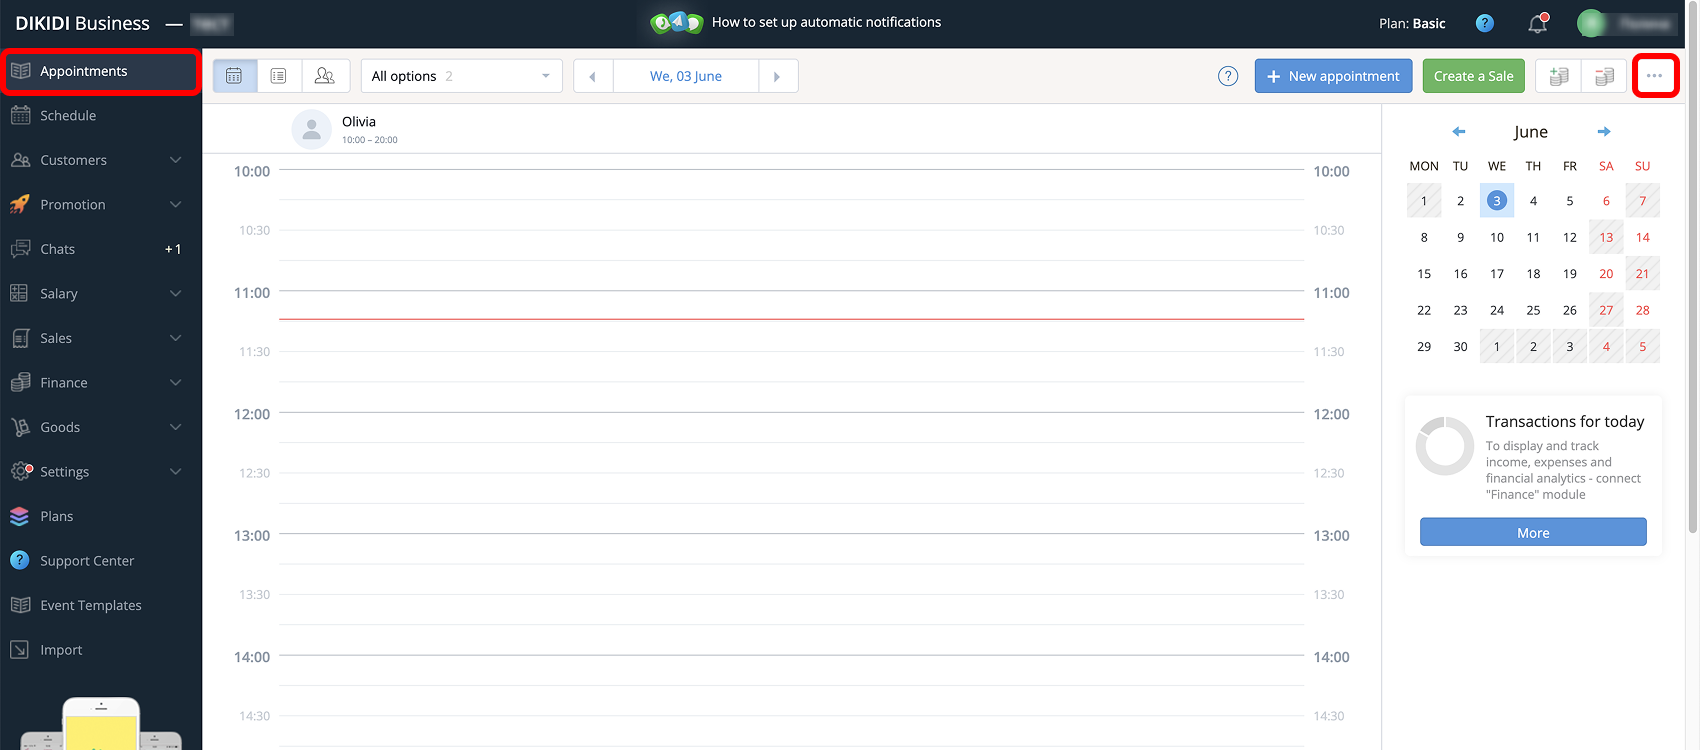
1️⃣ Go to the “Appointments” section and click the three dots in the upper-right corner;
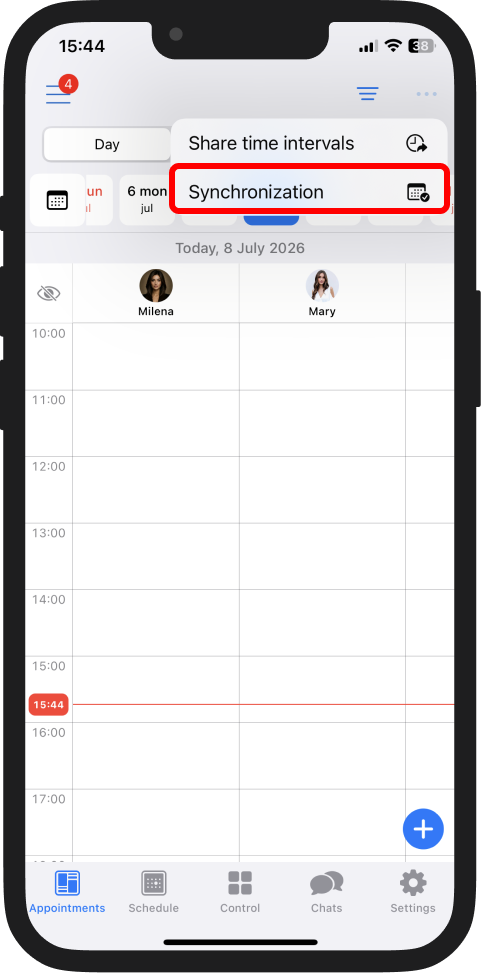
2️⃣ In the drop-down list, select “Synchronization”;
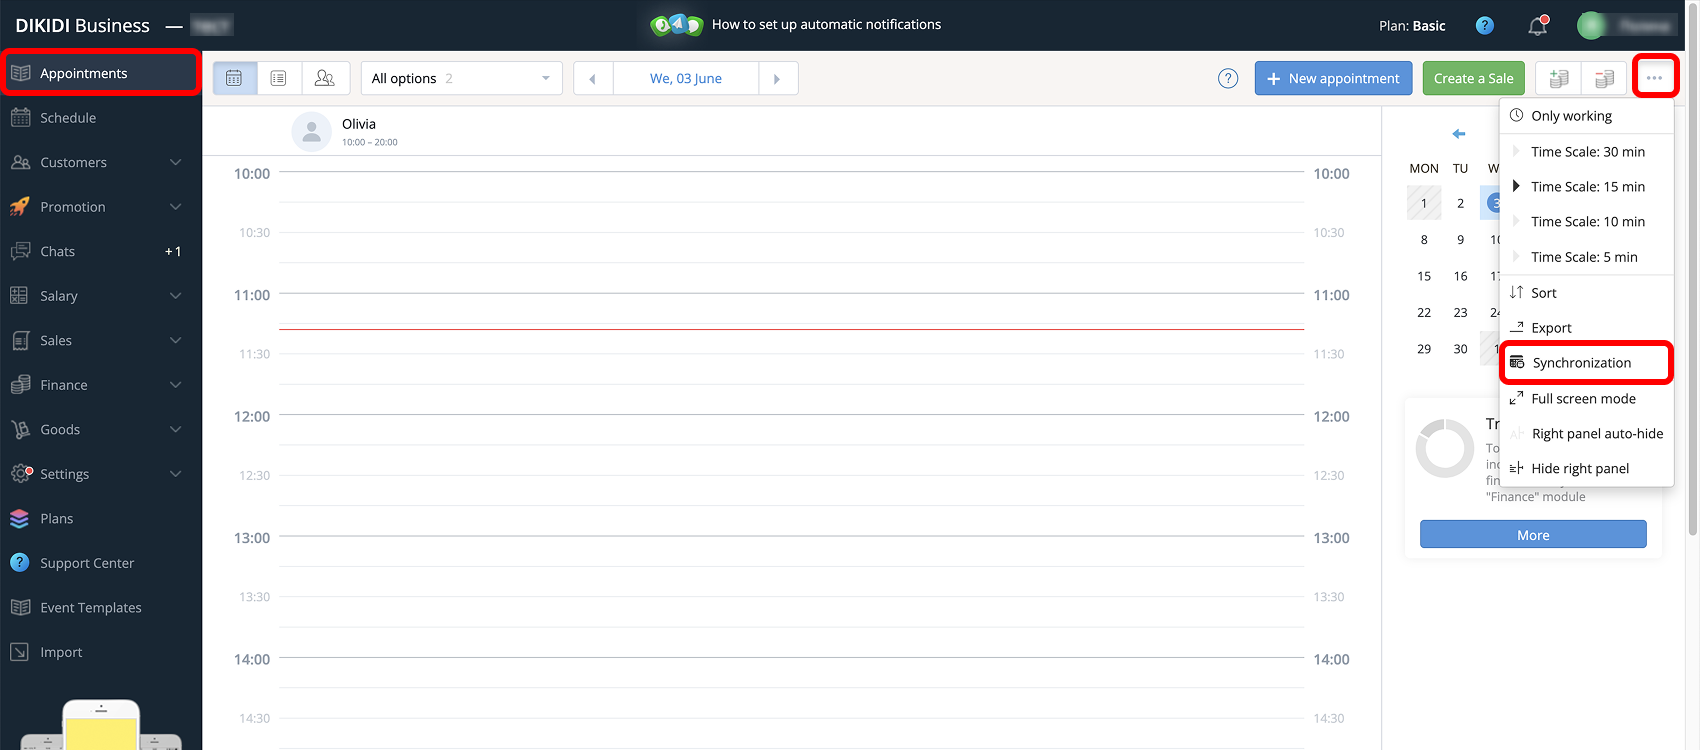
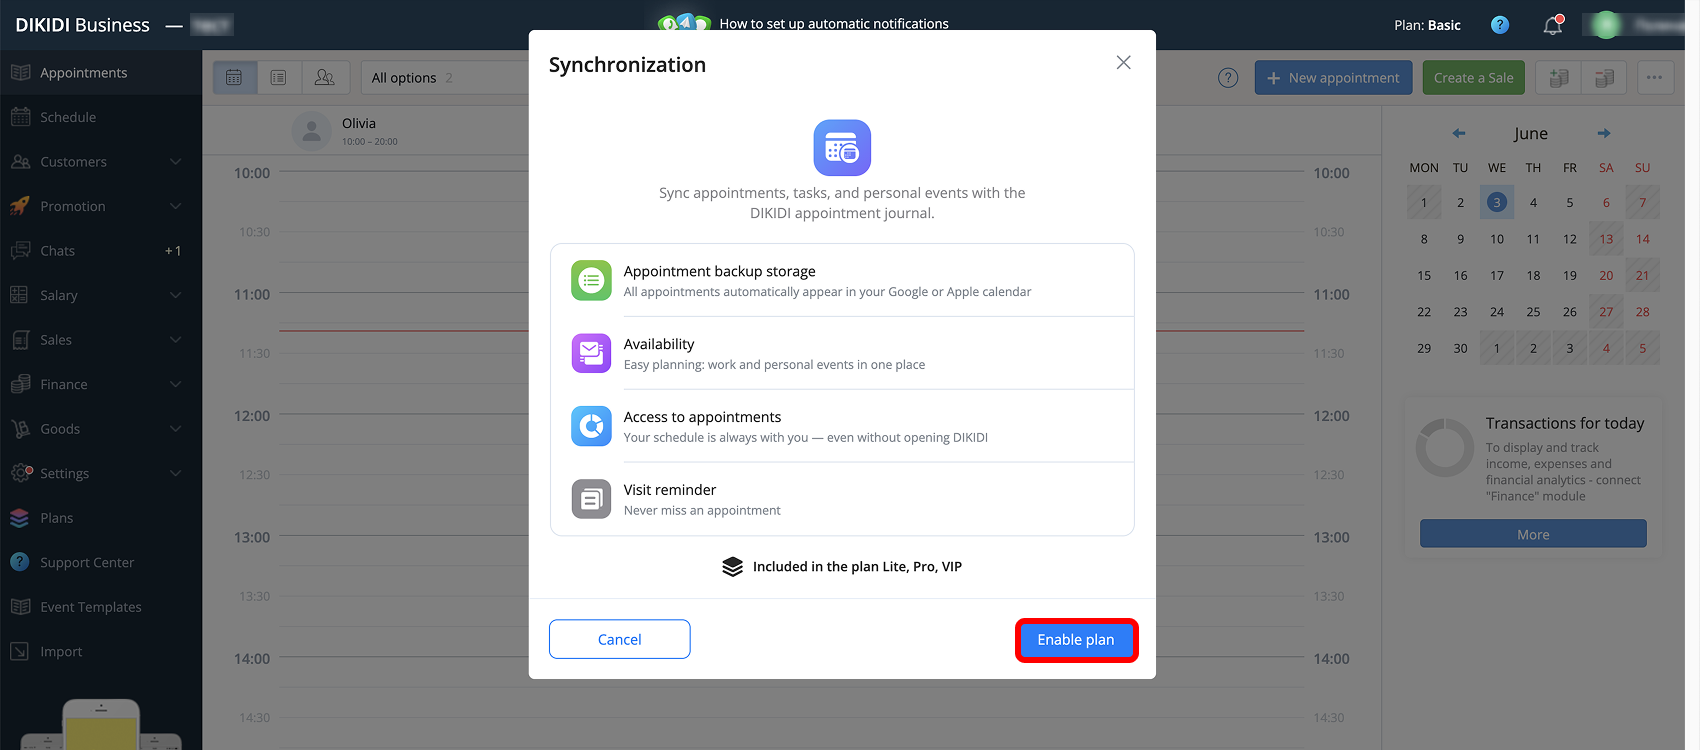
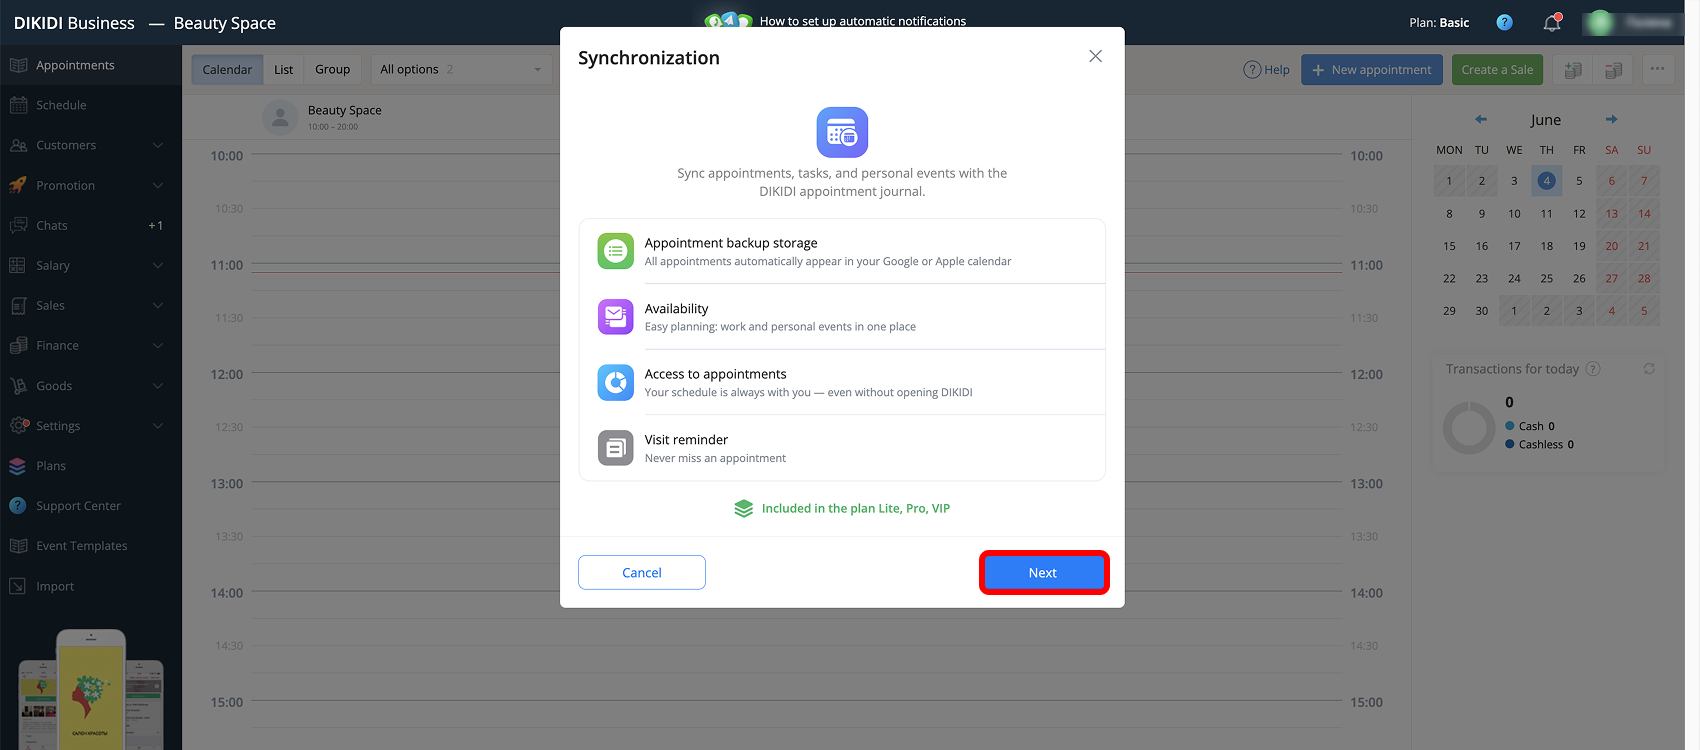
3️⃣ In the window that opens, you can review the benefits of the feature:
🔹 If you do not have the Lite, Pro, or VIP plan connected, click “Enable plan” and go to the “Plans” section;
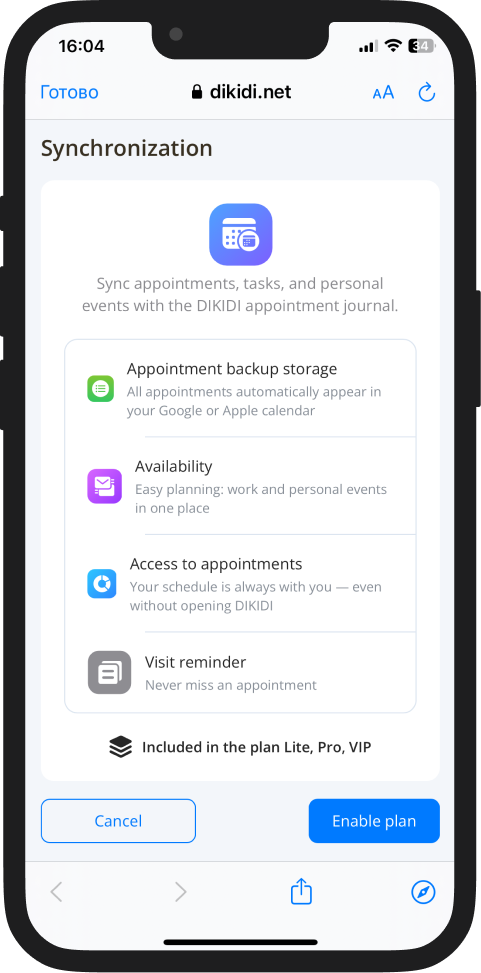
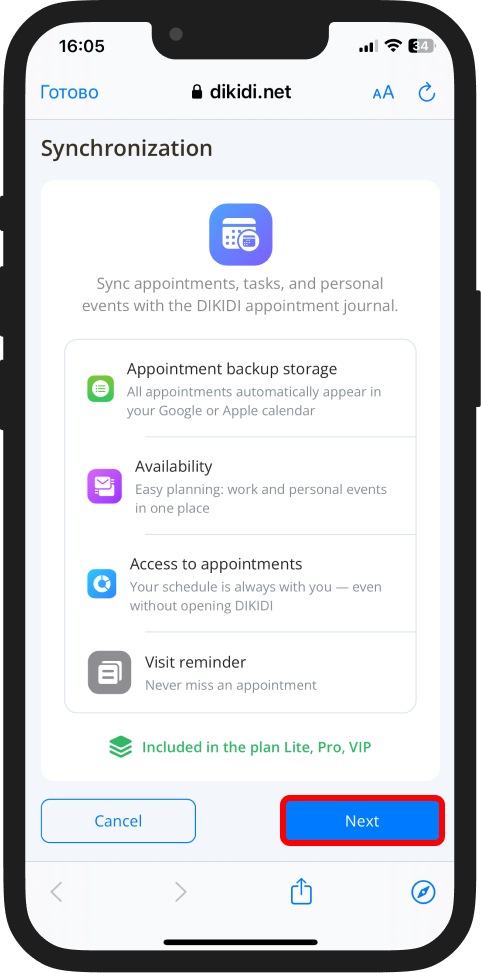
🔹 If you already have an active paid plan, click “Next”;
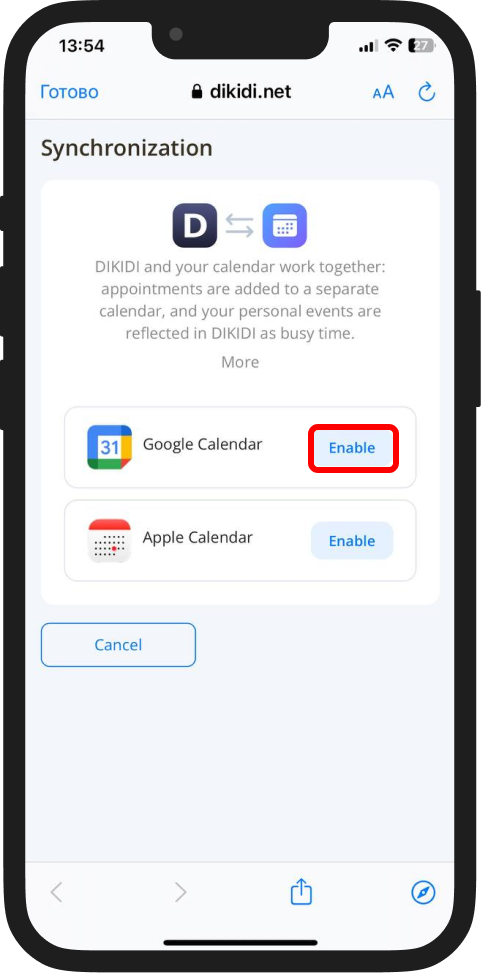
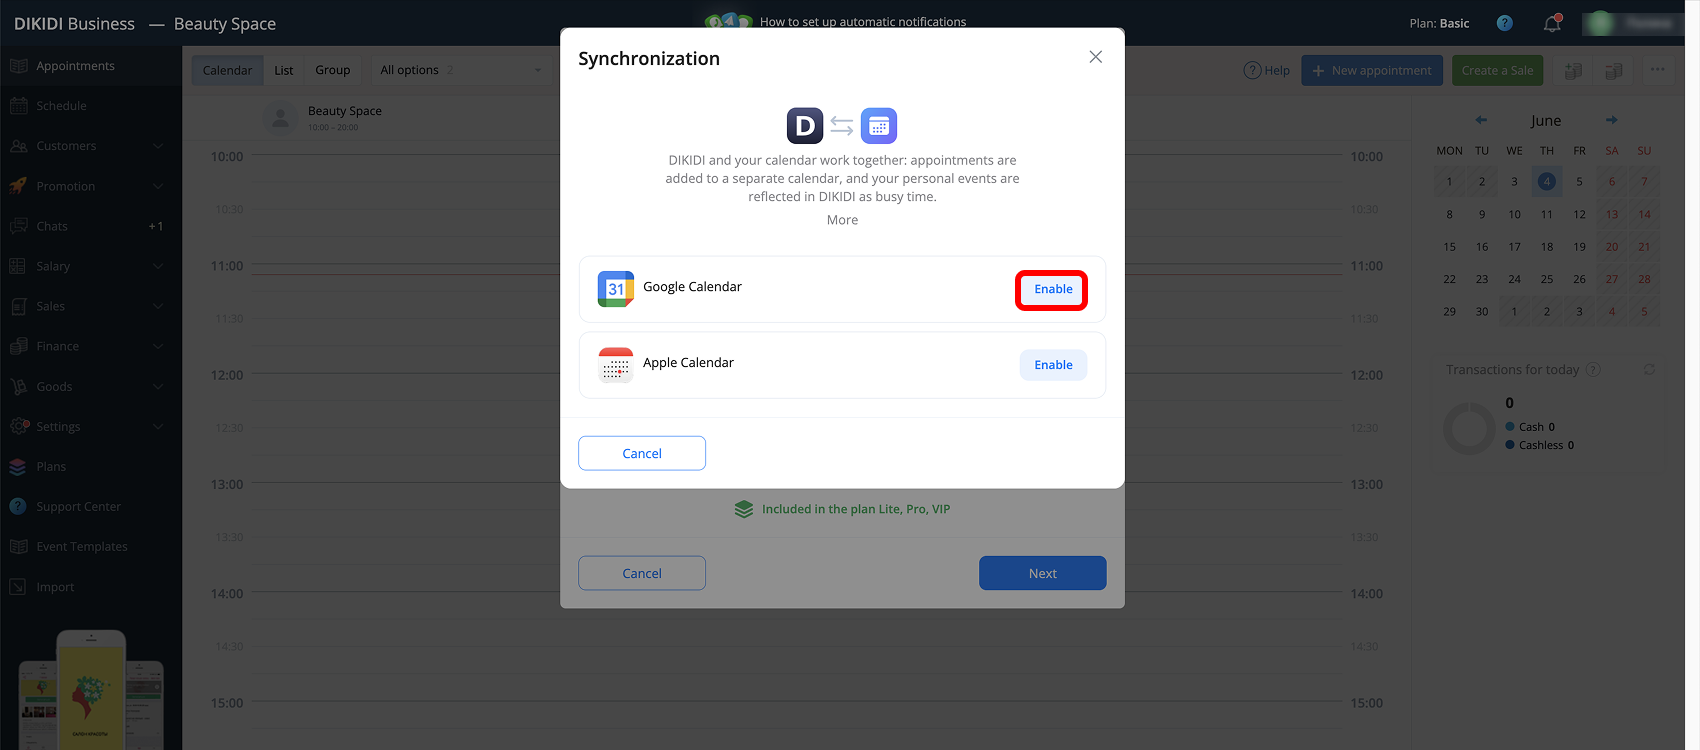
4️⃣ Click “Enable” next to Google Calendar;
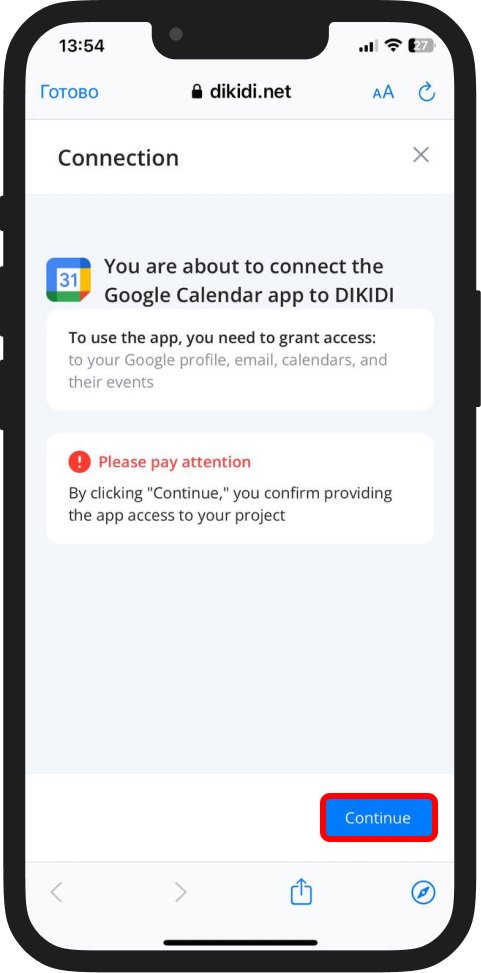
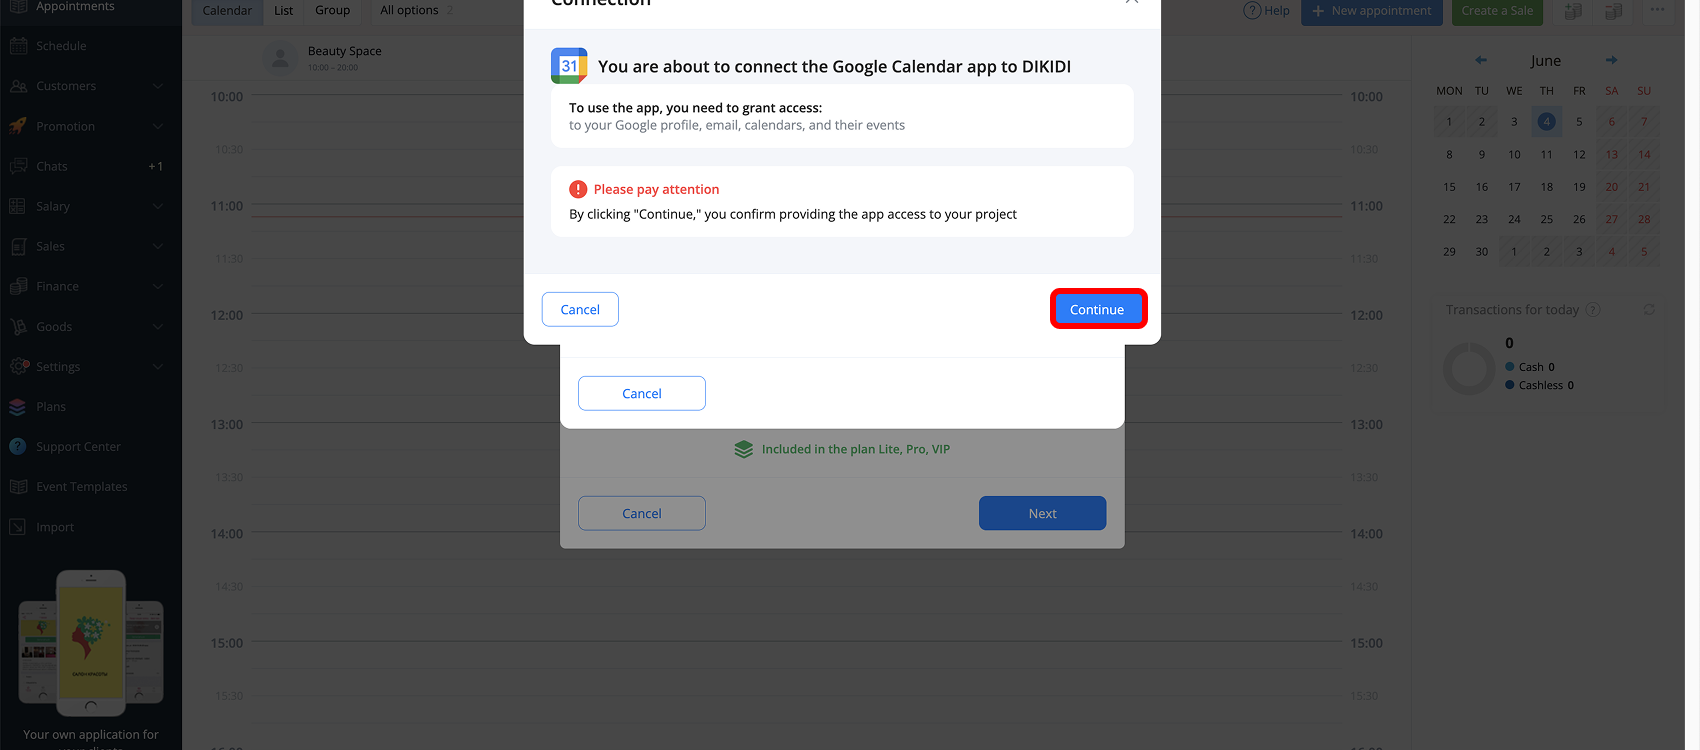
5️⃣ Click “Continue” and confirm the connection;
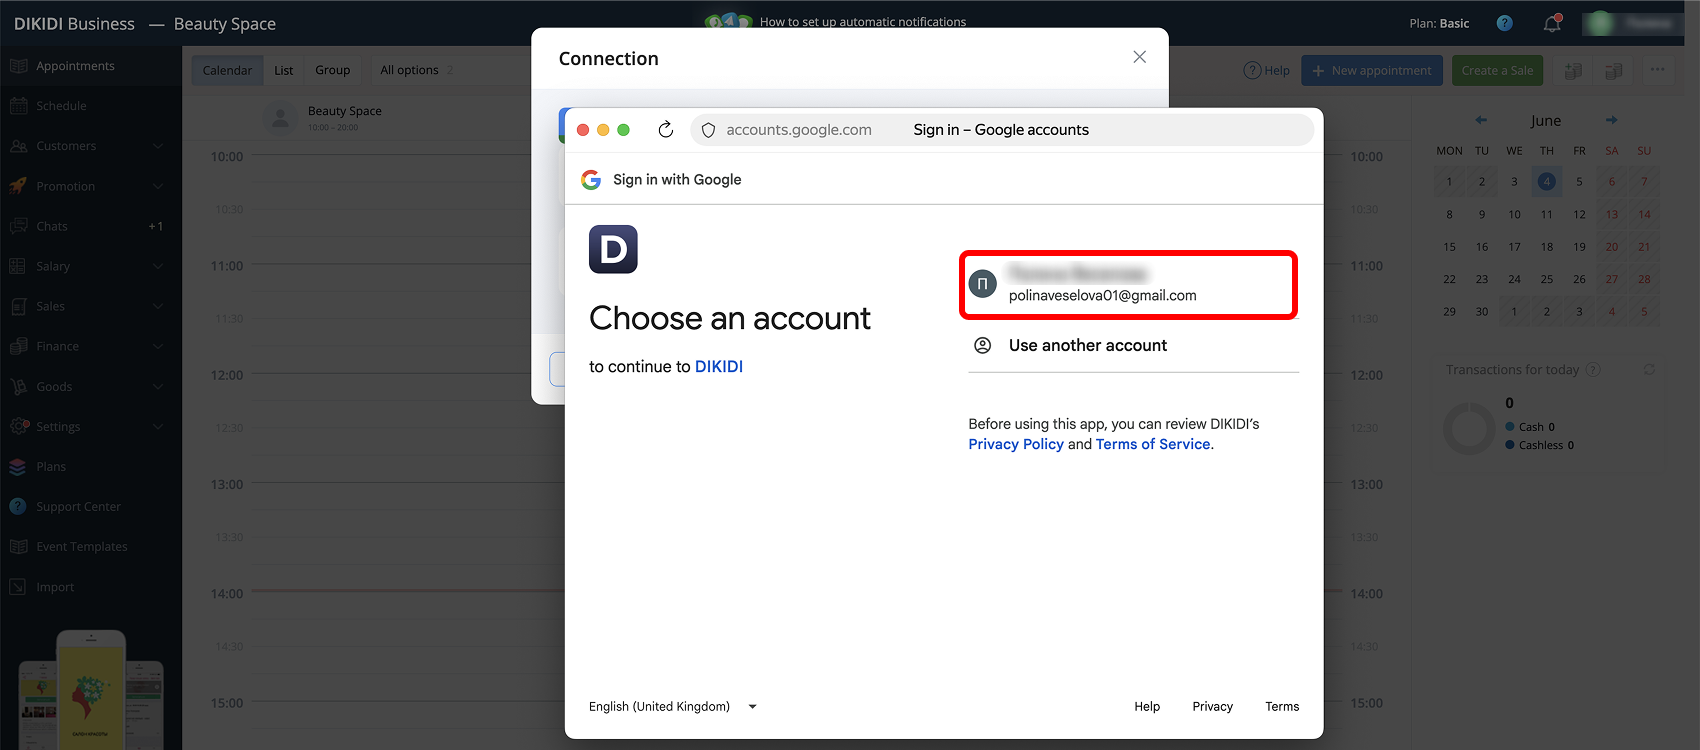
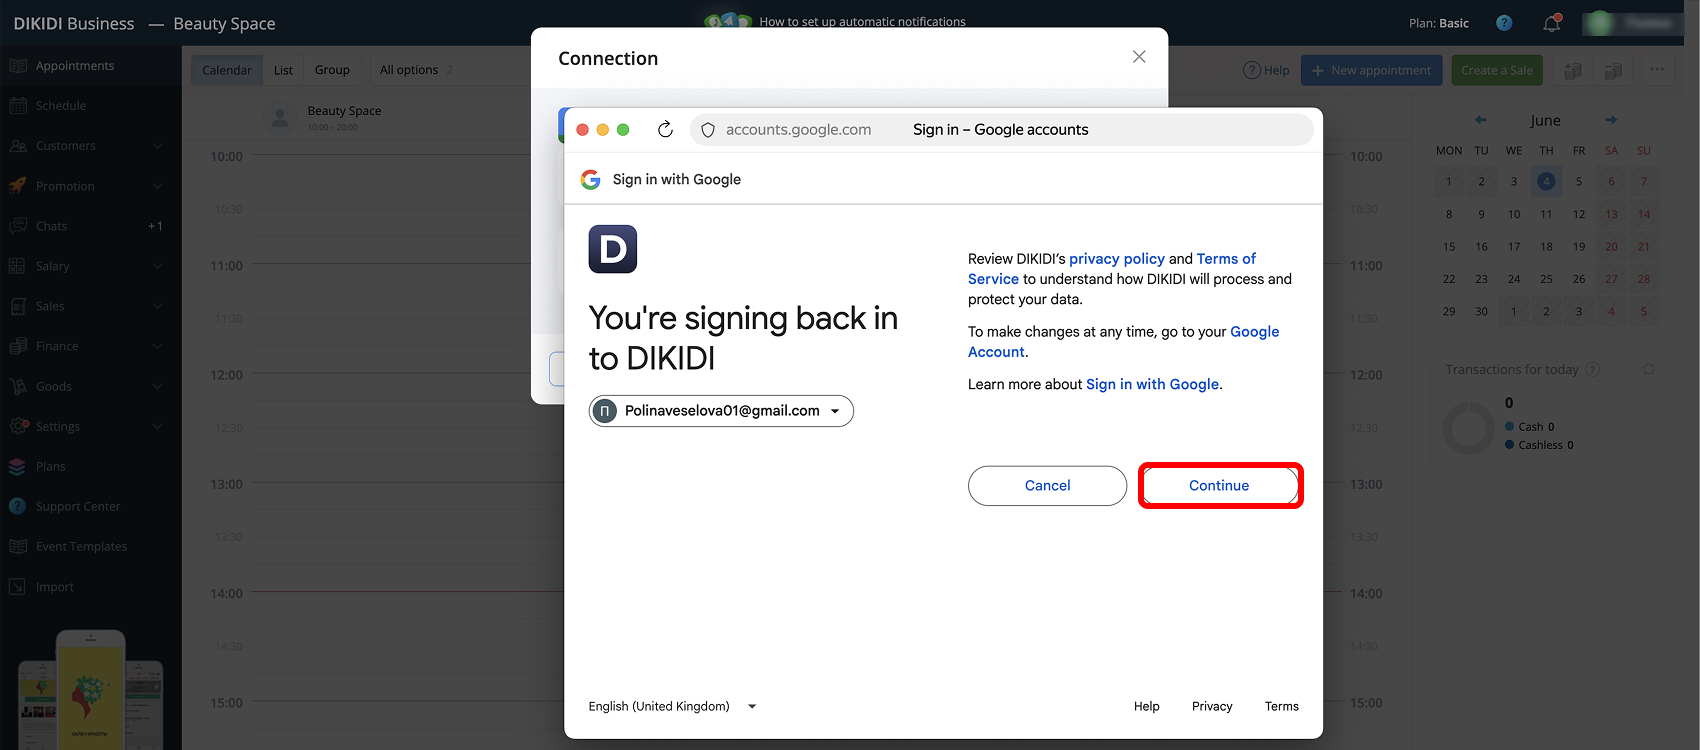
6️⃣ In the window that appears, select the Google account you want to link to the DIKIDI Business project;
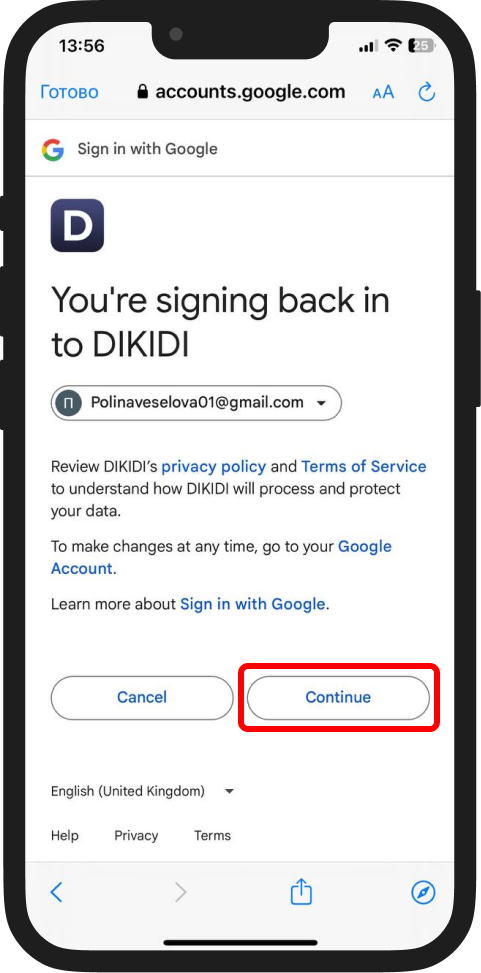
7️⃣ Review the access information and click “Continue”;
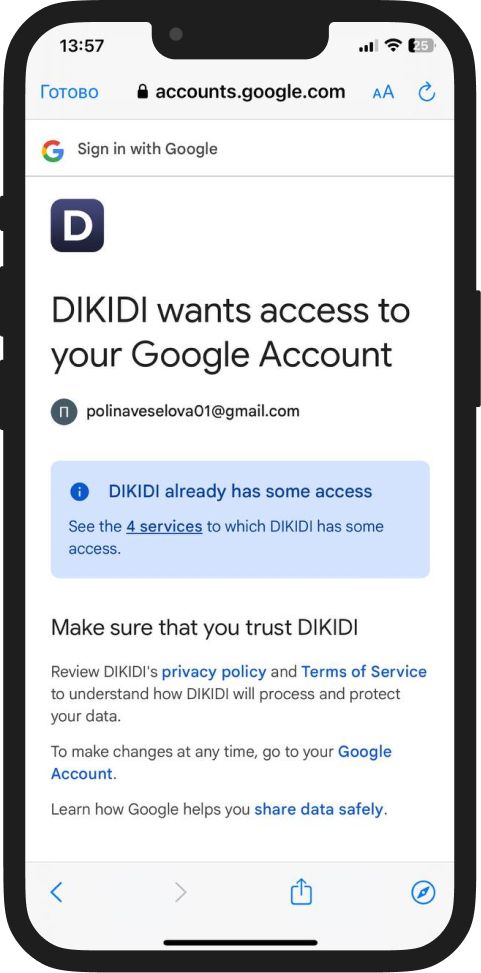
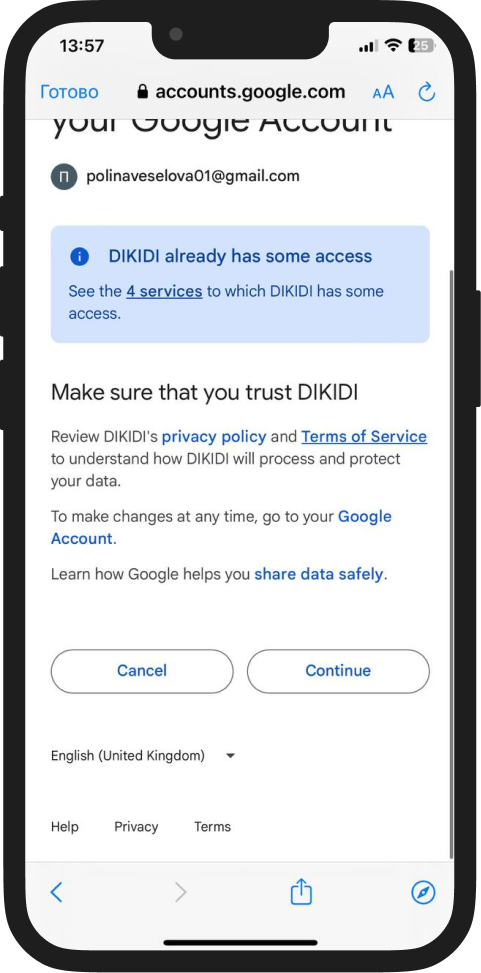
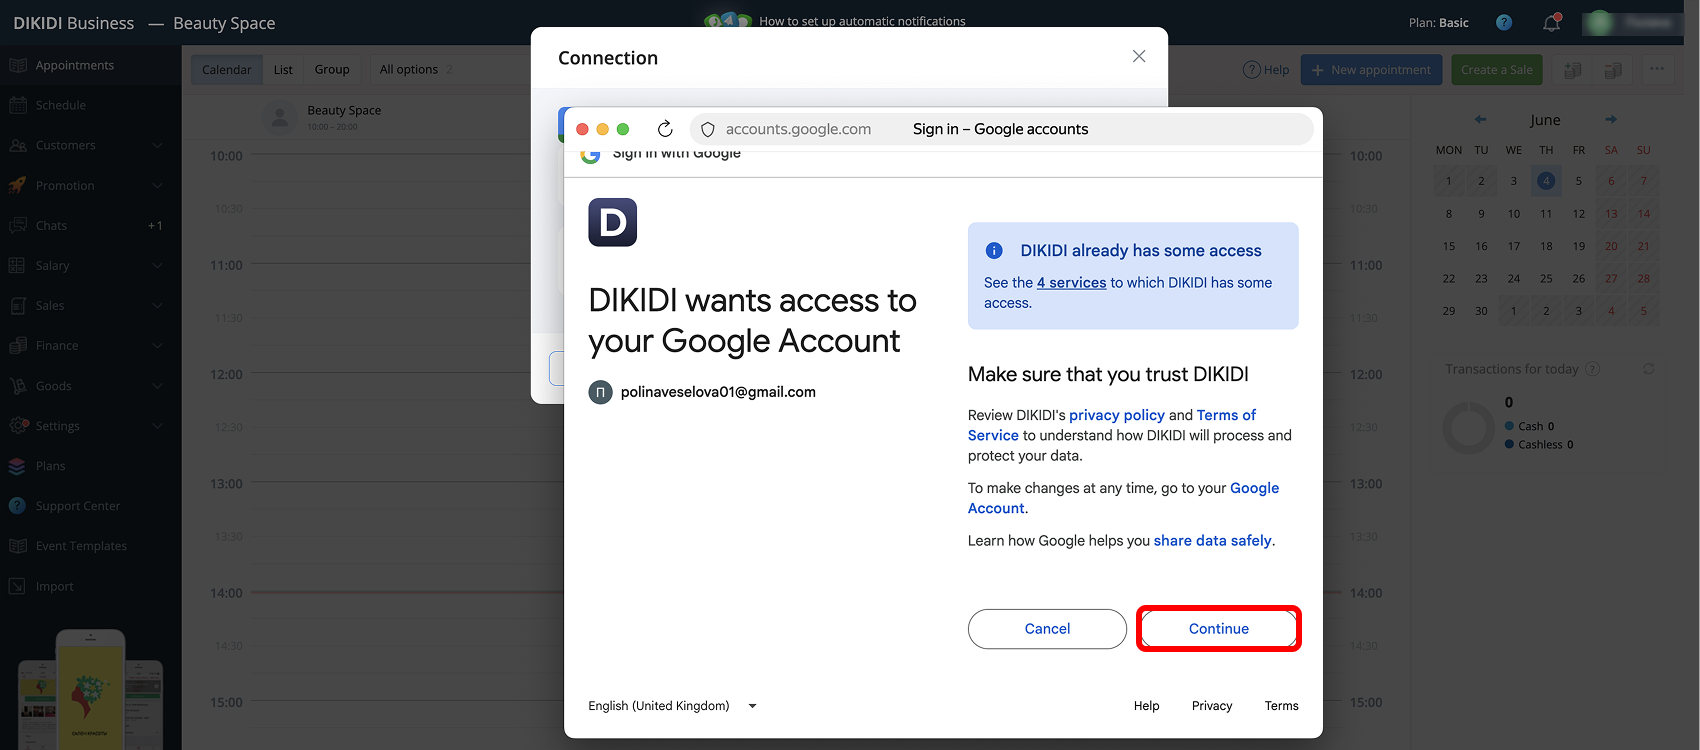
8️⃣ Confirm the access rights by checking the box, then click “Continue” again;
9️⃣ After that, the integration settings window will open.
🔹 For an individual specialist;
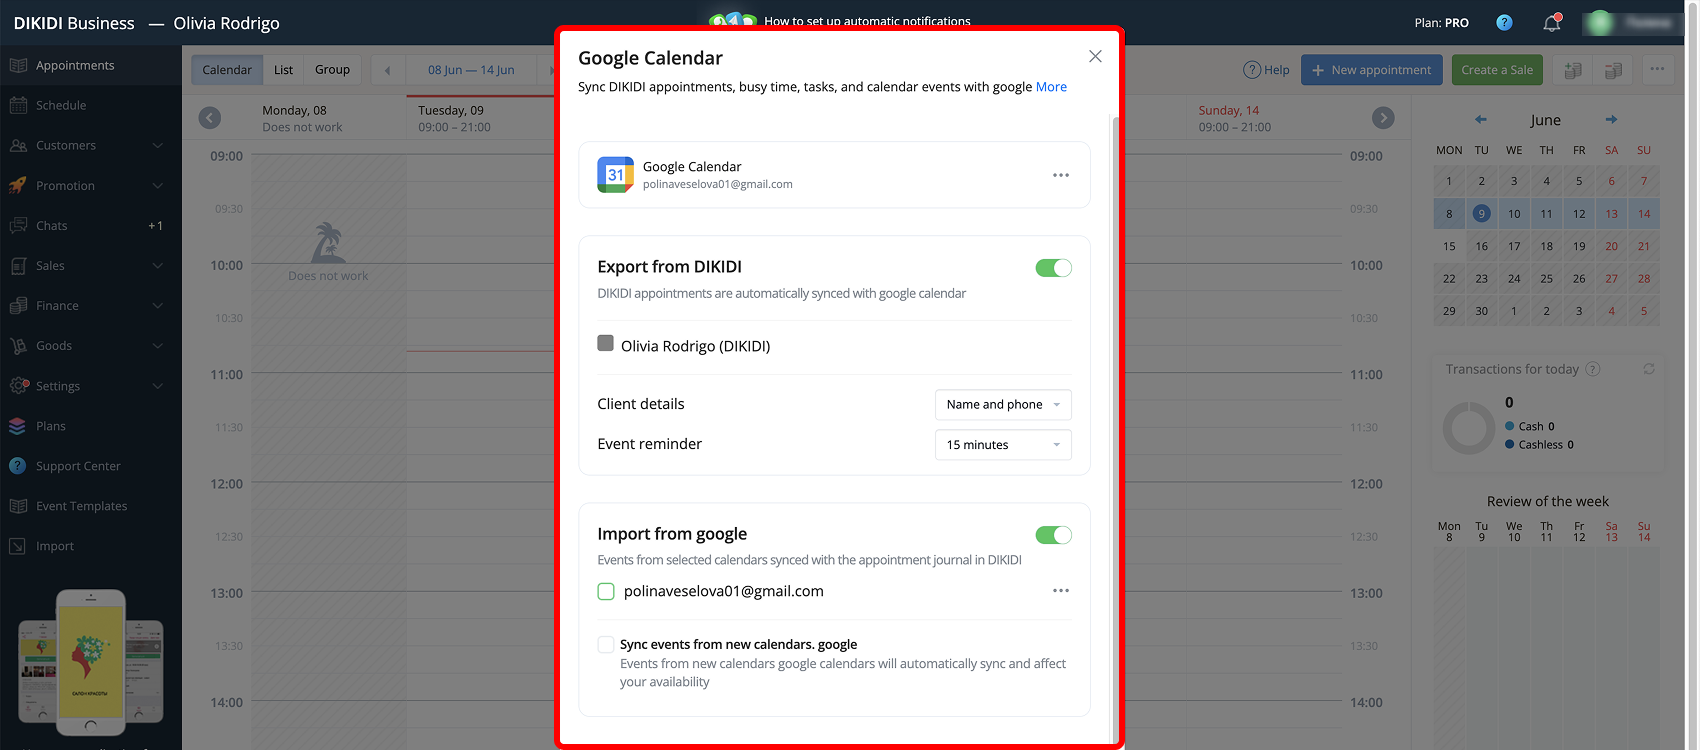
🔹 For a company;
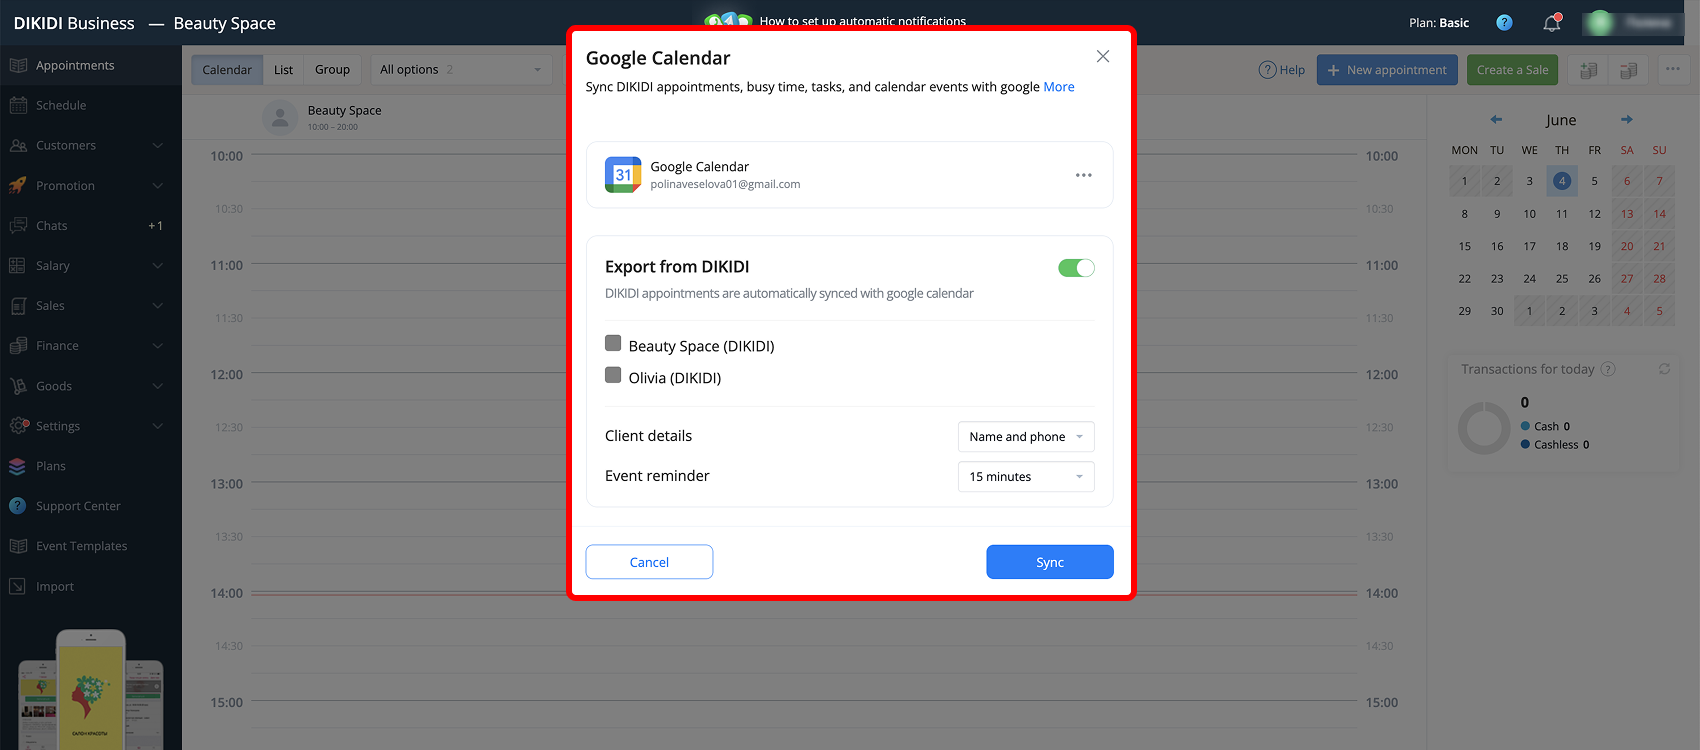
⚙️ Setting up the integration for a “Company” project type
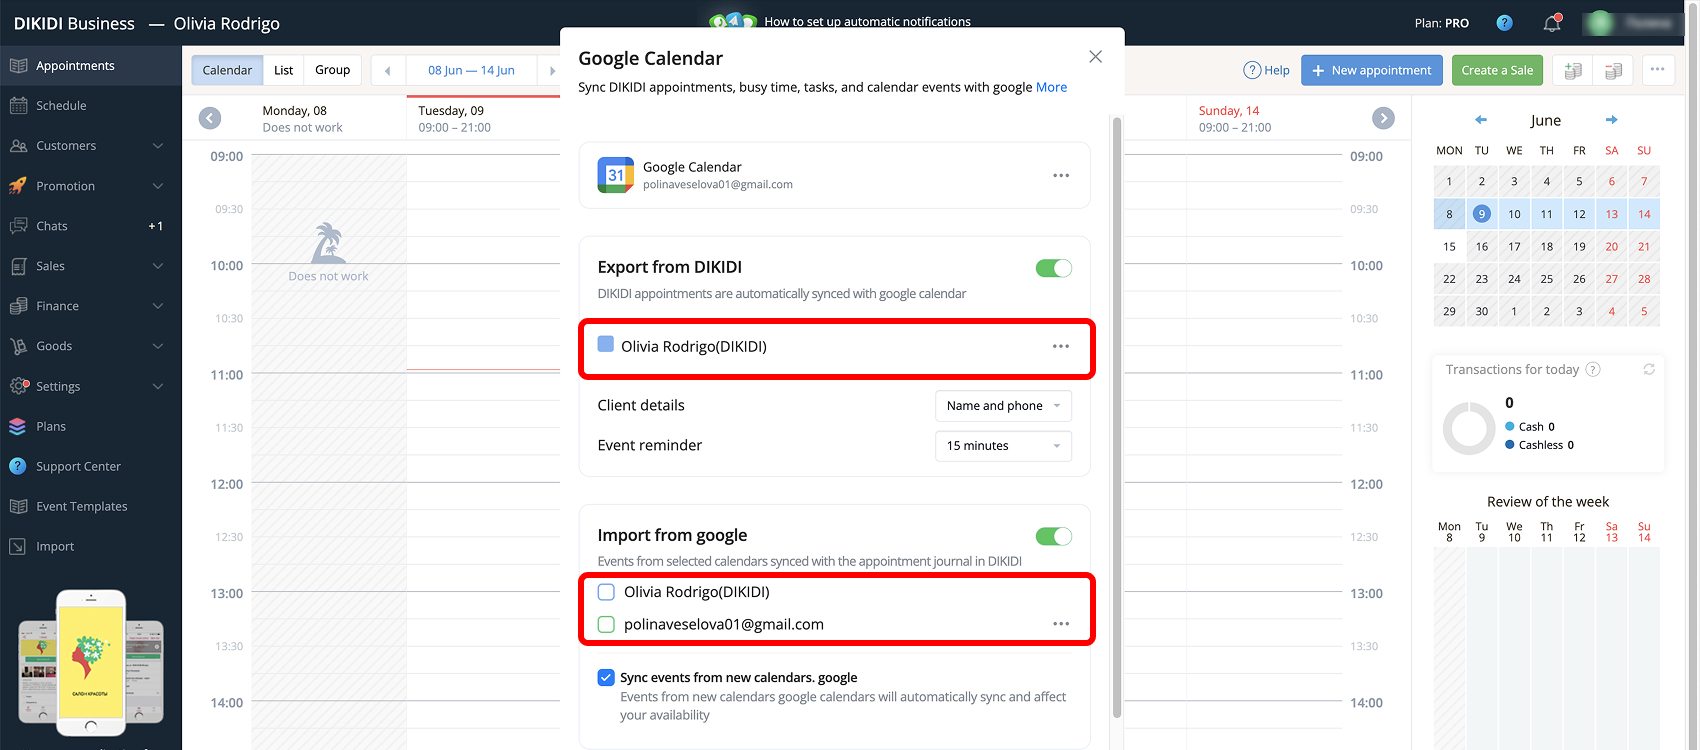
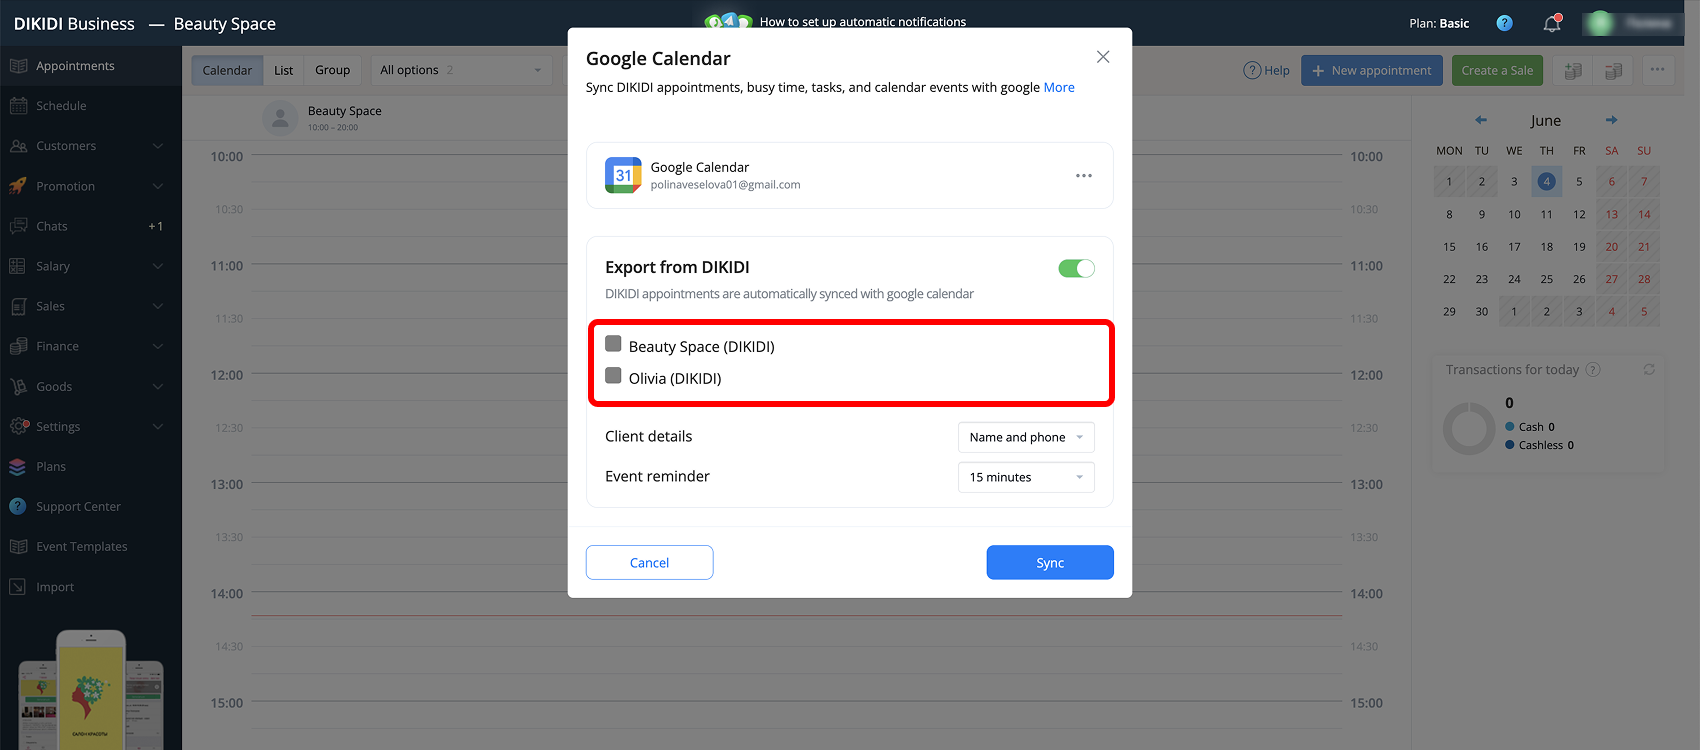
The following settings are available in the DIKIDI “Appointments” synchronization window with Google Calendar:
1️⃣ Connection management
Click the three dots to:
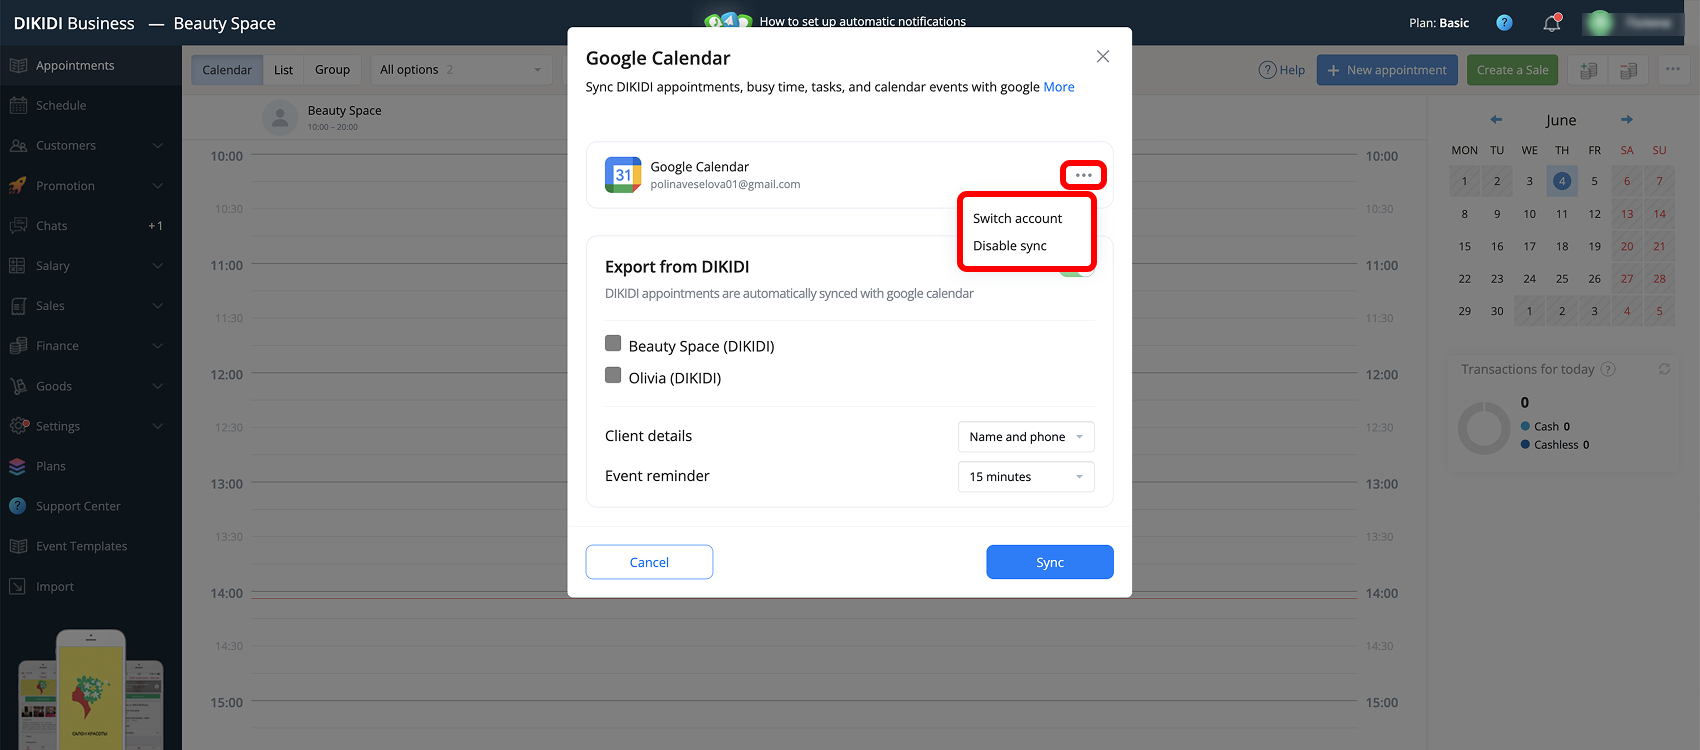
🔹 Change the Google account for synchronization using the “Switch account” button;
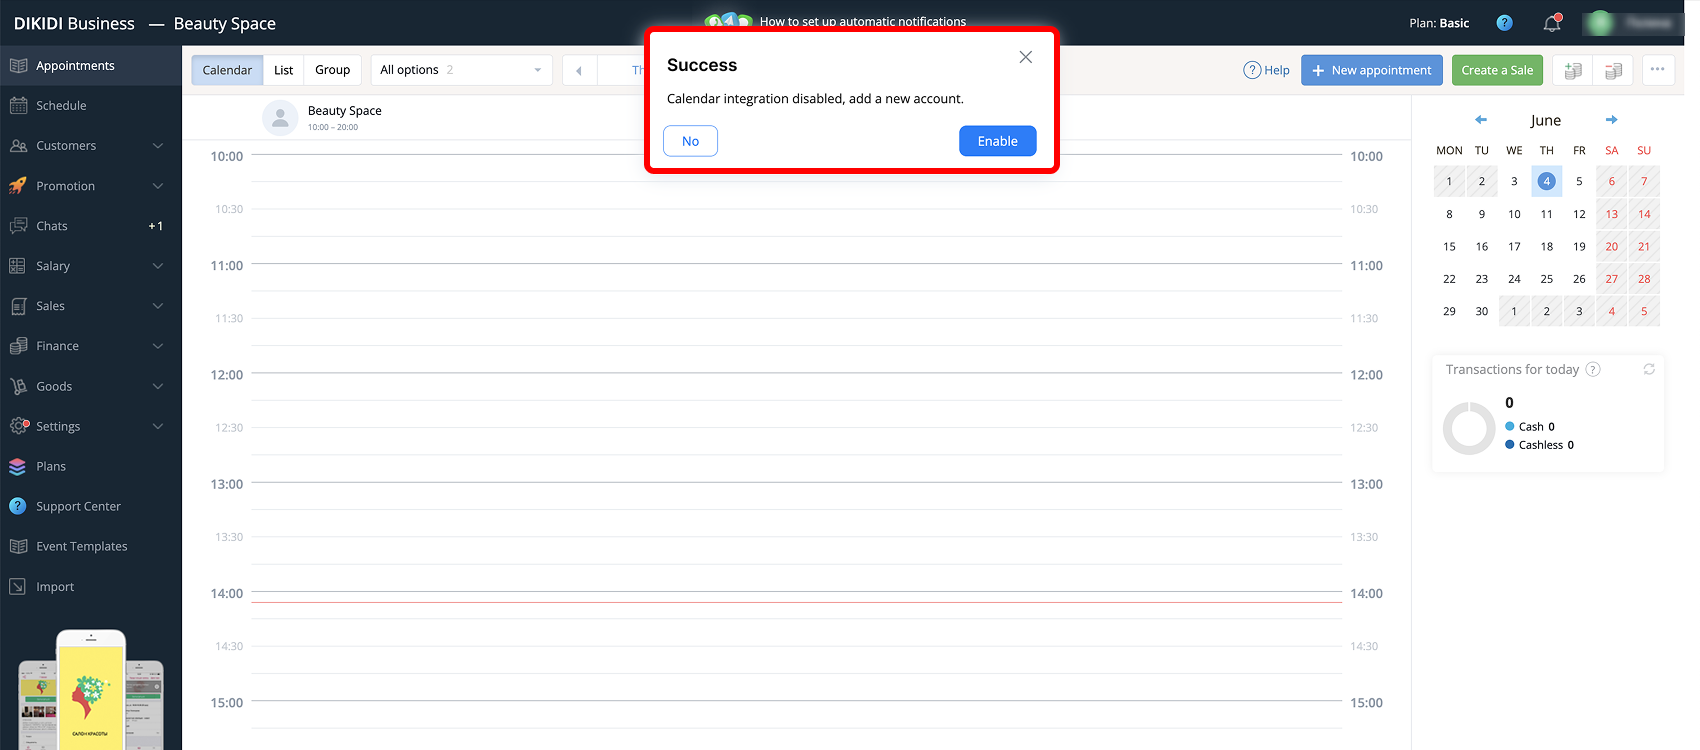
🔹 Disable synchronization using the corresponding button.
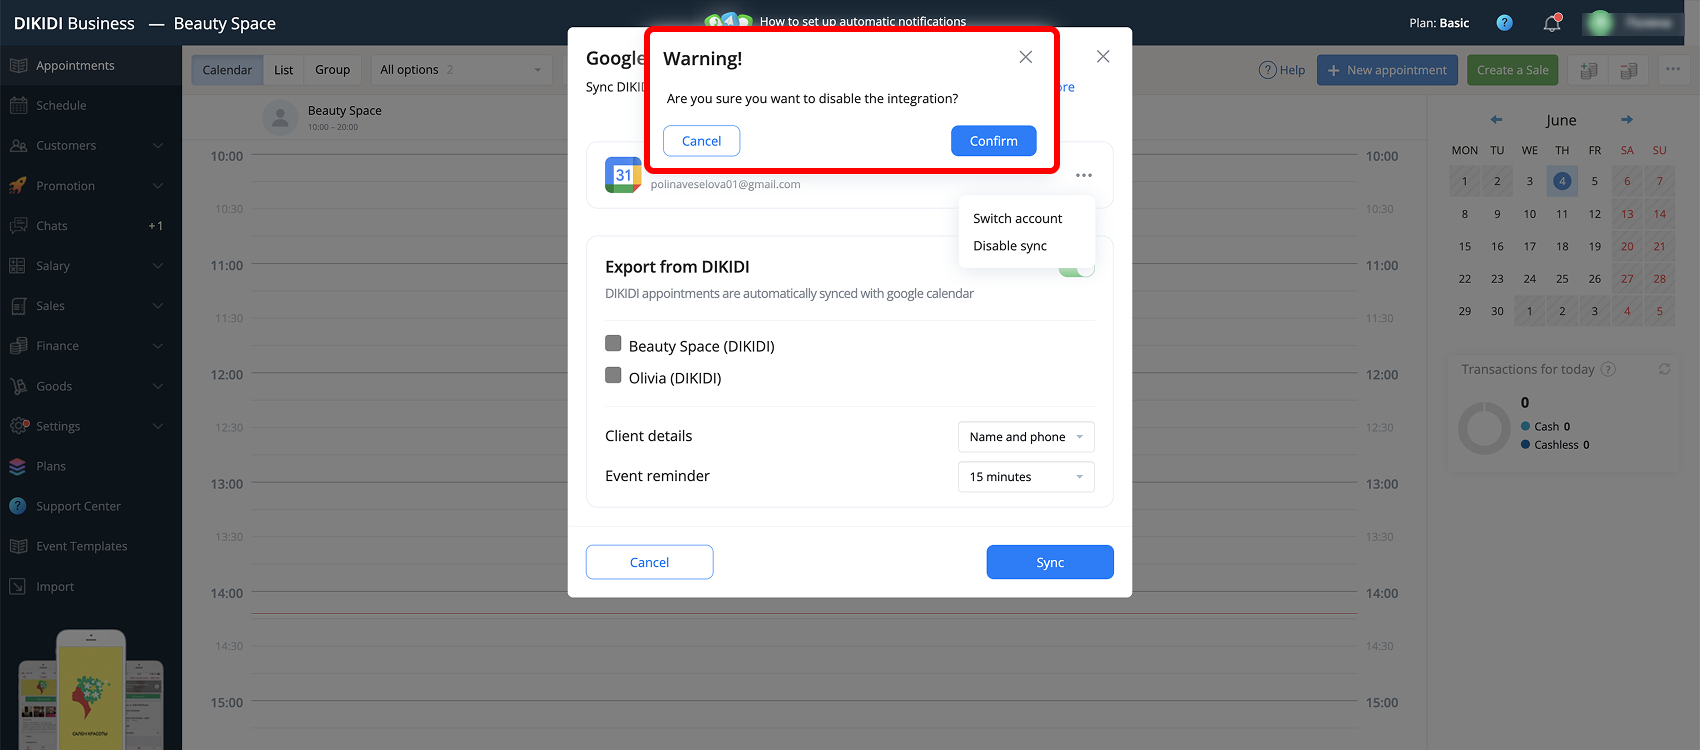
2️⃣ Export from DIKIDI
The “Export from DIKIDI” toggle is enabled by default. You can:
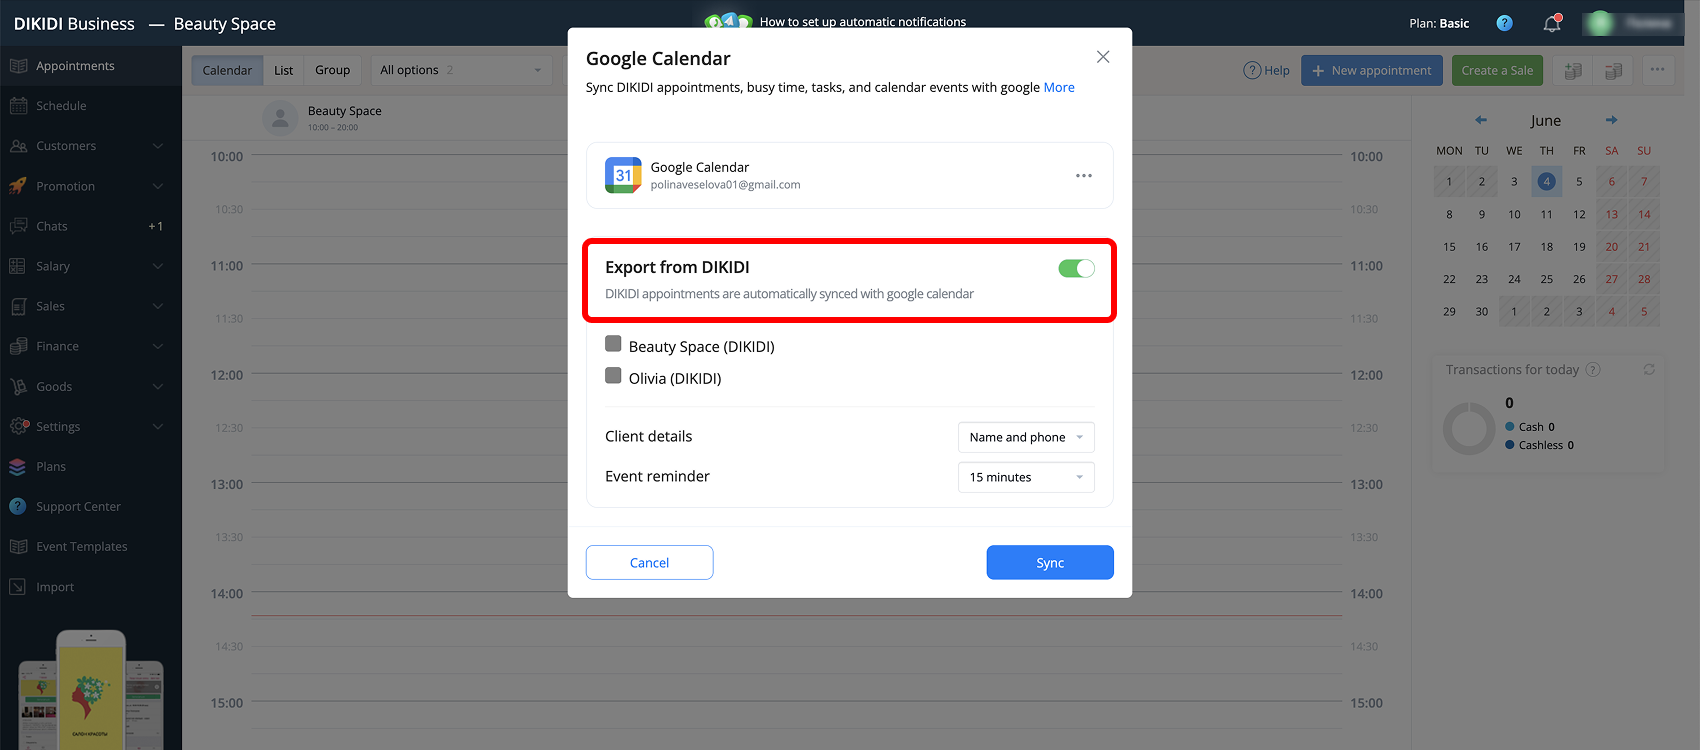
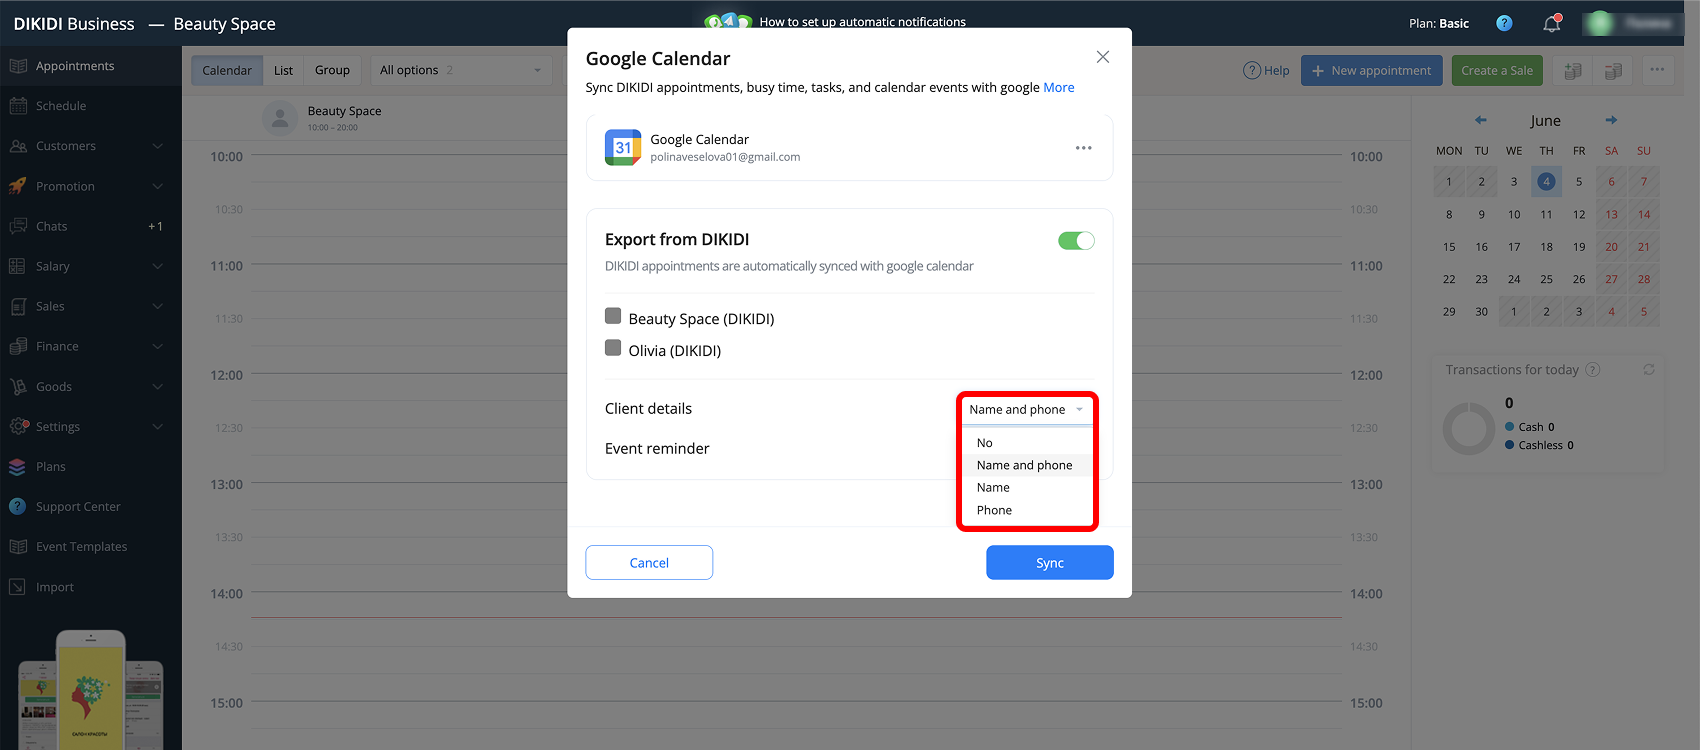
🔹 Choose which client data to export to the calendar;
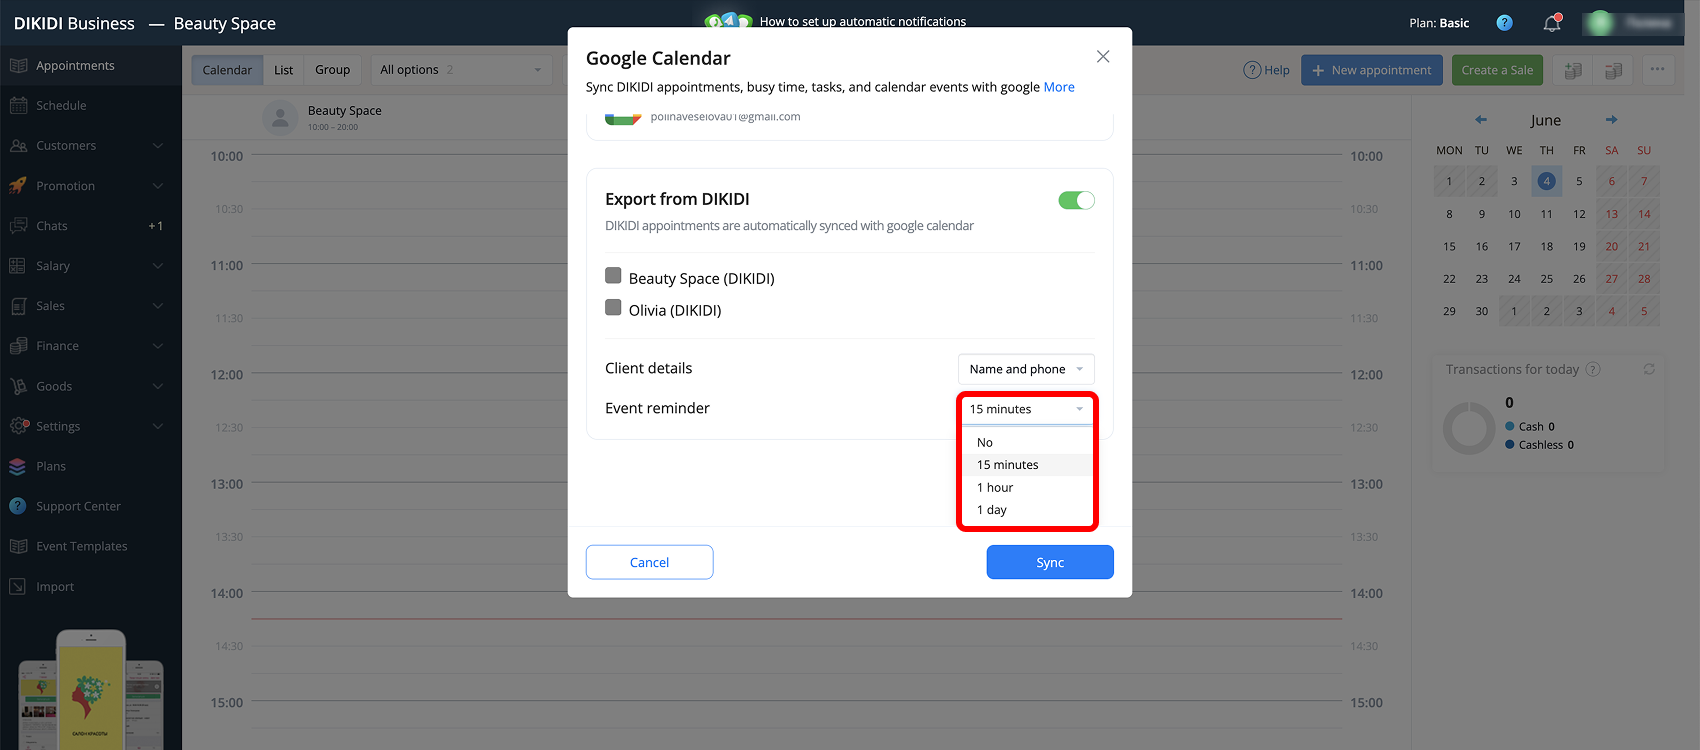
🔹 Configure Google Calendar reminders for the client appointment.
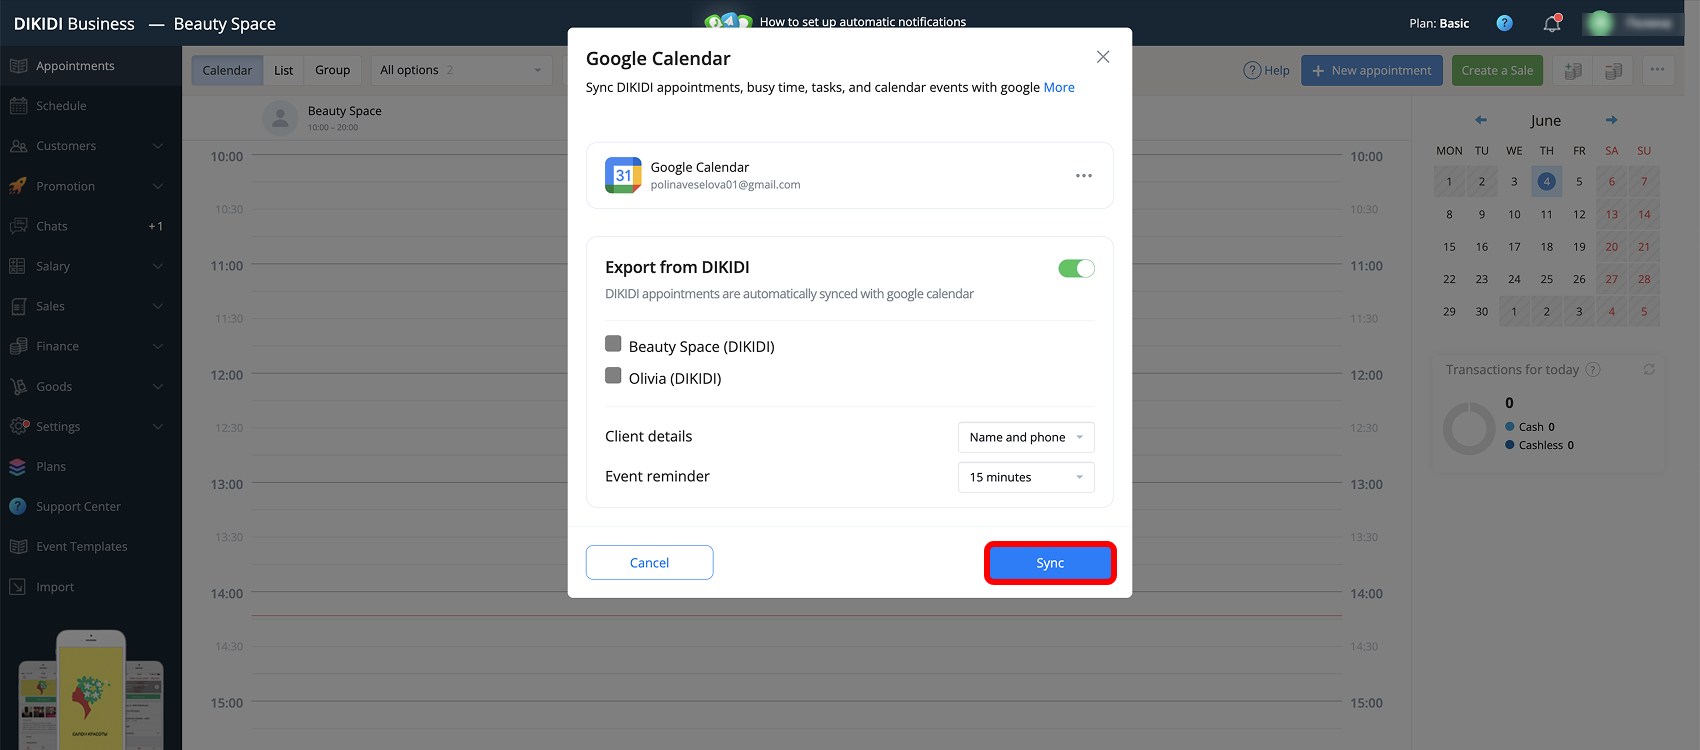
After completing the setup, click “Sync” to apply the changes.
✅ After a successful connection, new calendars with the names of your project employees and the (DIKIDI) label will automatically appear in Google Calendar.
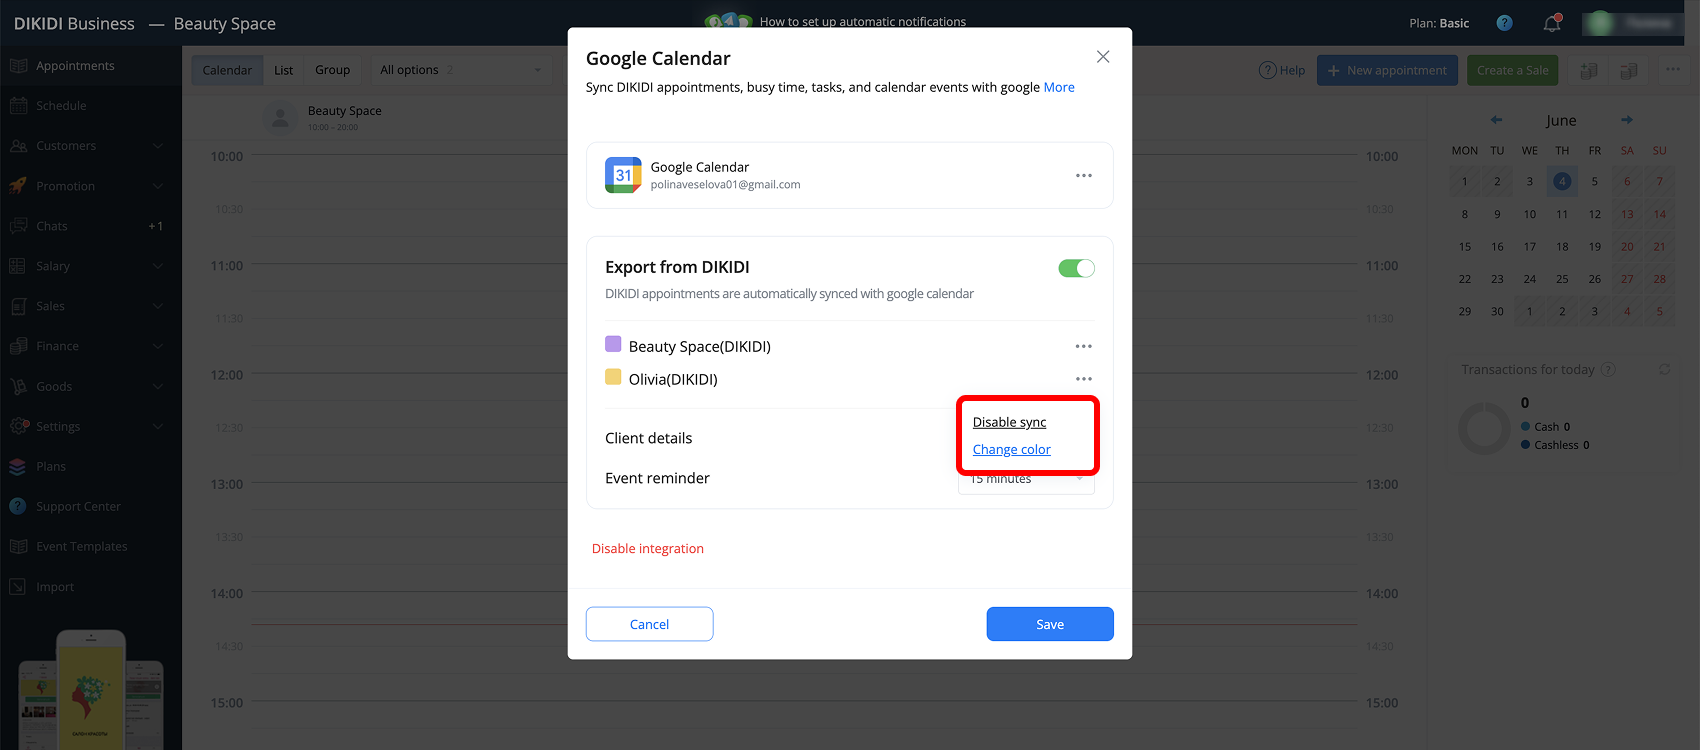
They are created automatically and used for data exchange between the services. For each calendar, you can:
🔹 Set a custom color;
🔹 If necessary, disable synchronization of the DIKIDI “Appointments” to Google Calendar for a specific employee.
Setting up the integration for a “Specialist” project type
The following settings are available in the DIKIDI “Appointments” synchronization window with Google Calendar:
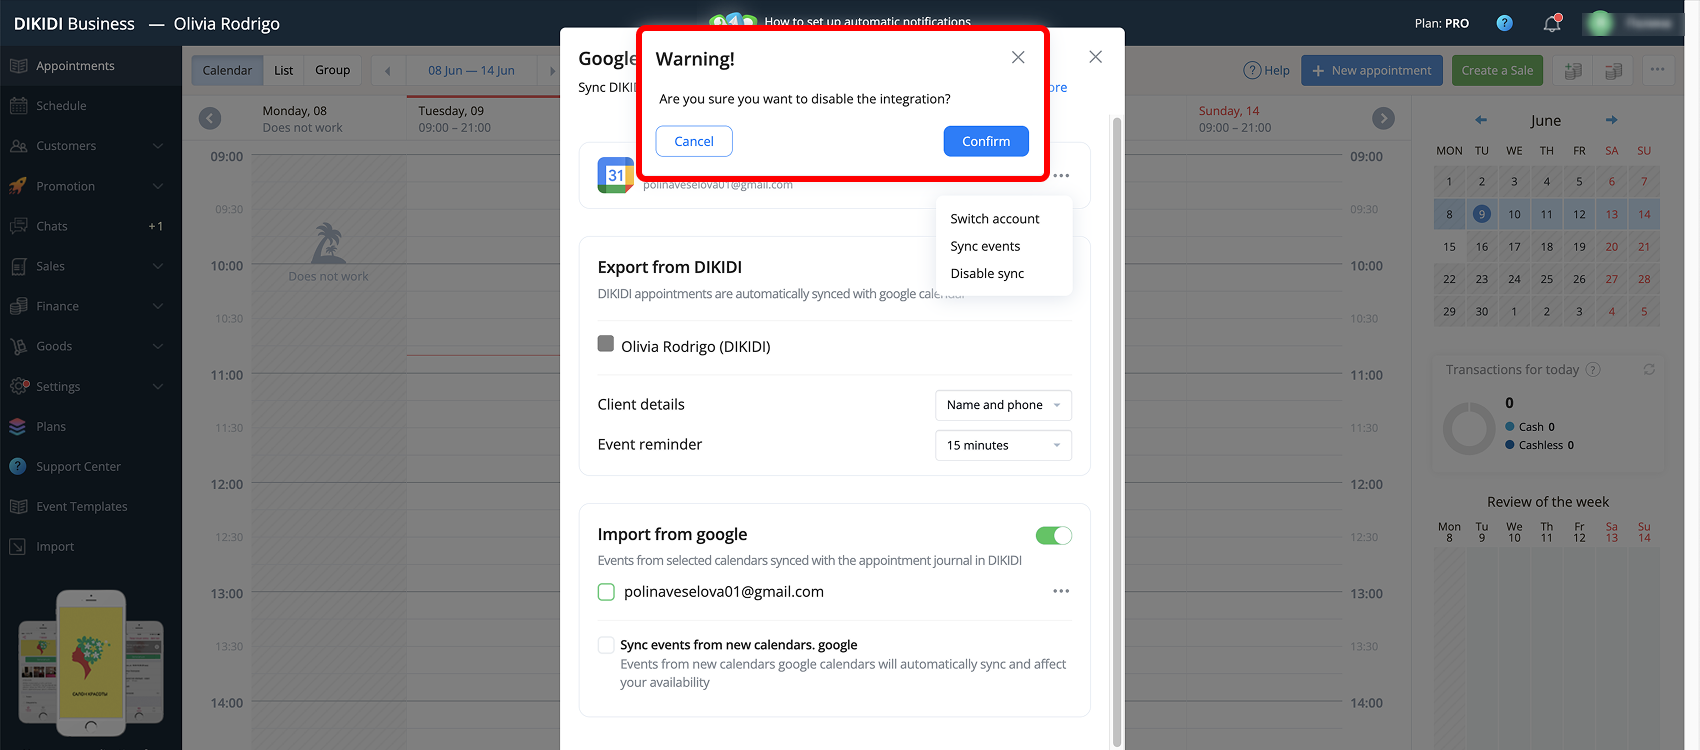
1️⃣ Connection management
Click the three dots to:
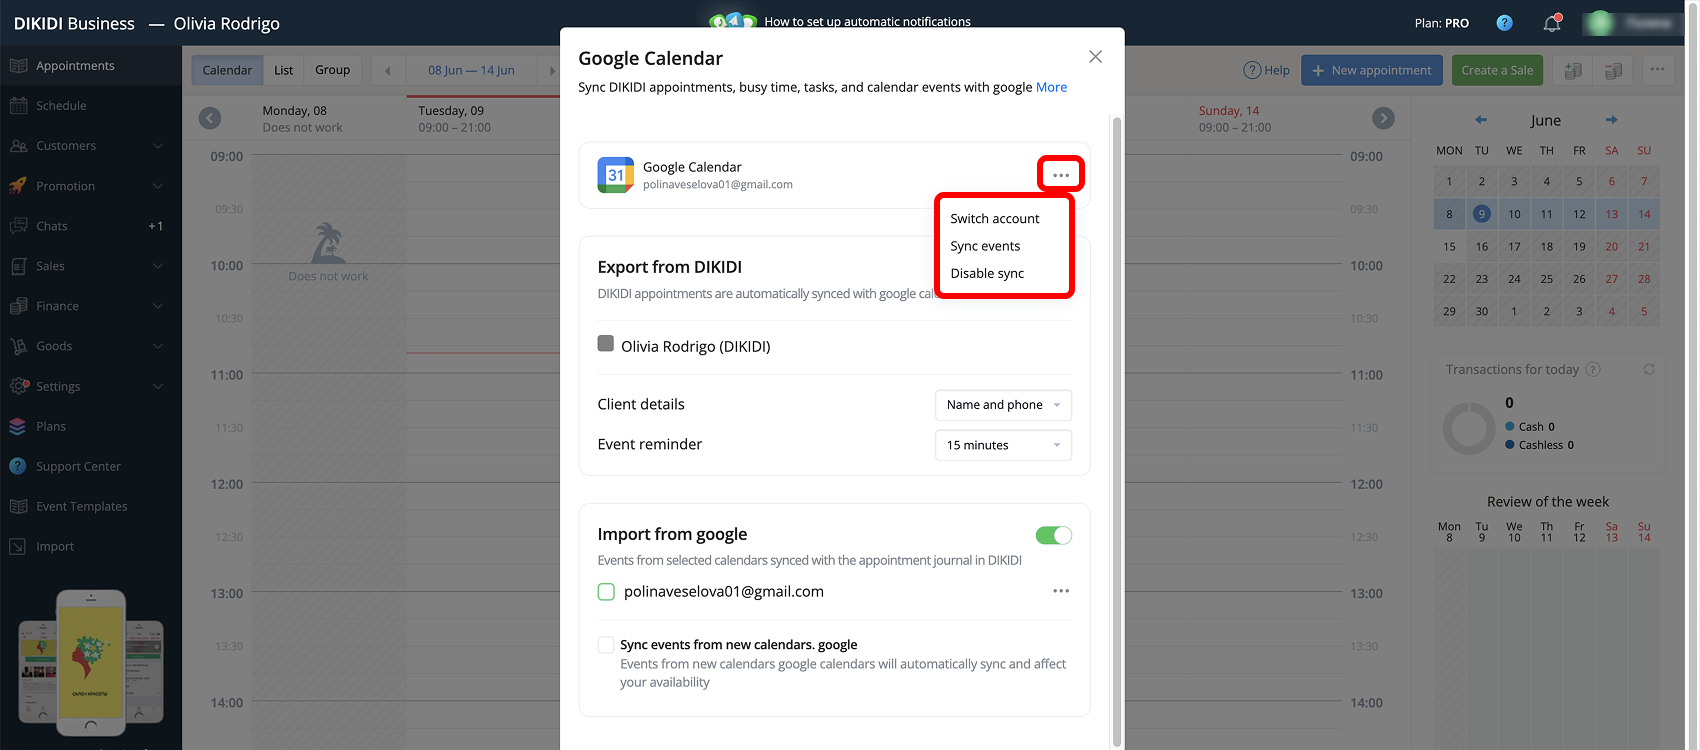
🔹 Change the Google account for synchronization using the “Switch" account” button;
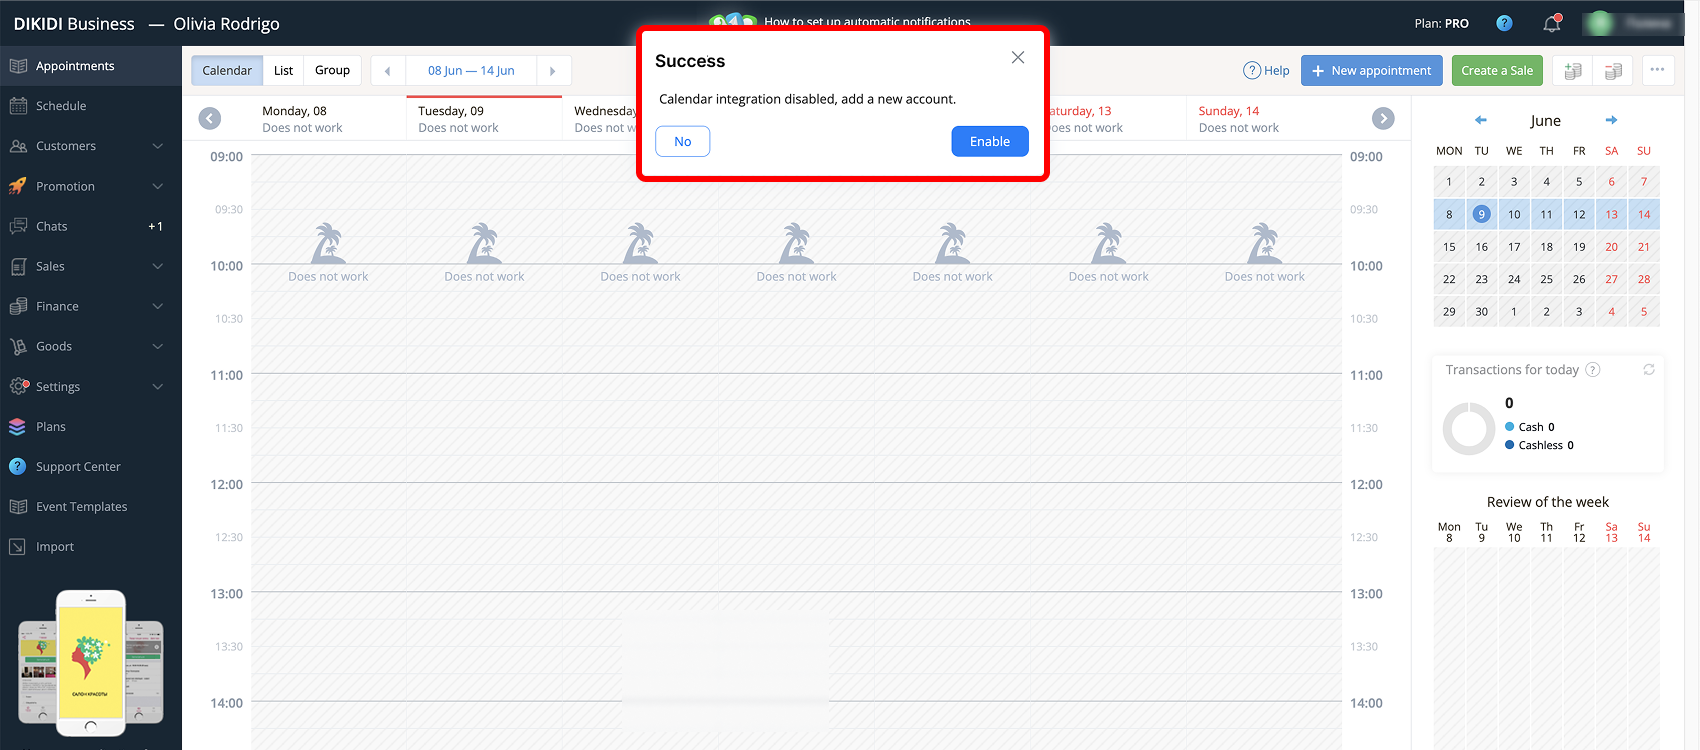
🔹 Disable synchronization using the corresponding button
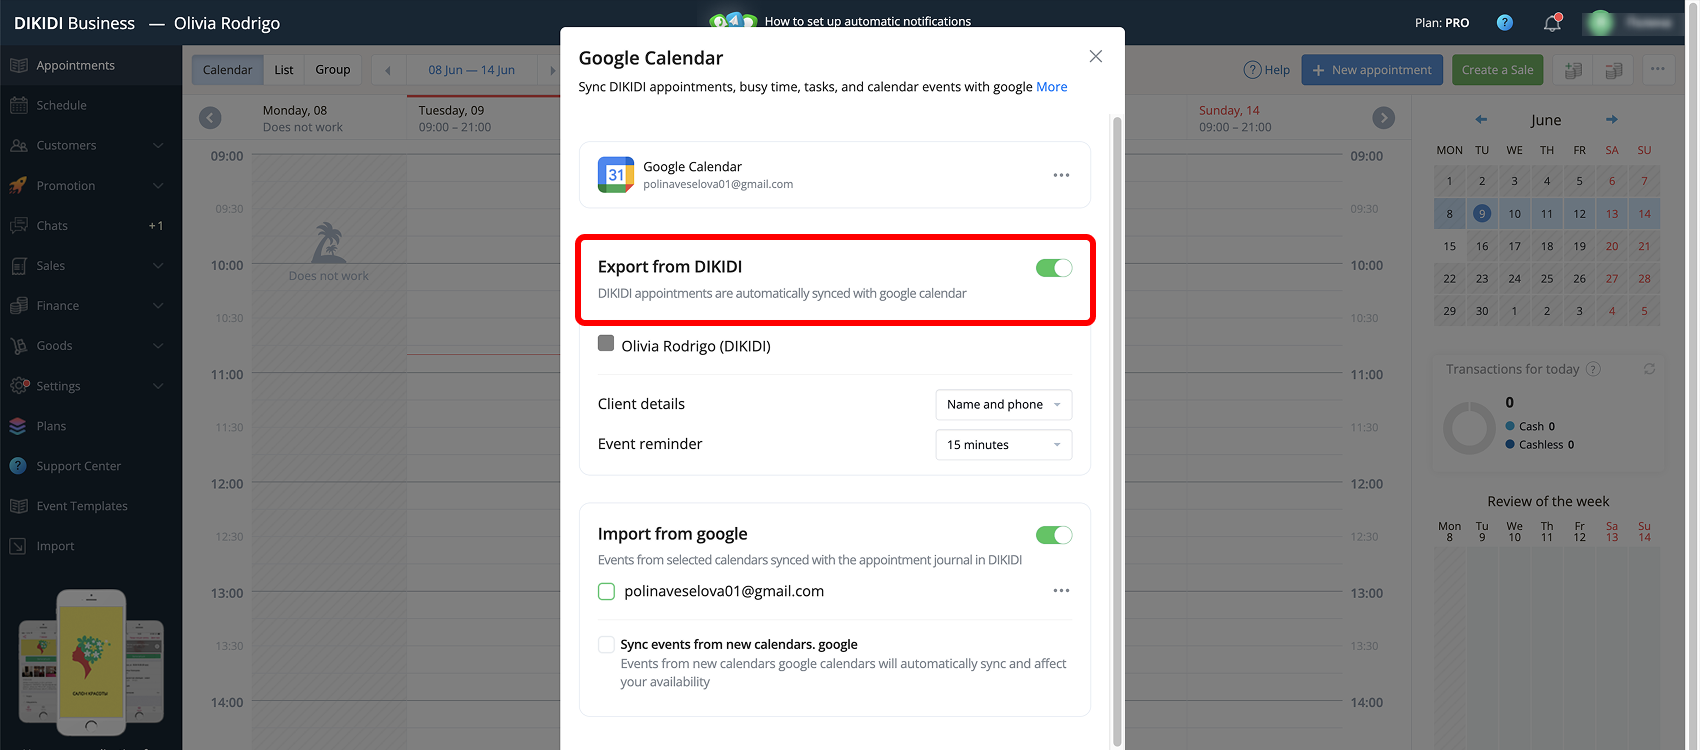
2️⃣ Export from DIKIDI
The “Export from DIKIDI” toggle is enabled by default. You can:
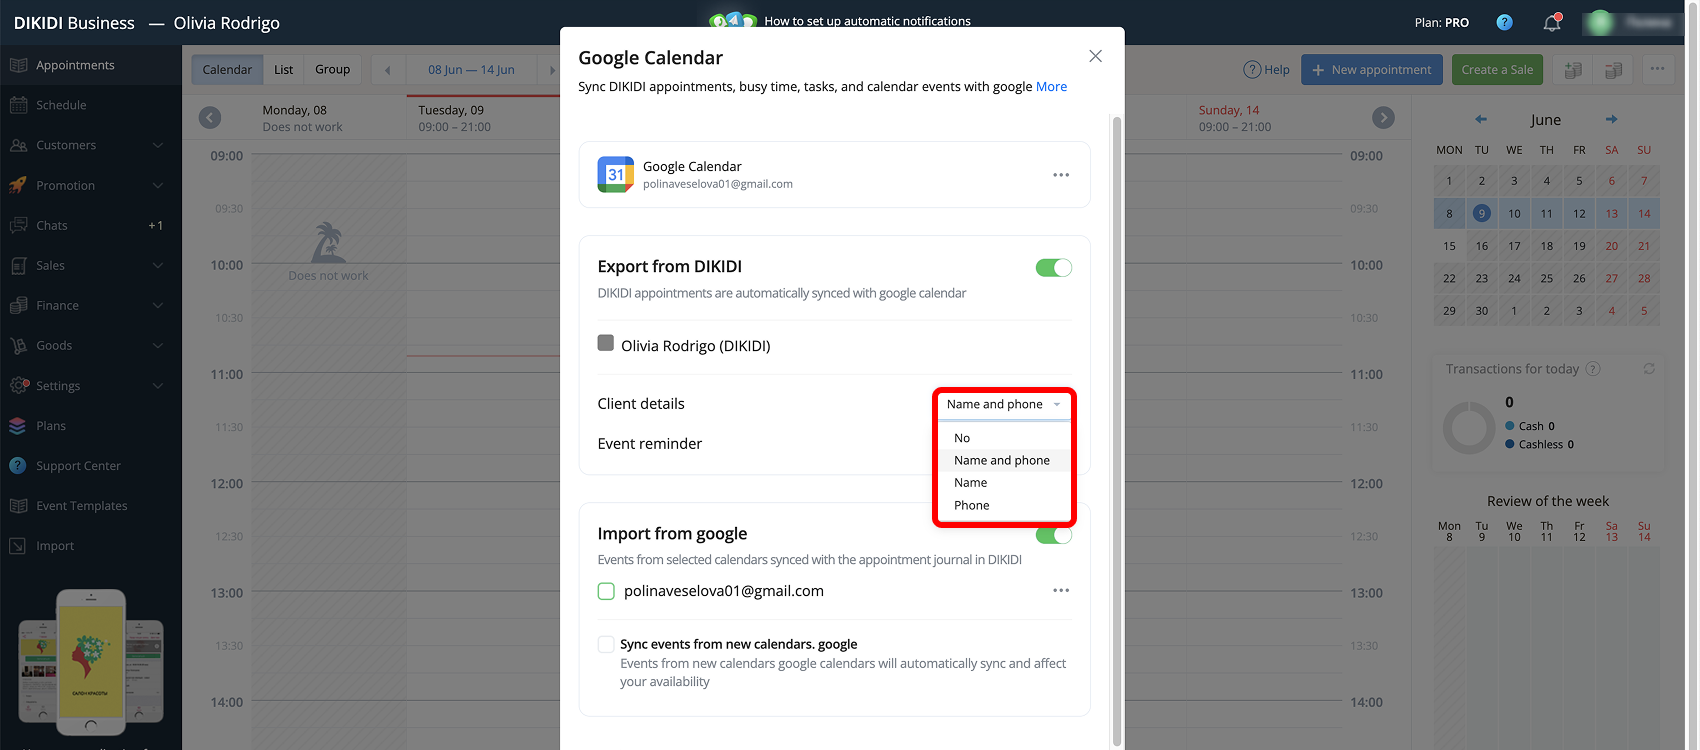
🔹 Choose which client data to export to the calendar;
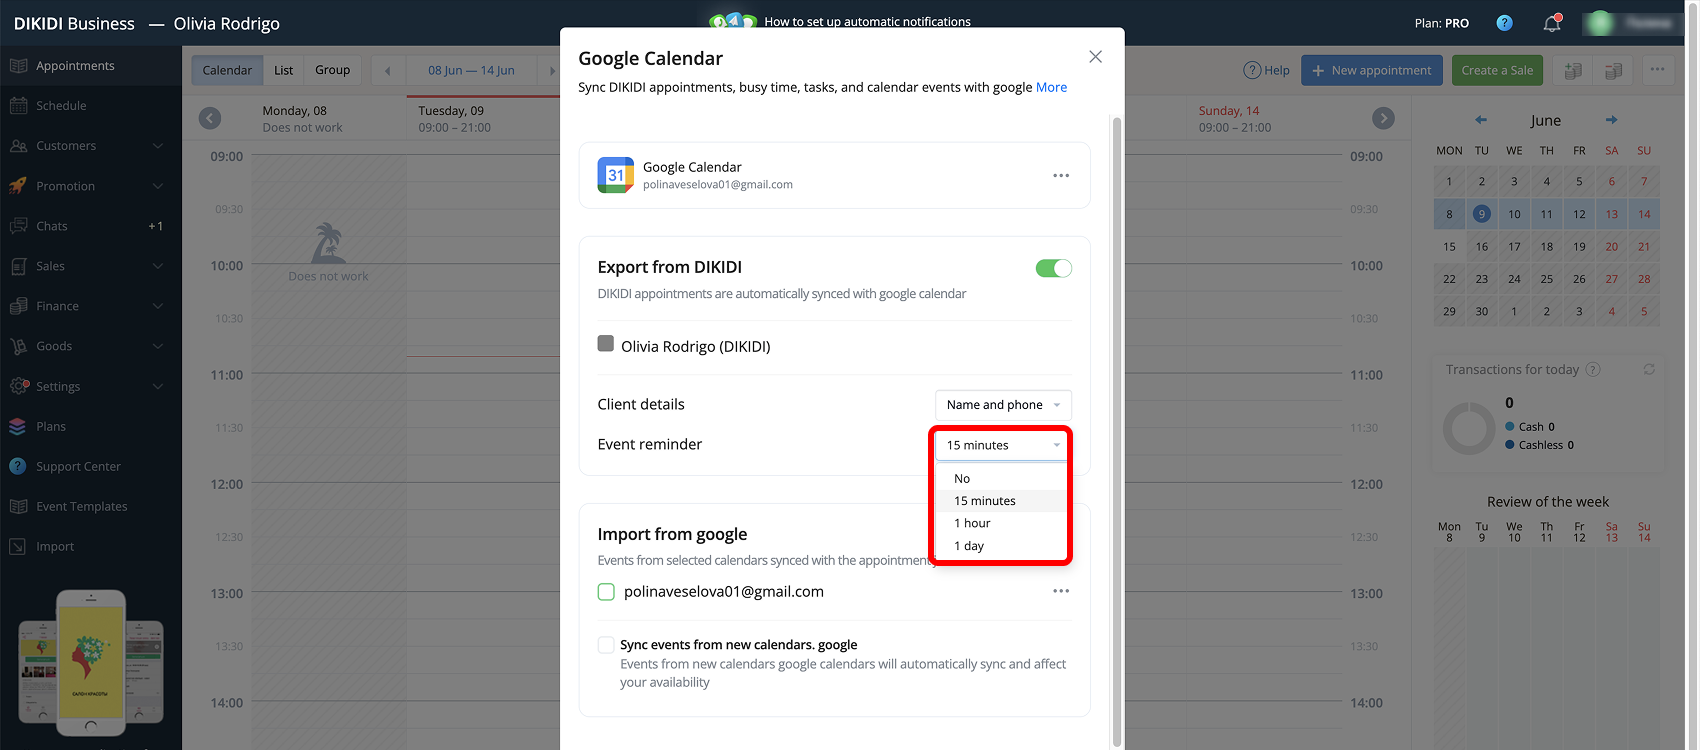
🔹 Configure Google Calendar reminders for the client appointment.
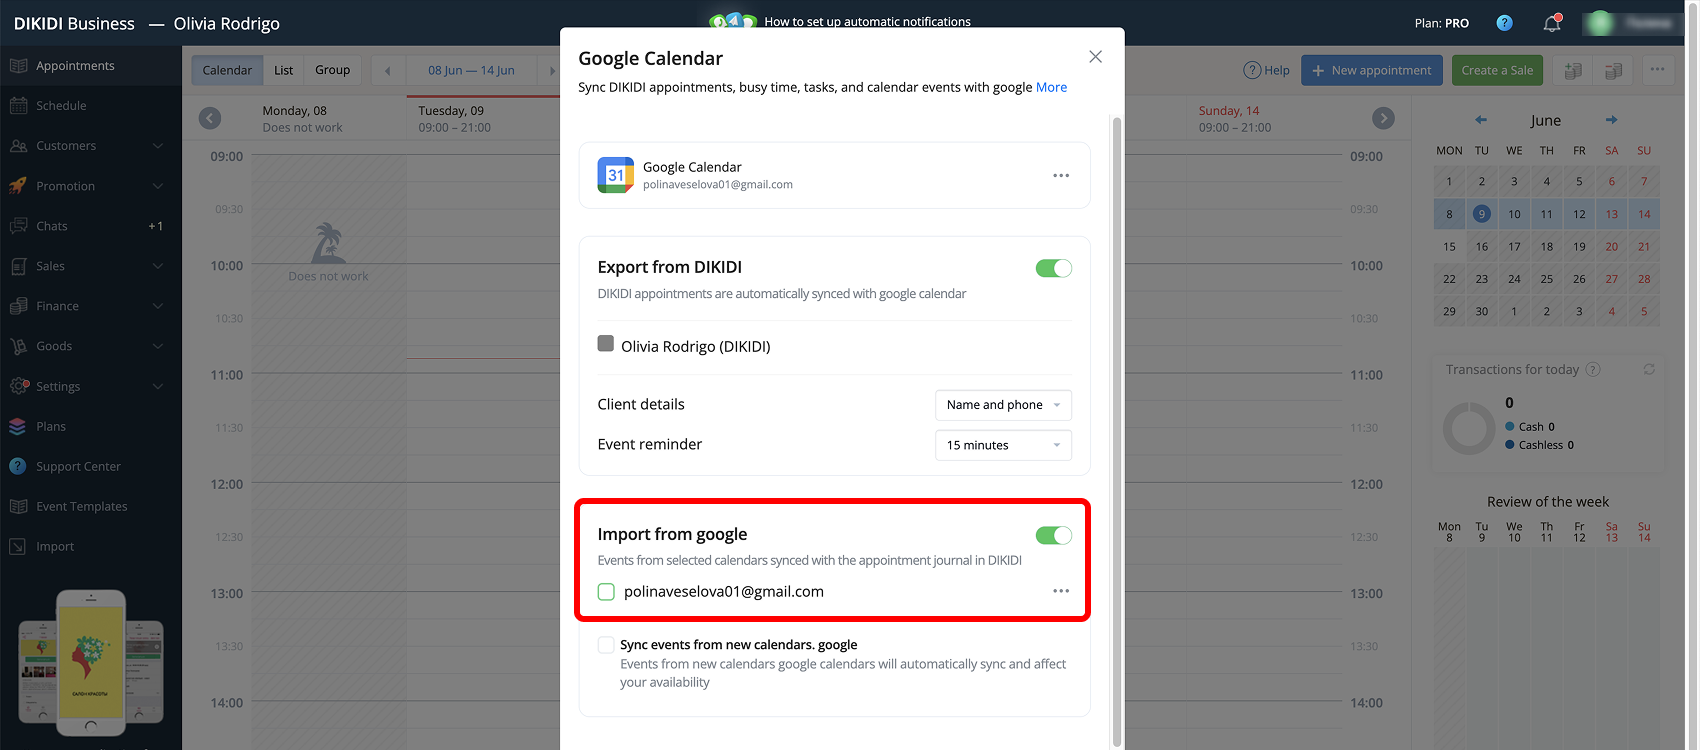
3️⃣ Import from Google Calendars
Enable the “Import from Google” toggle if you want to load events from Google into the DIKIDI “Appointments”.
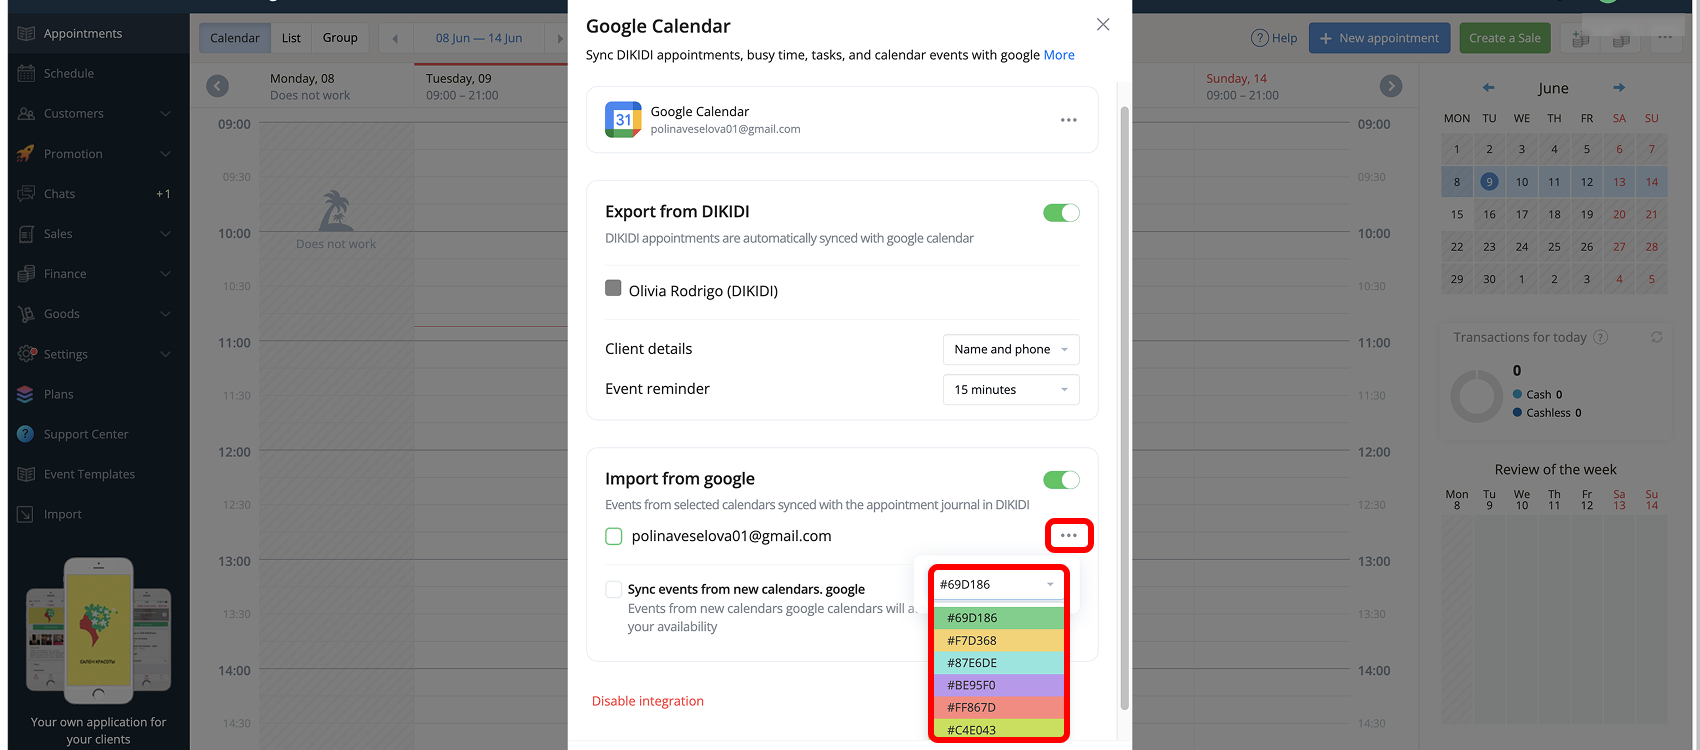
A list of calendars will appear below, and you can set a custom color for each one.
4️⃣ Synchronization of new calendars
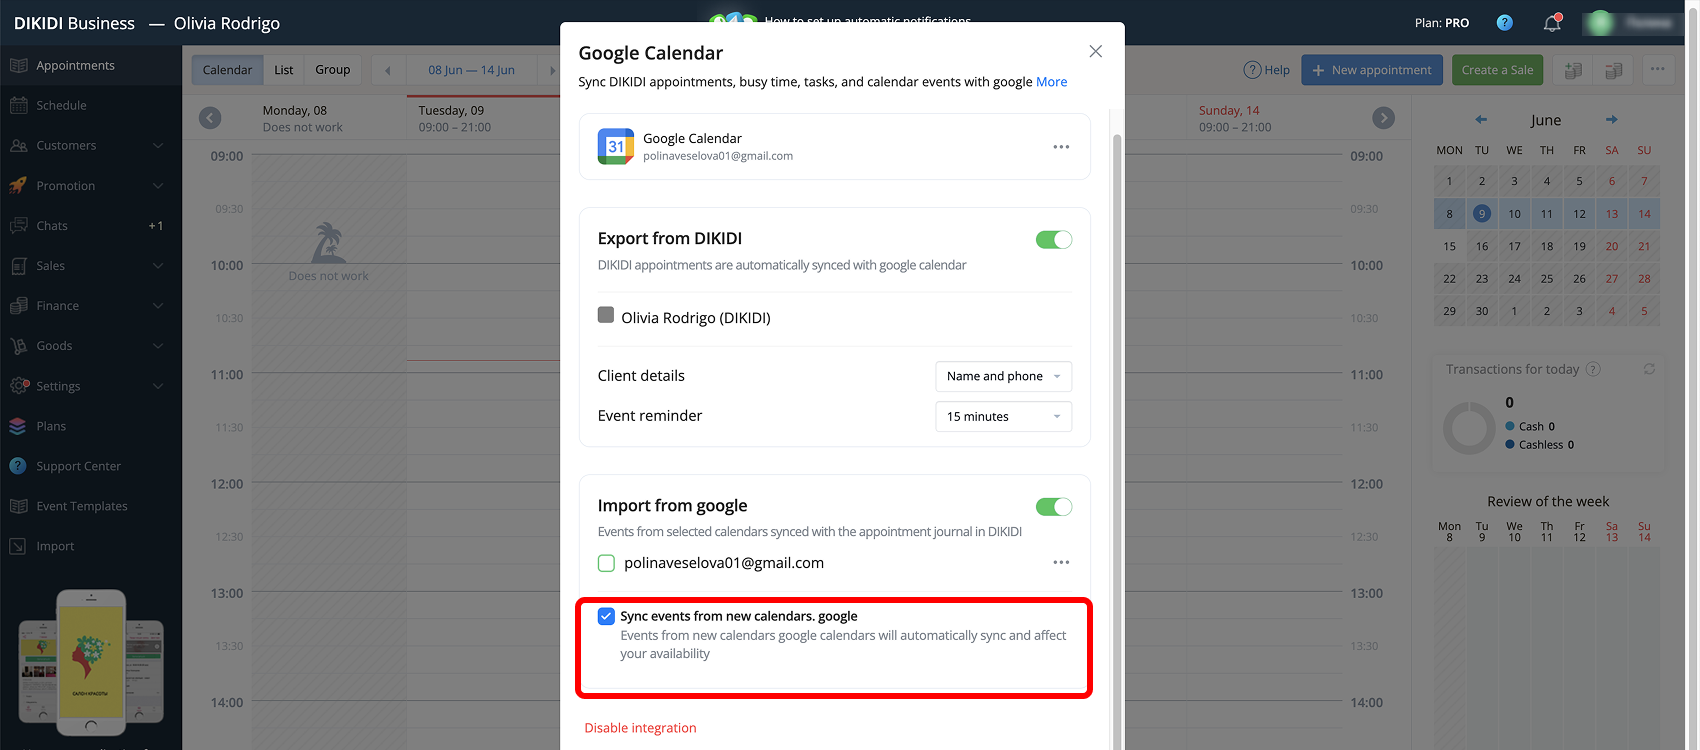
Enable “Sync events from new calendars google” to automatically import data from newly created Google calendars.
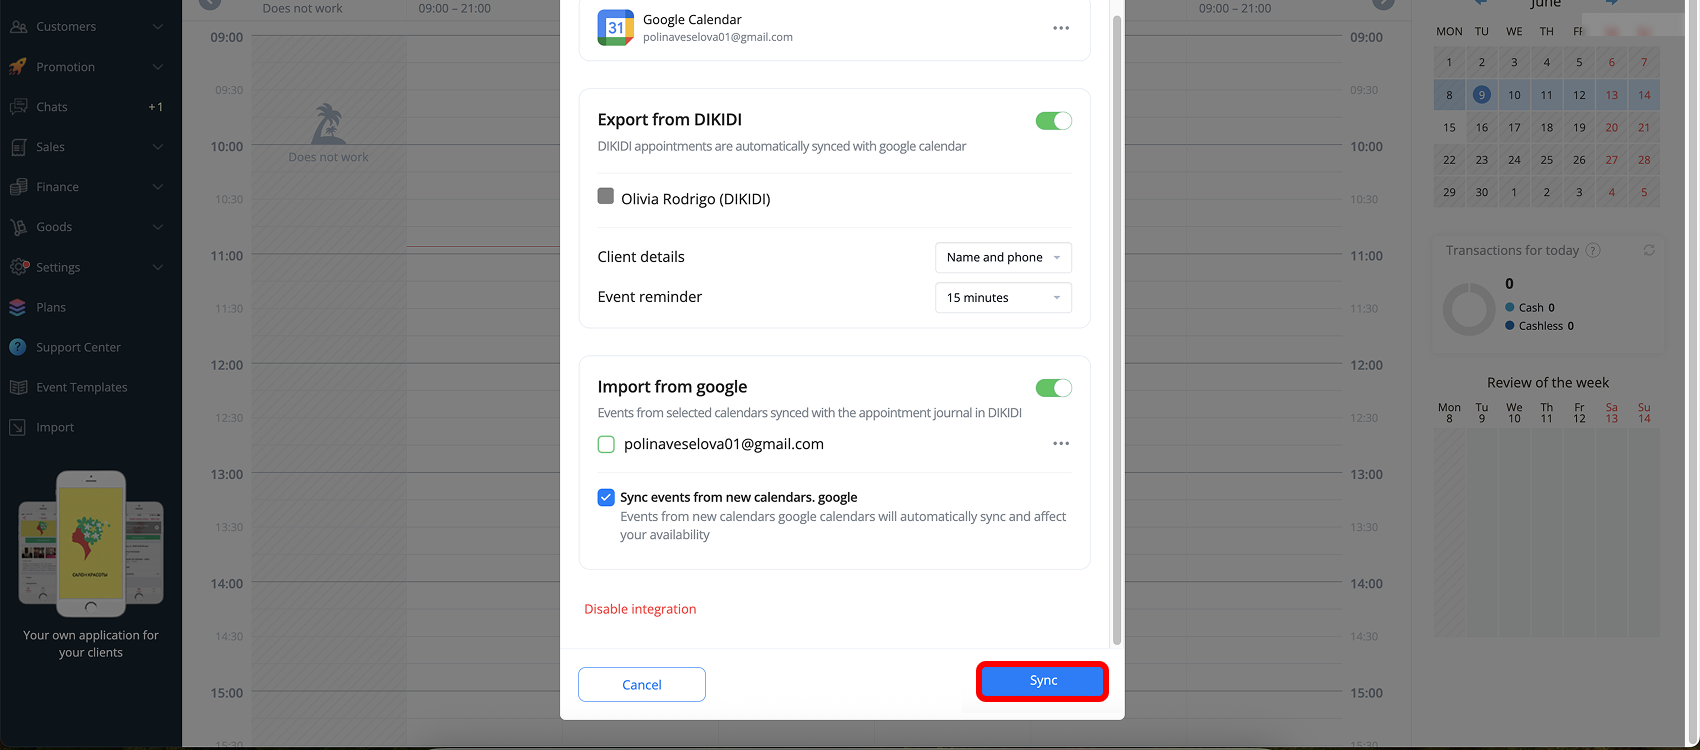
After completing the setup, click “Sync” to apply the changes.
✅ After a successful connection, a new calendar with your project name and the (DIKIDI) label will appear in Google Calendar.
It is created automatically and used for data exchange between the services.