How to Set Up Prepayment with Square?
Última modificación:
1. Register in Square
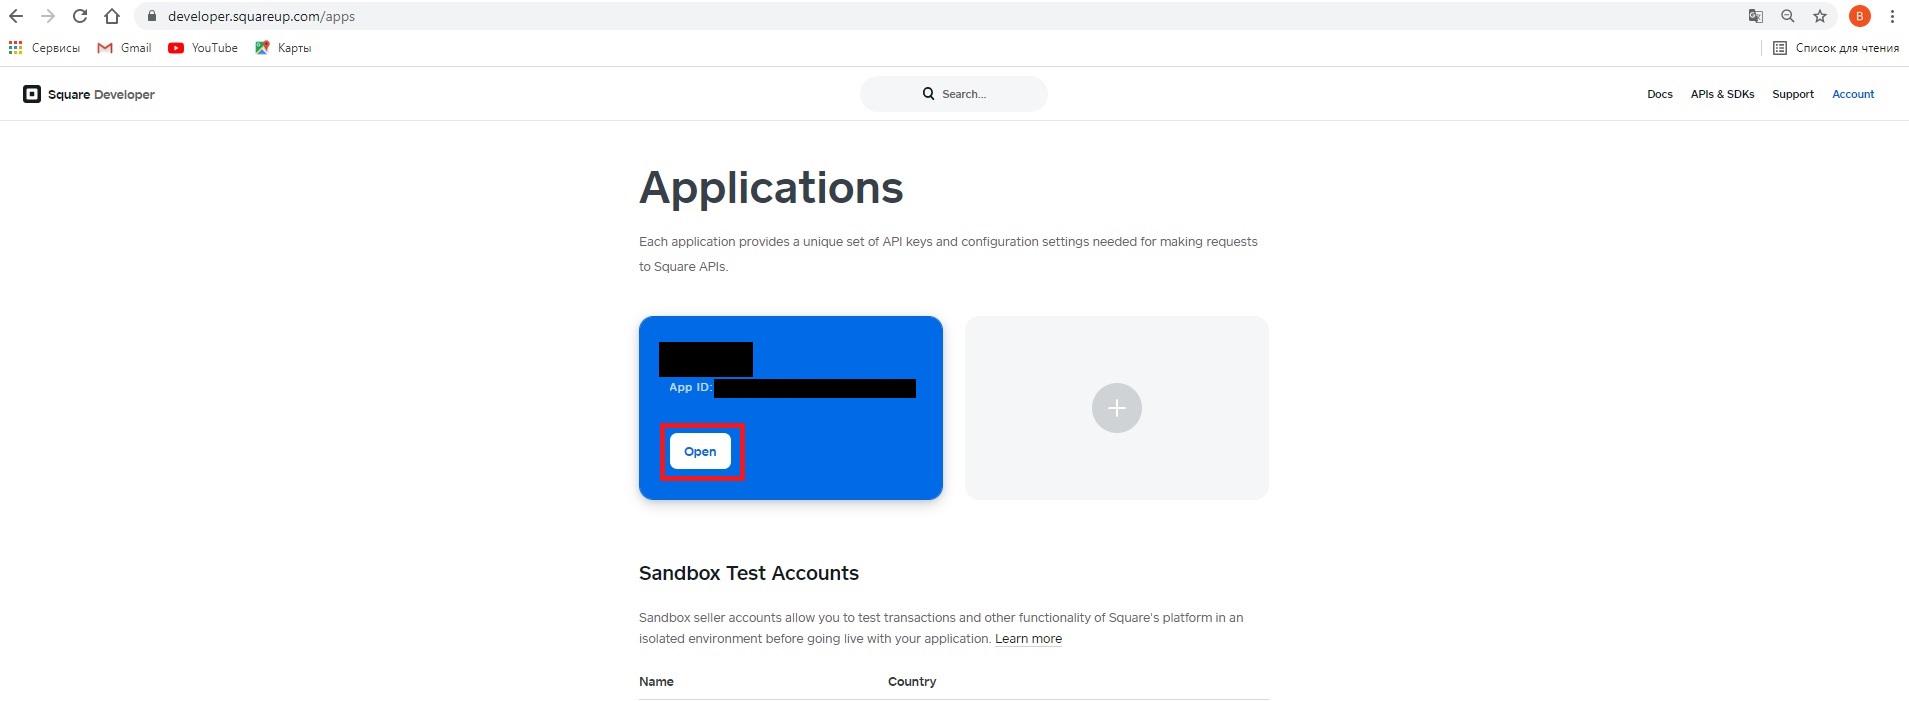
2. In section https://developer.squareup.com/us/en click “Get Started” and “+”
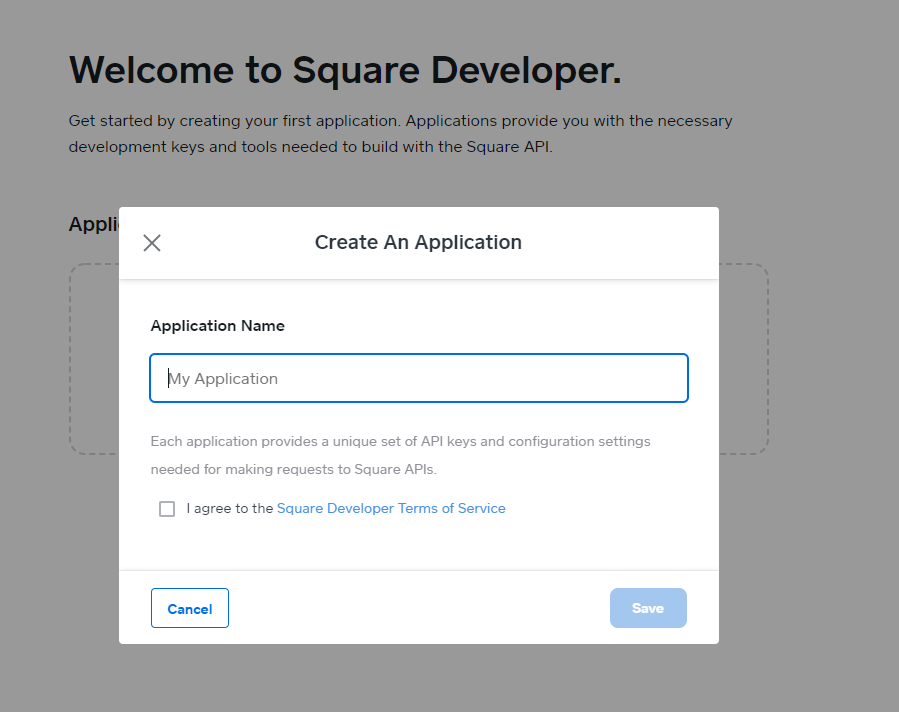
Give a name, click “Save”,then “Open”.
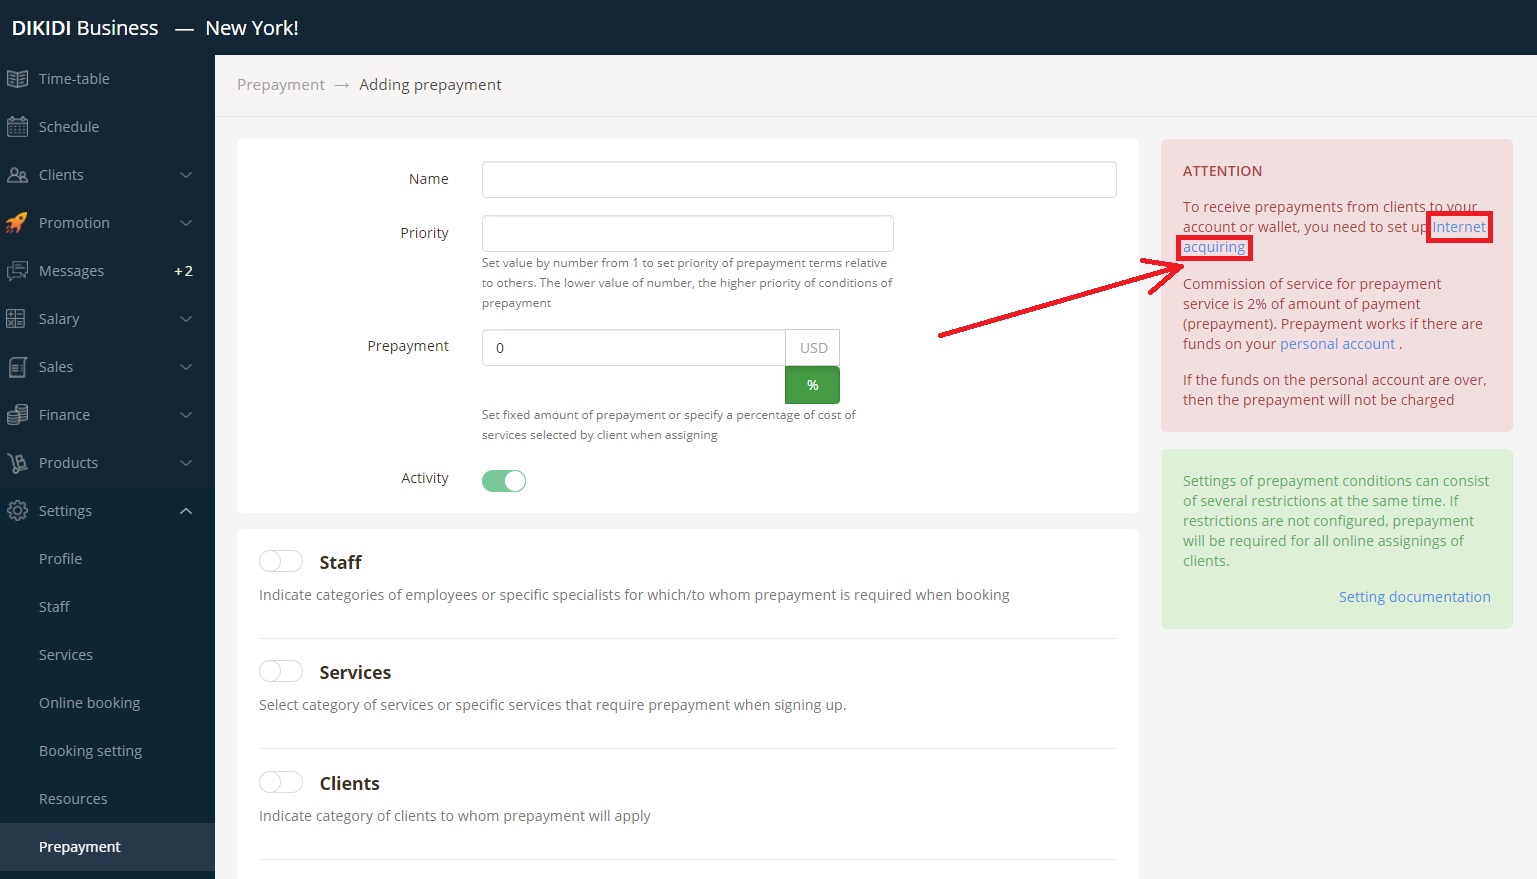
3. In the web-version of the DIKIDI Business service on the website dikidi.net/business, enable prepayment in the Settings - Prepayment - Add prepayment section.
Click Internet Acquiring
4. Select a payment method
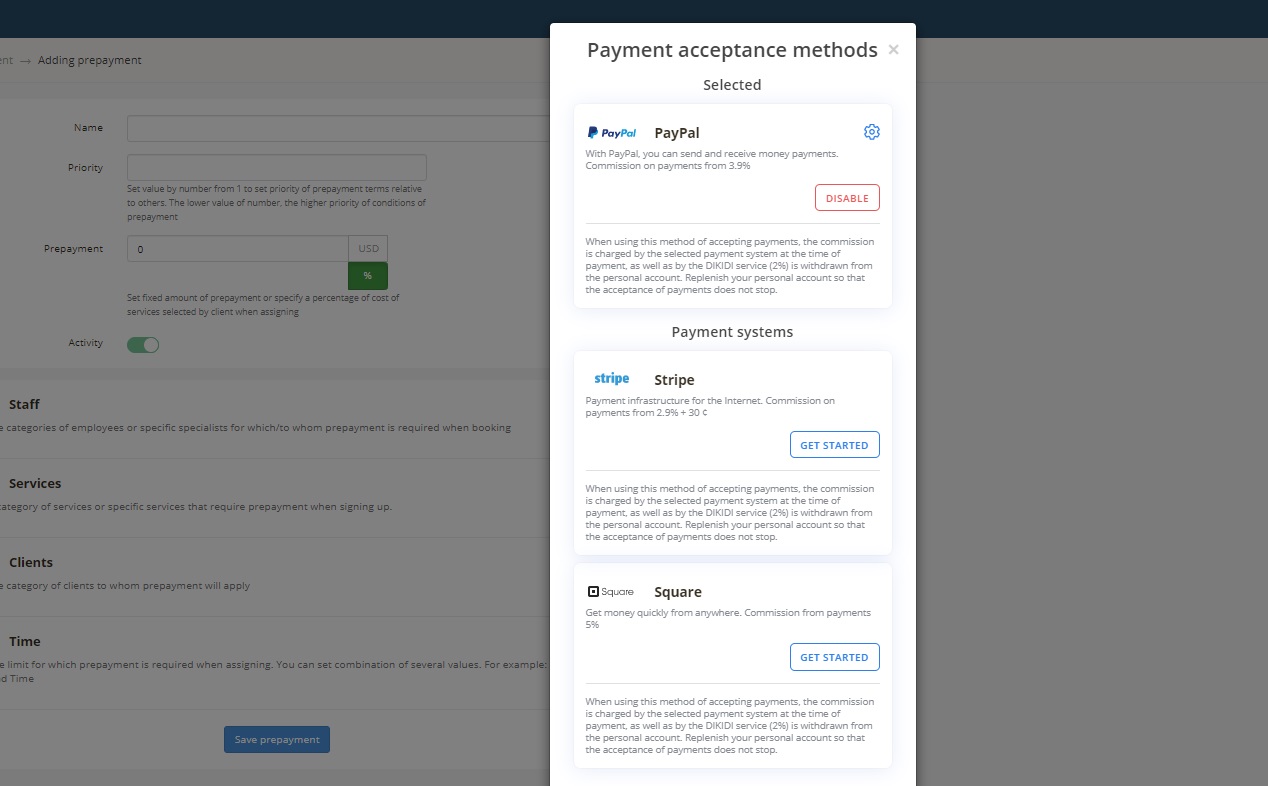
The system will ask for the сredentials required for the selected payment system
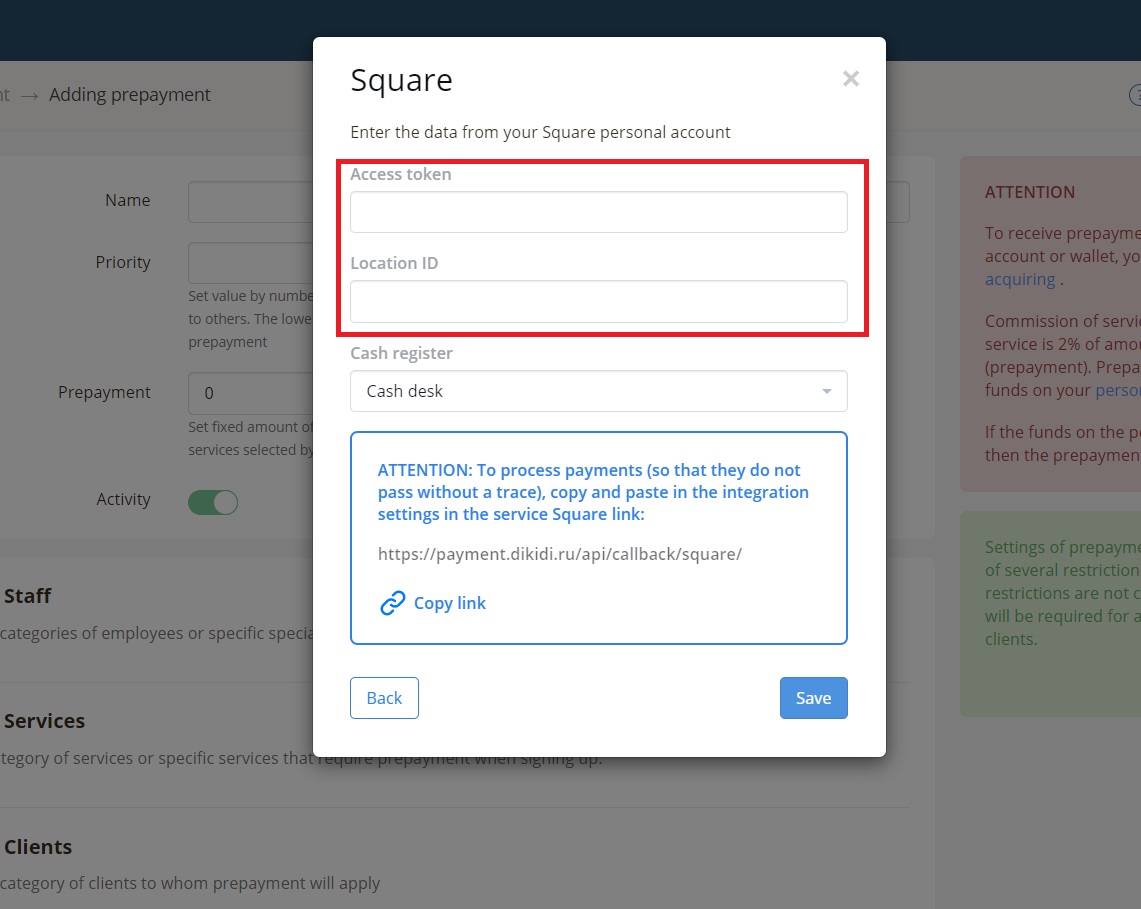
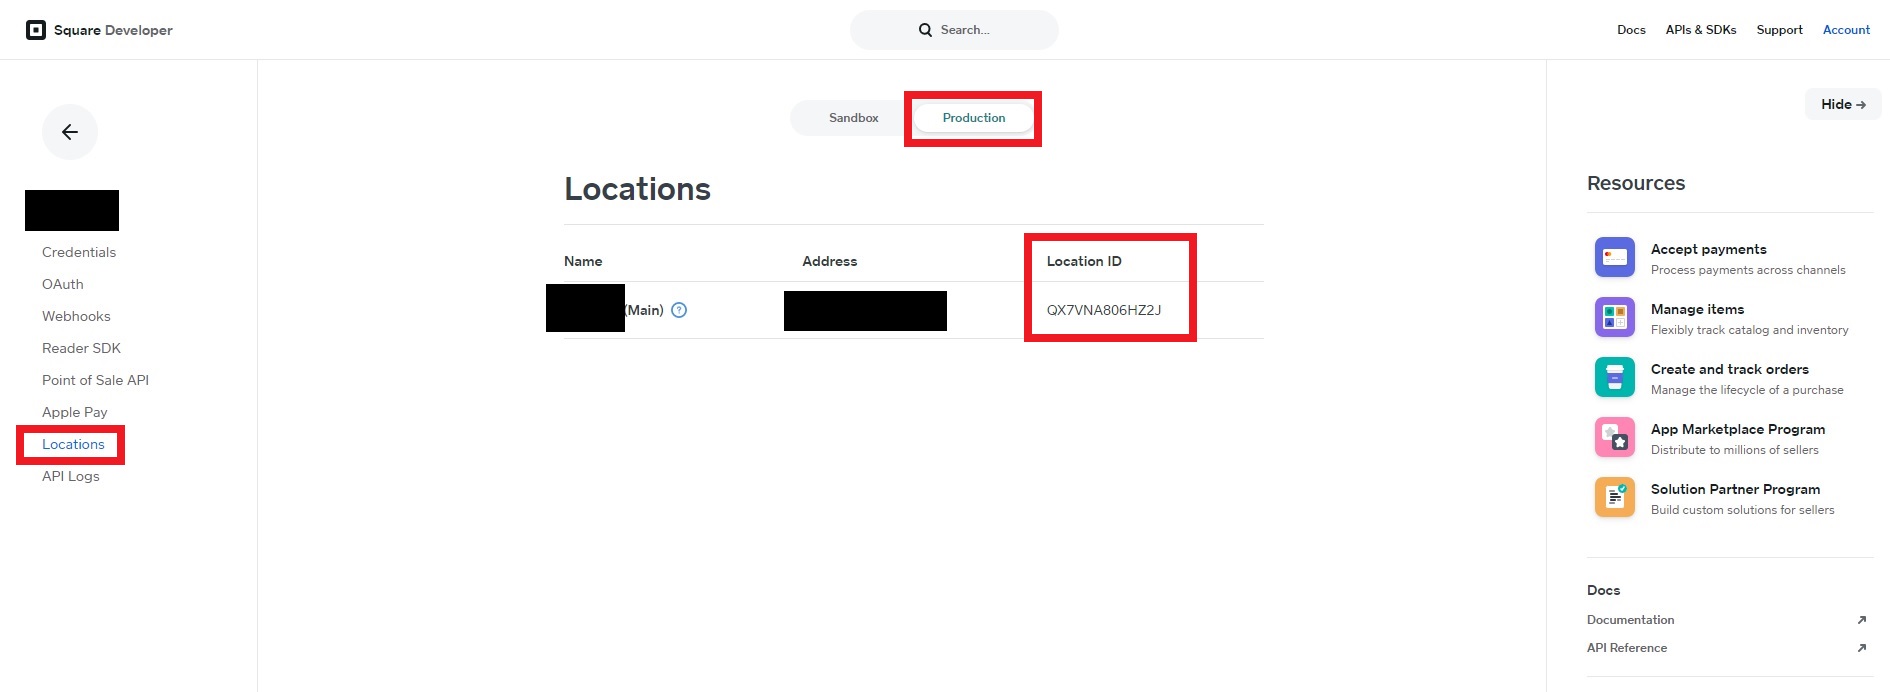
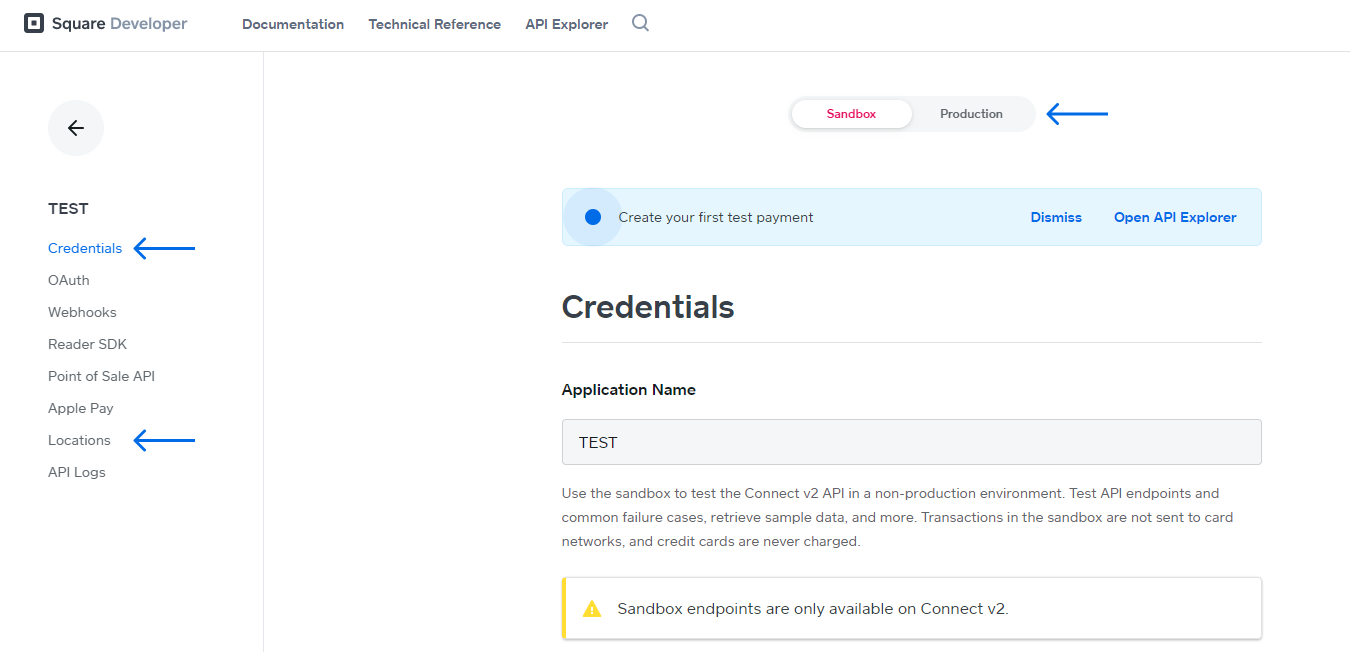
5. In your personal account Square should be the data for integration with CRM: Access Token and Location ID
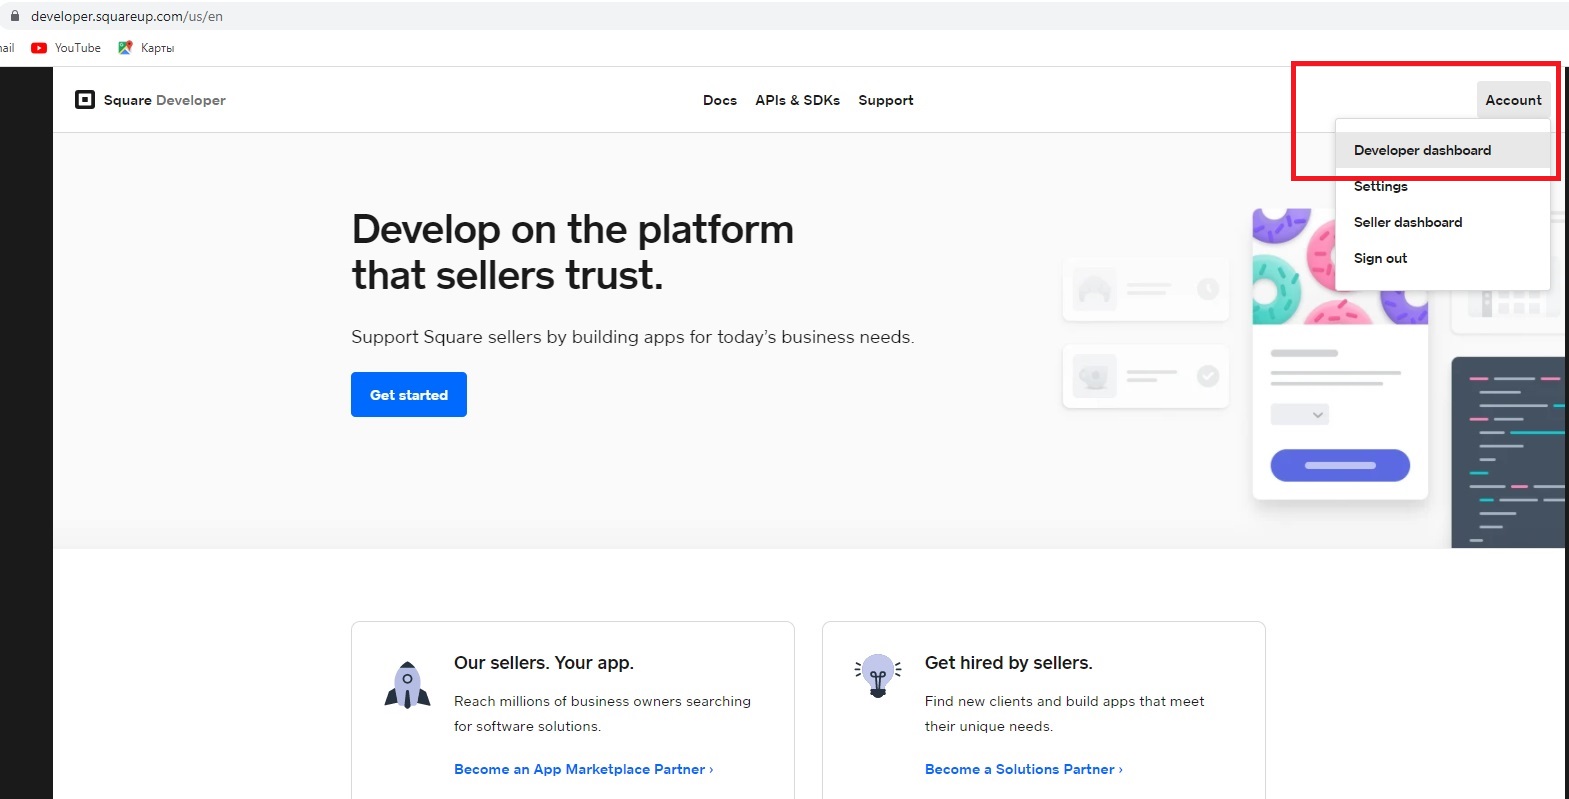
Log into your account at: https://developer.squareup.com/us/en.
On the Production tab, under Credentials, in the Access Token row, click Show, then copy and paste into the form in DIKIDI (screenshot below).
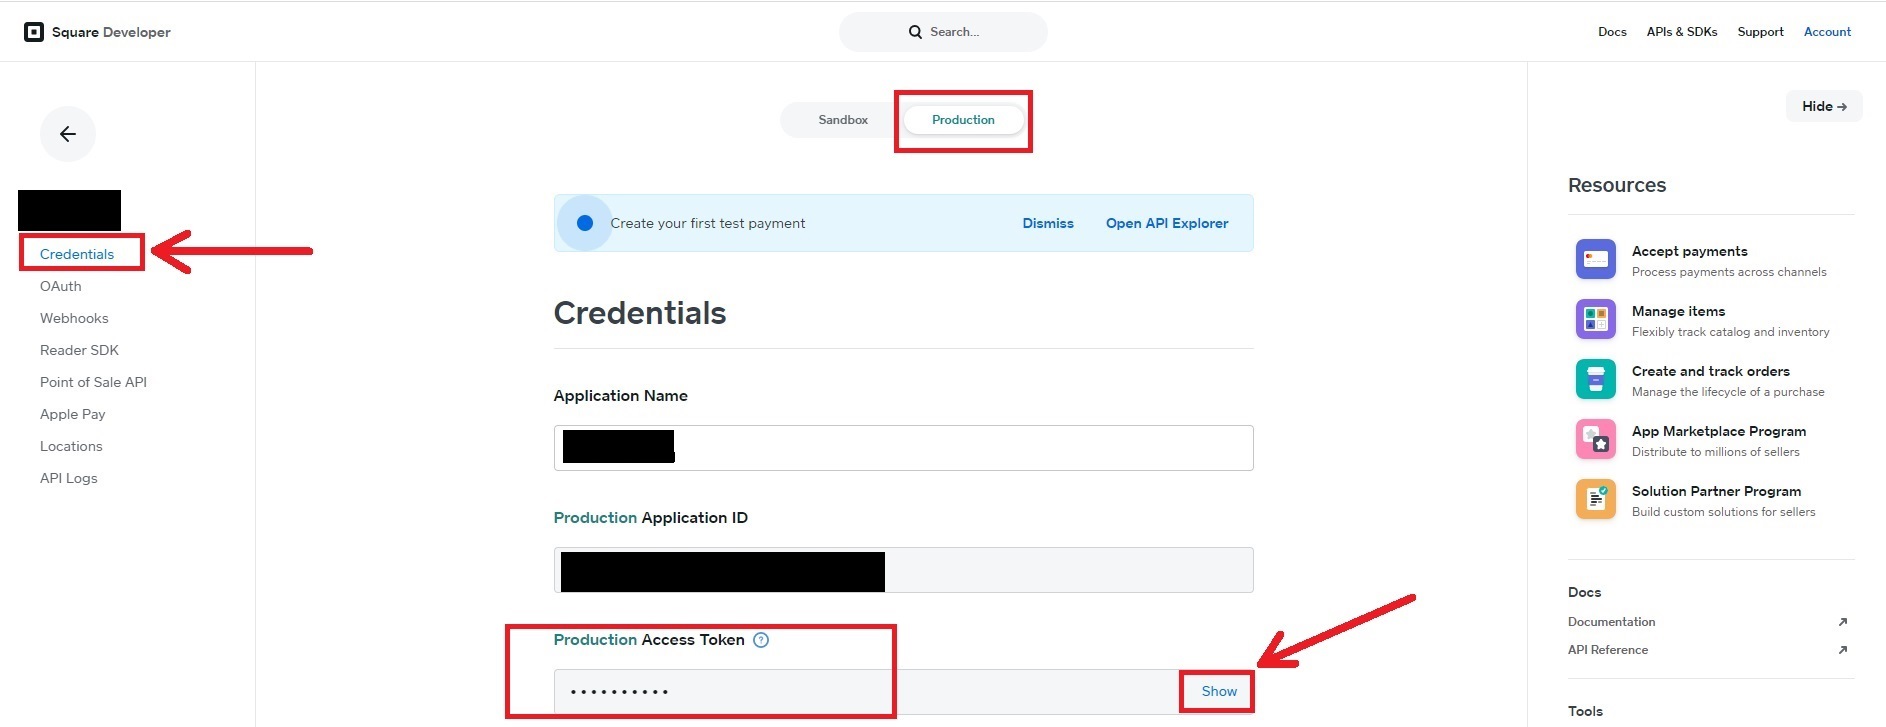
On the Production tab in the Credentials section, copy the Access Token and paste it into the form in DIKIDI (screenshot above). On the Location tab, copy the Location ID and paste it into the form in DIKIDI. Click Save.
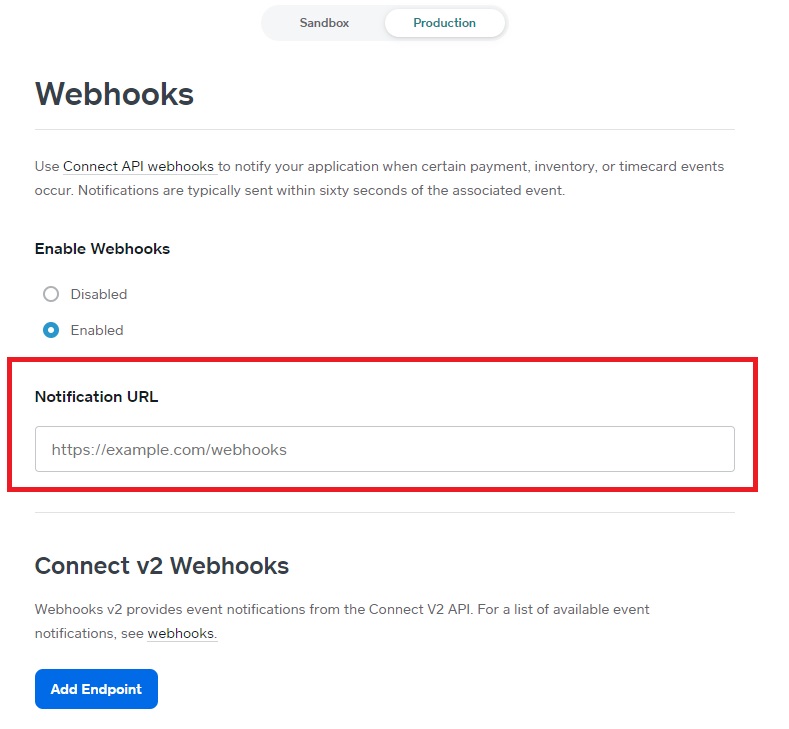
6. In your Square personal account, in the Webhooks section, you need to select Enabled and in a new line, enter the address indicated on the form in DIKIDI in red (https: //payment.dikidi.net/...)
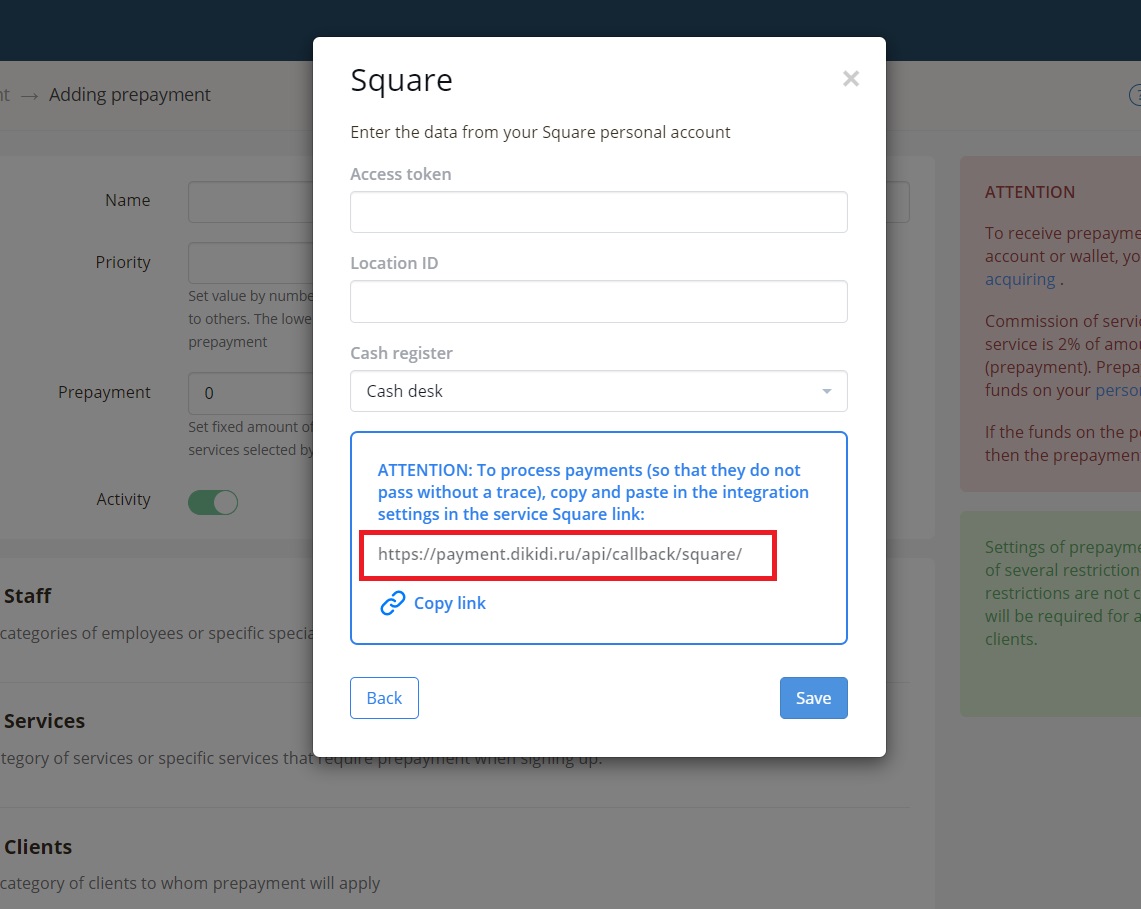
Then you need to set up the prepayment conditions