Setting Up Work Schedule
Last modified:
The schedule needs to be updated — fill in working hours for a new period (for example, a month) in advance. The working hours are set in the "Schedule" section of your project. Select the days in the work schedule table when the corresponding employee will work.
In the DIKIDI Web
In the schedule section, you can:
-
Select all days (by clicking the calendar icon in the top left corner);
-
Choose the schedule of a specific employee (by clicking on their icon);
-
Select a specific day (by clicking on the date);
-
Manually mark the desired days.
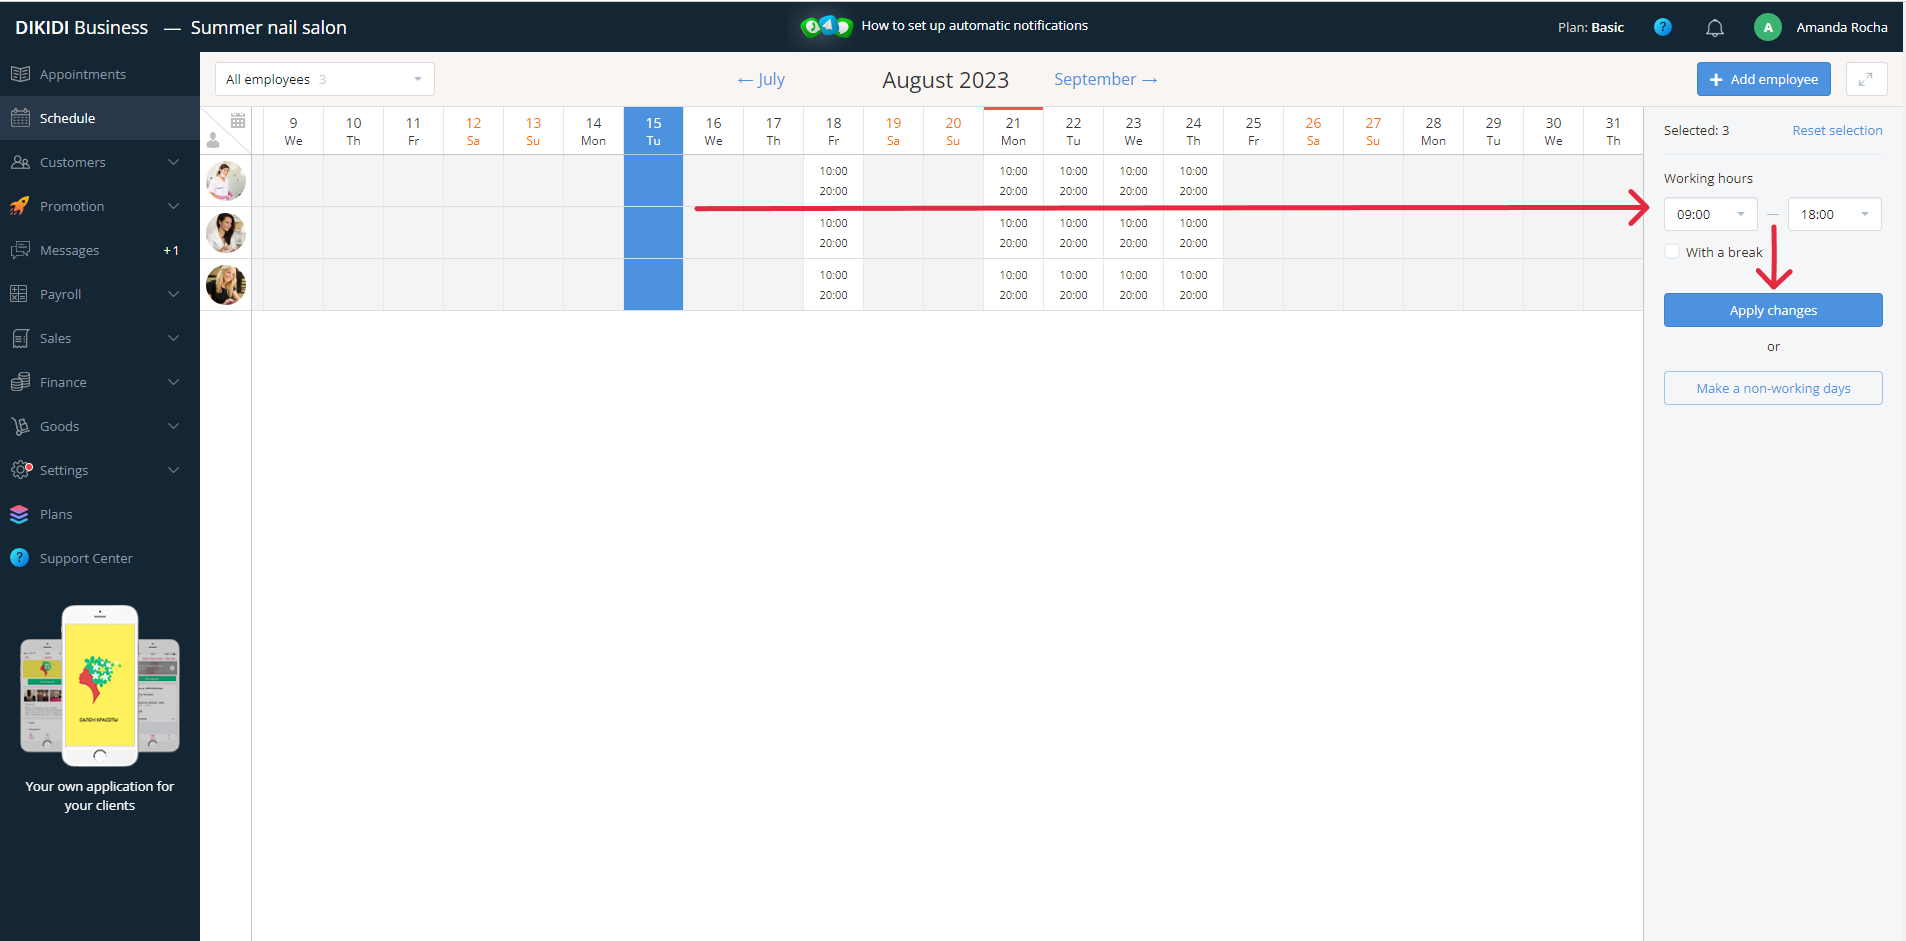
In the web version in the "Schedule" section select the days when the staff works. After that, set the working hours and click "Apply changes."
If you want to mark the selected days as non-working, click "Mark days as non-working."
In the DIKIDI App
For Companies:
You can set up employees' work schedules in two ways: via the schedule or using the "Set up schedule" button.
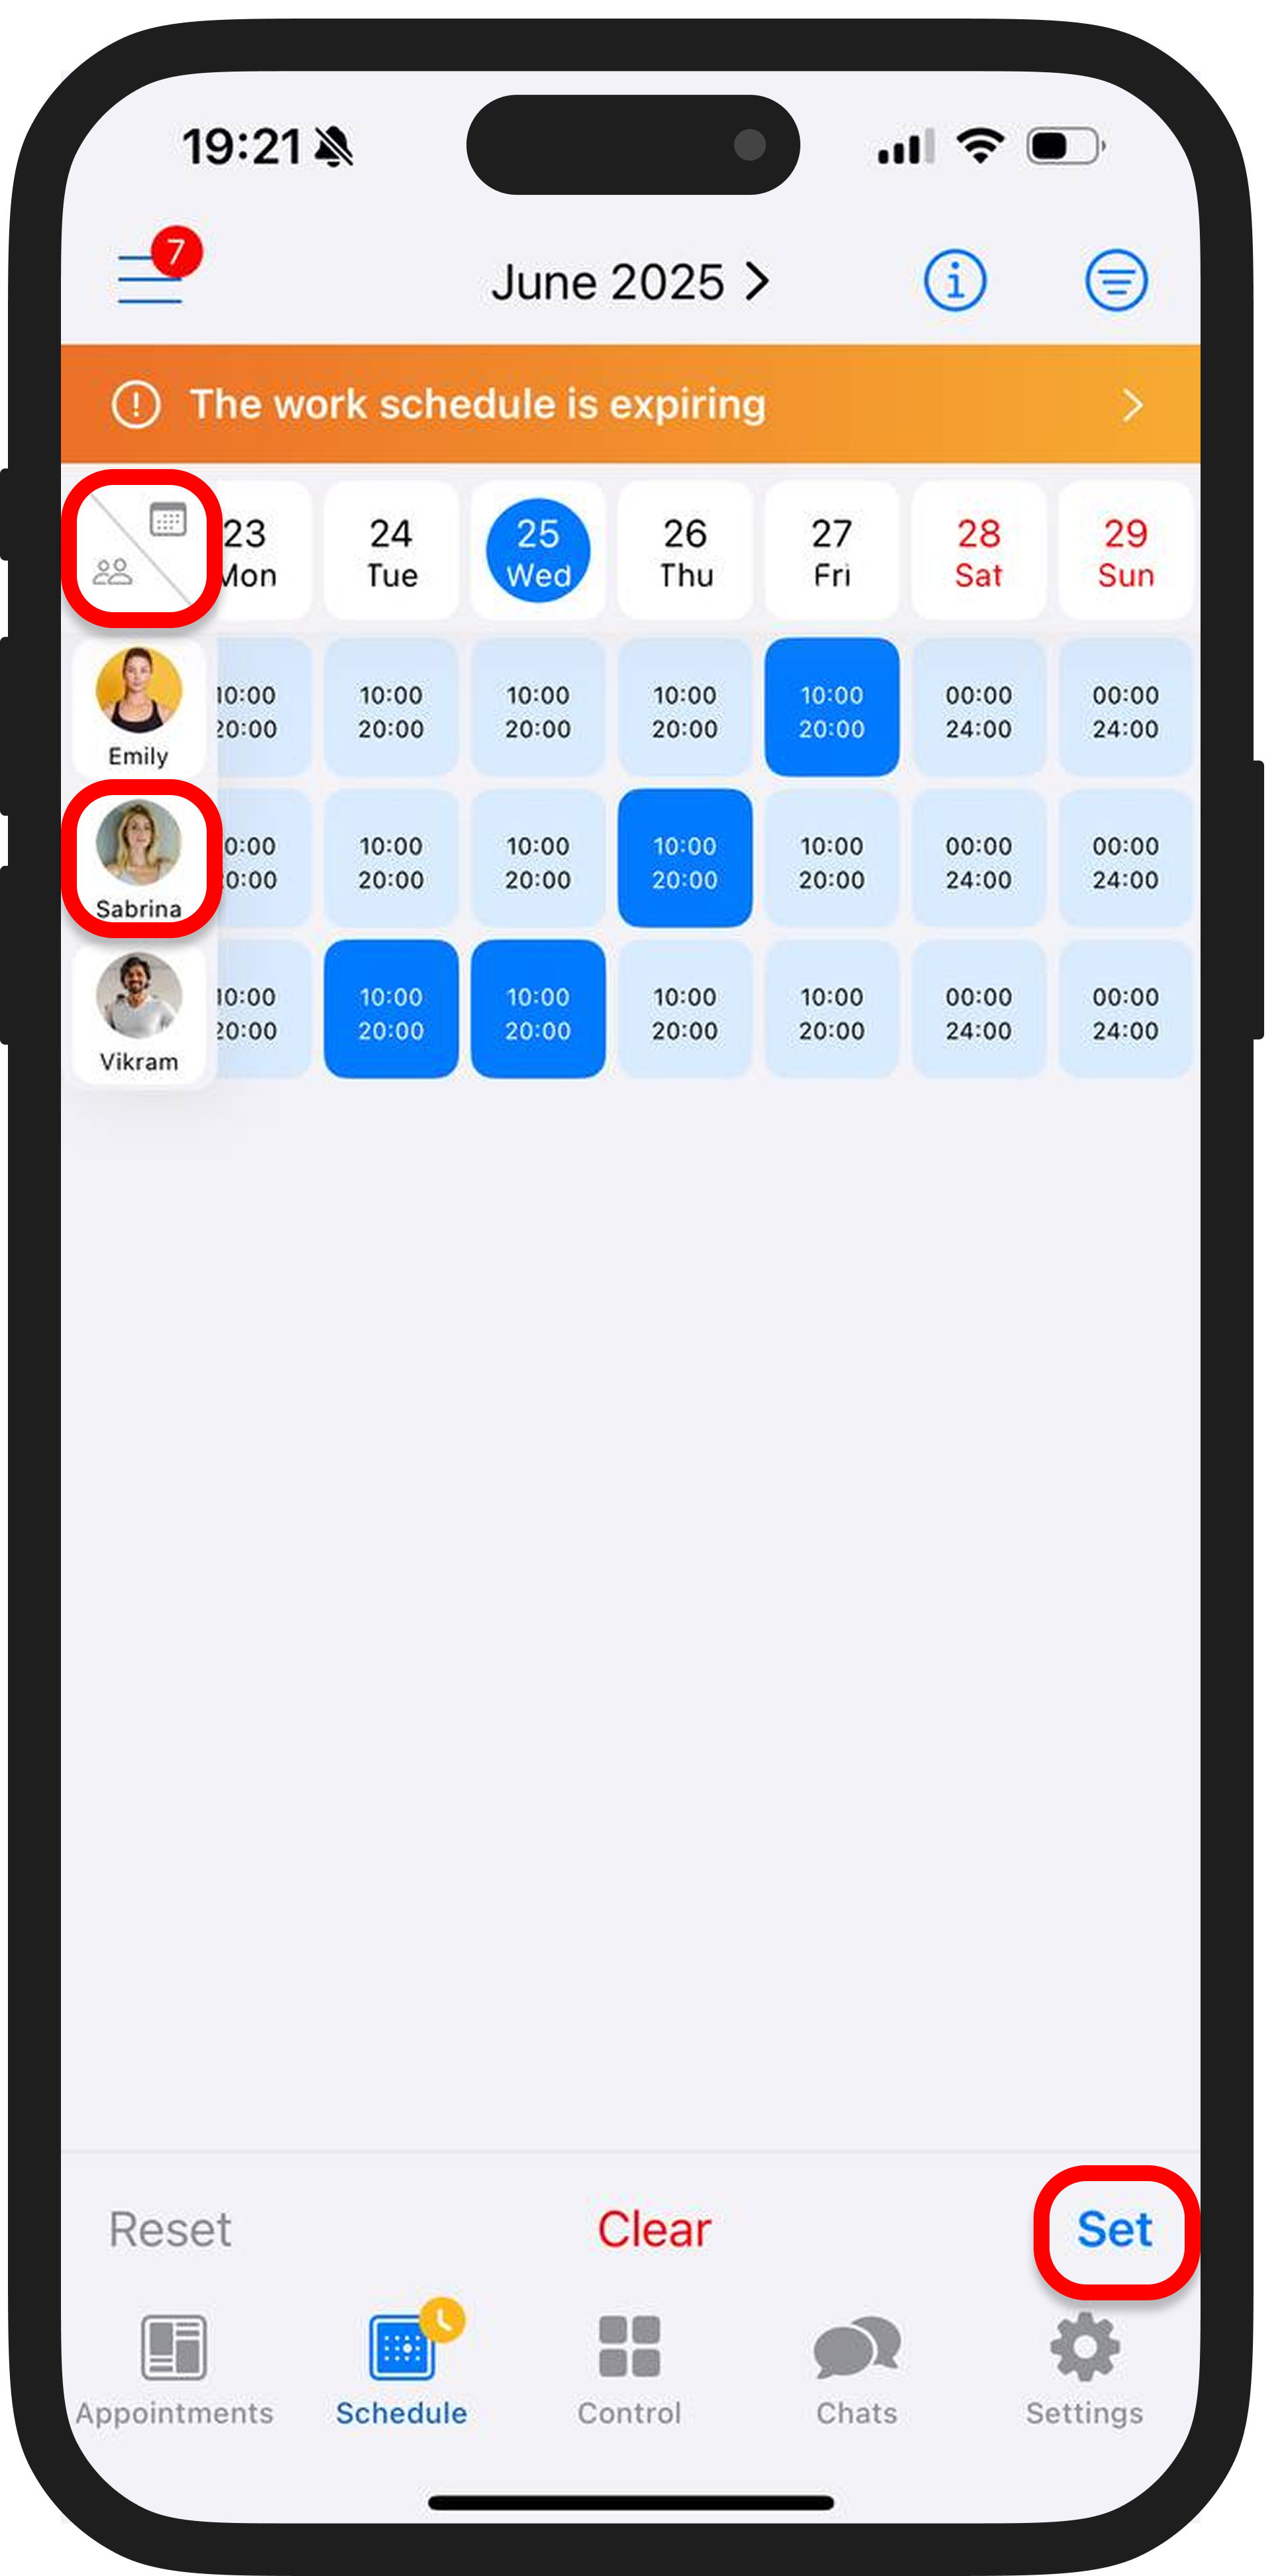
1️⃣ In the schedule, you can:
-
Select all days (by tapping the calendar icon in the top left corner)
-
Choose a specific employee's schedule (by tapping their icon)
-
Select a workday for everyone (by tapping the date)
-
Or manually select the required days.
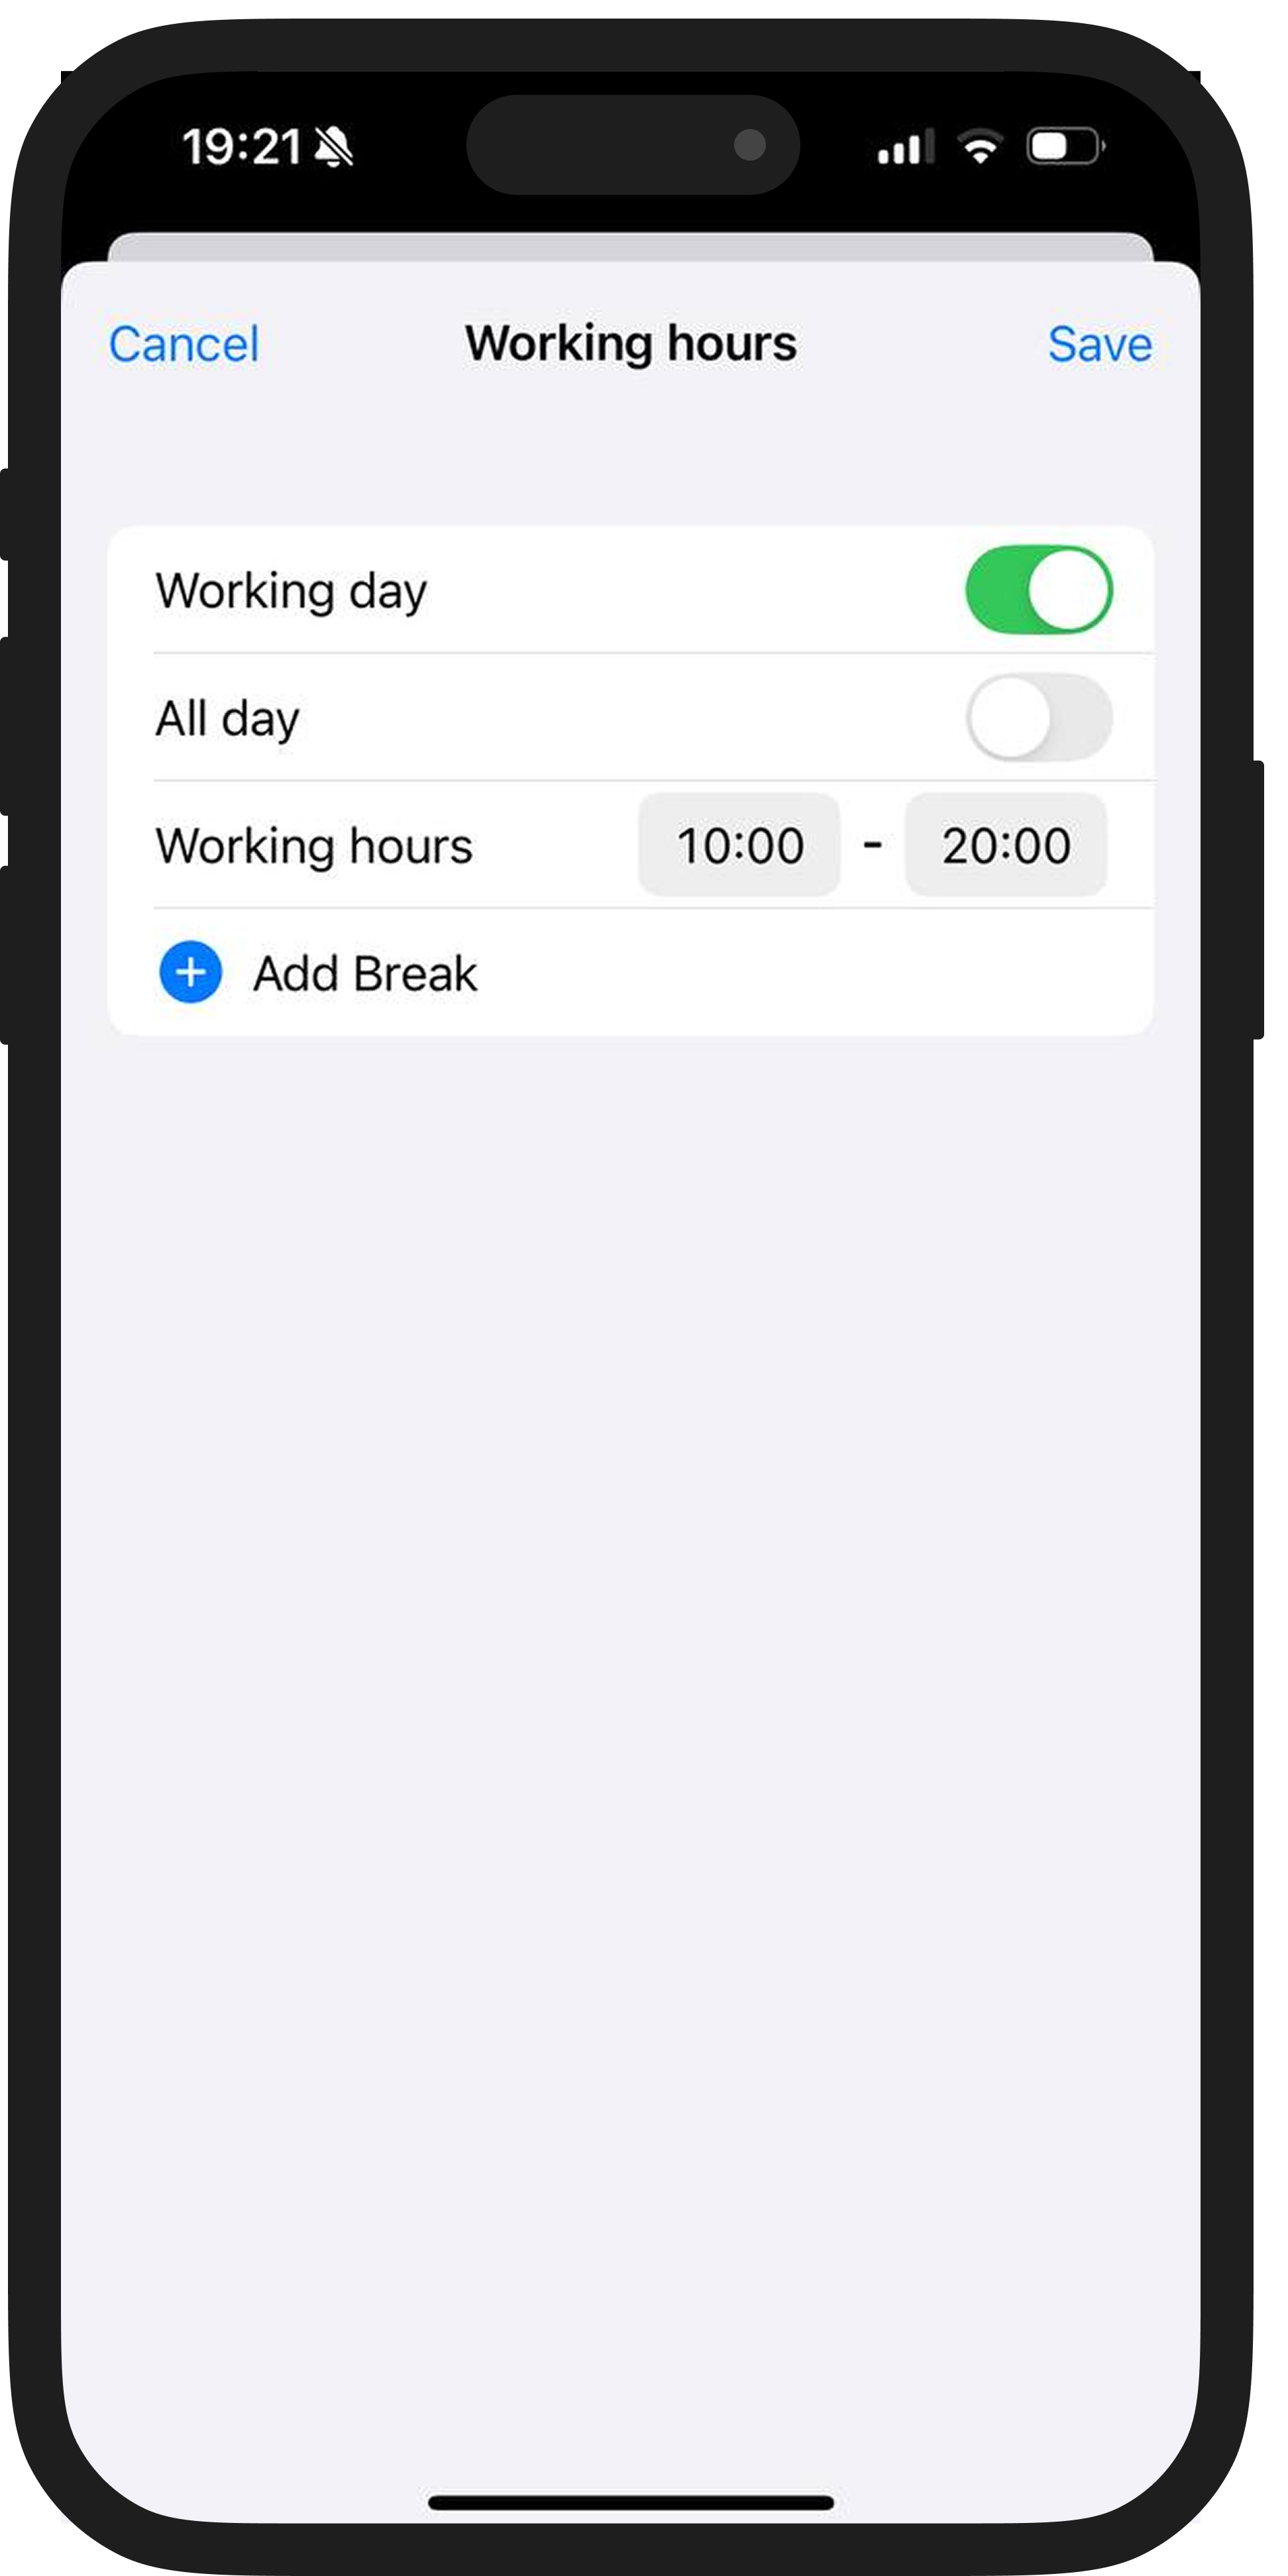
After that, tap "Set" in the bottom right corner and specify the working hours.
2️⃣ If you tap the "Set" button, you can choose employees from the list or by category.
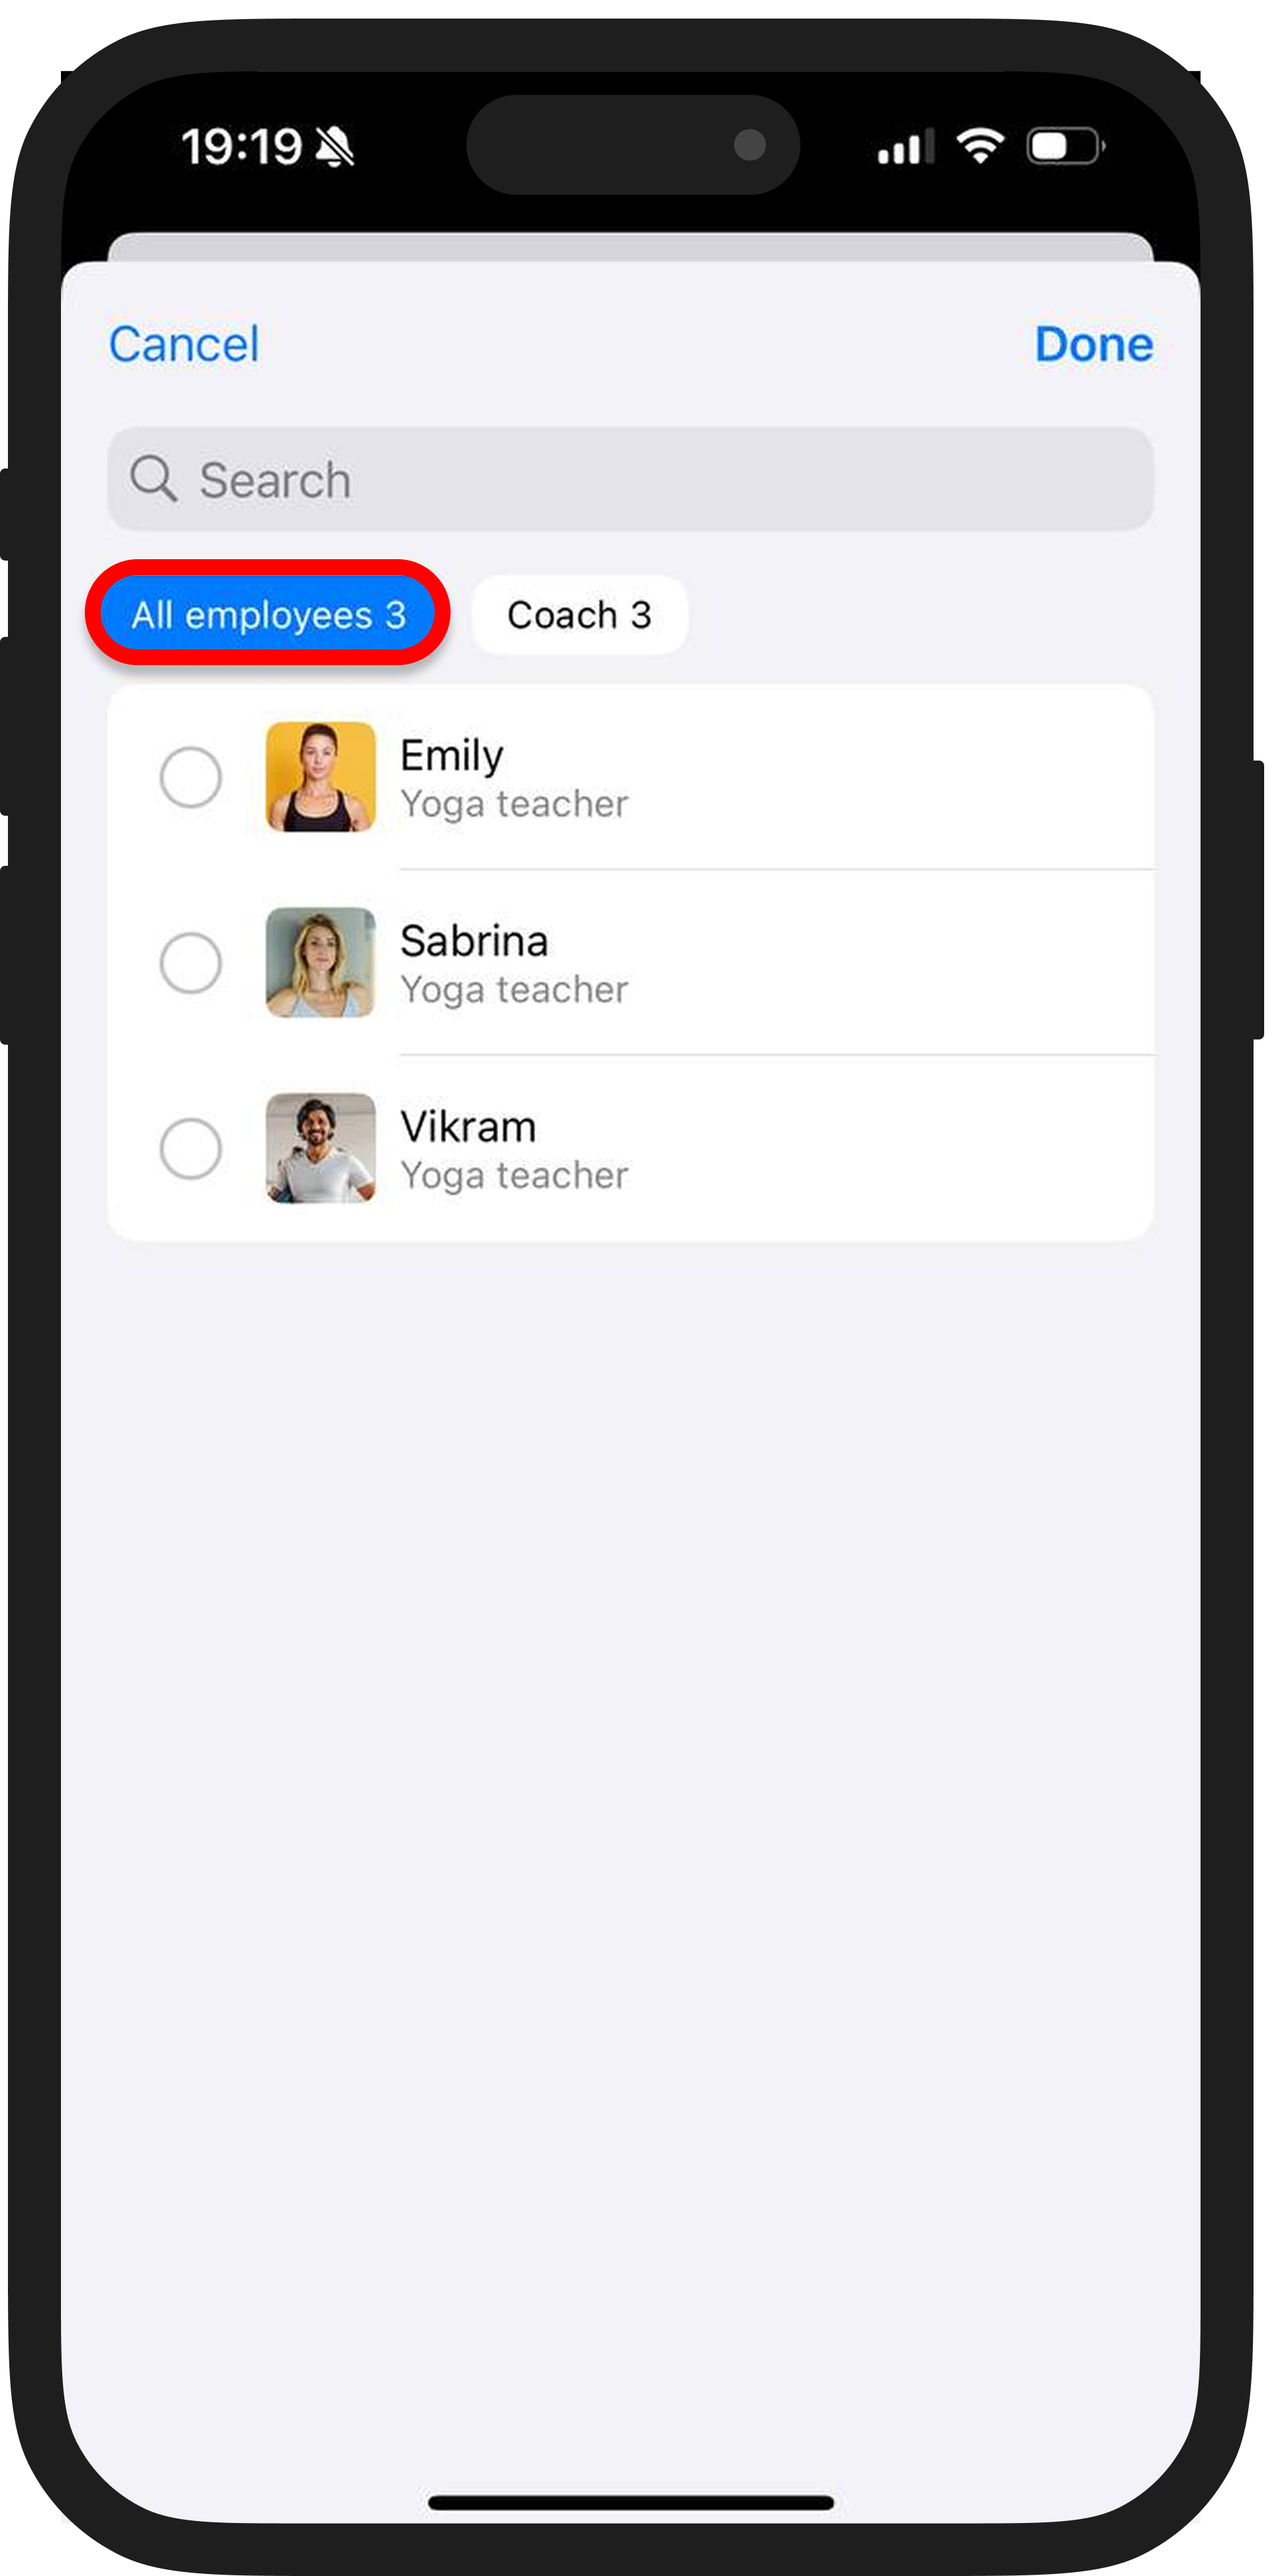
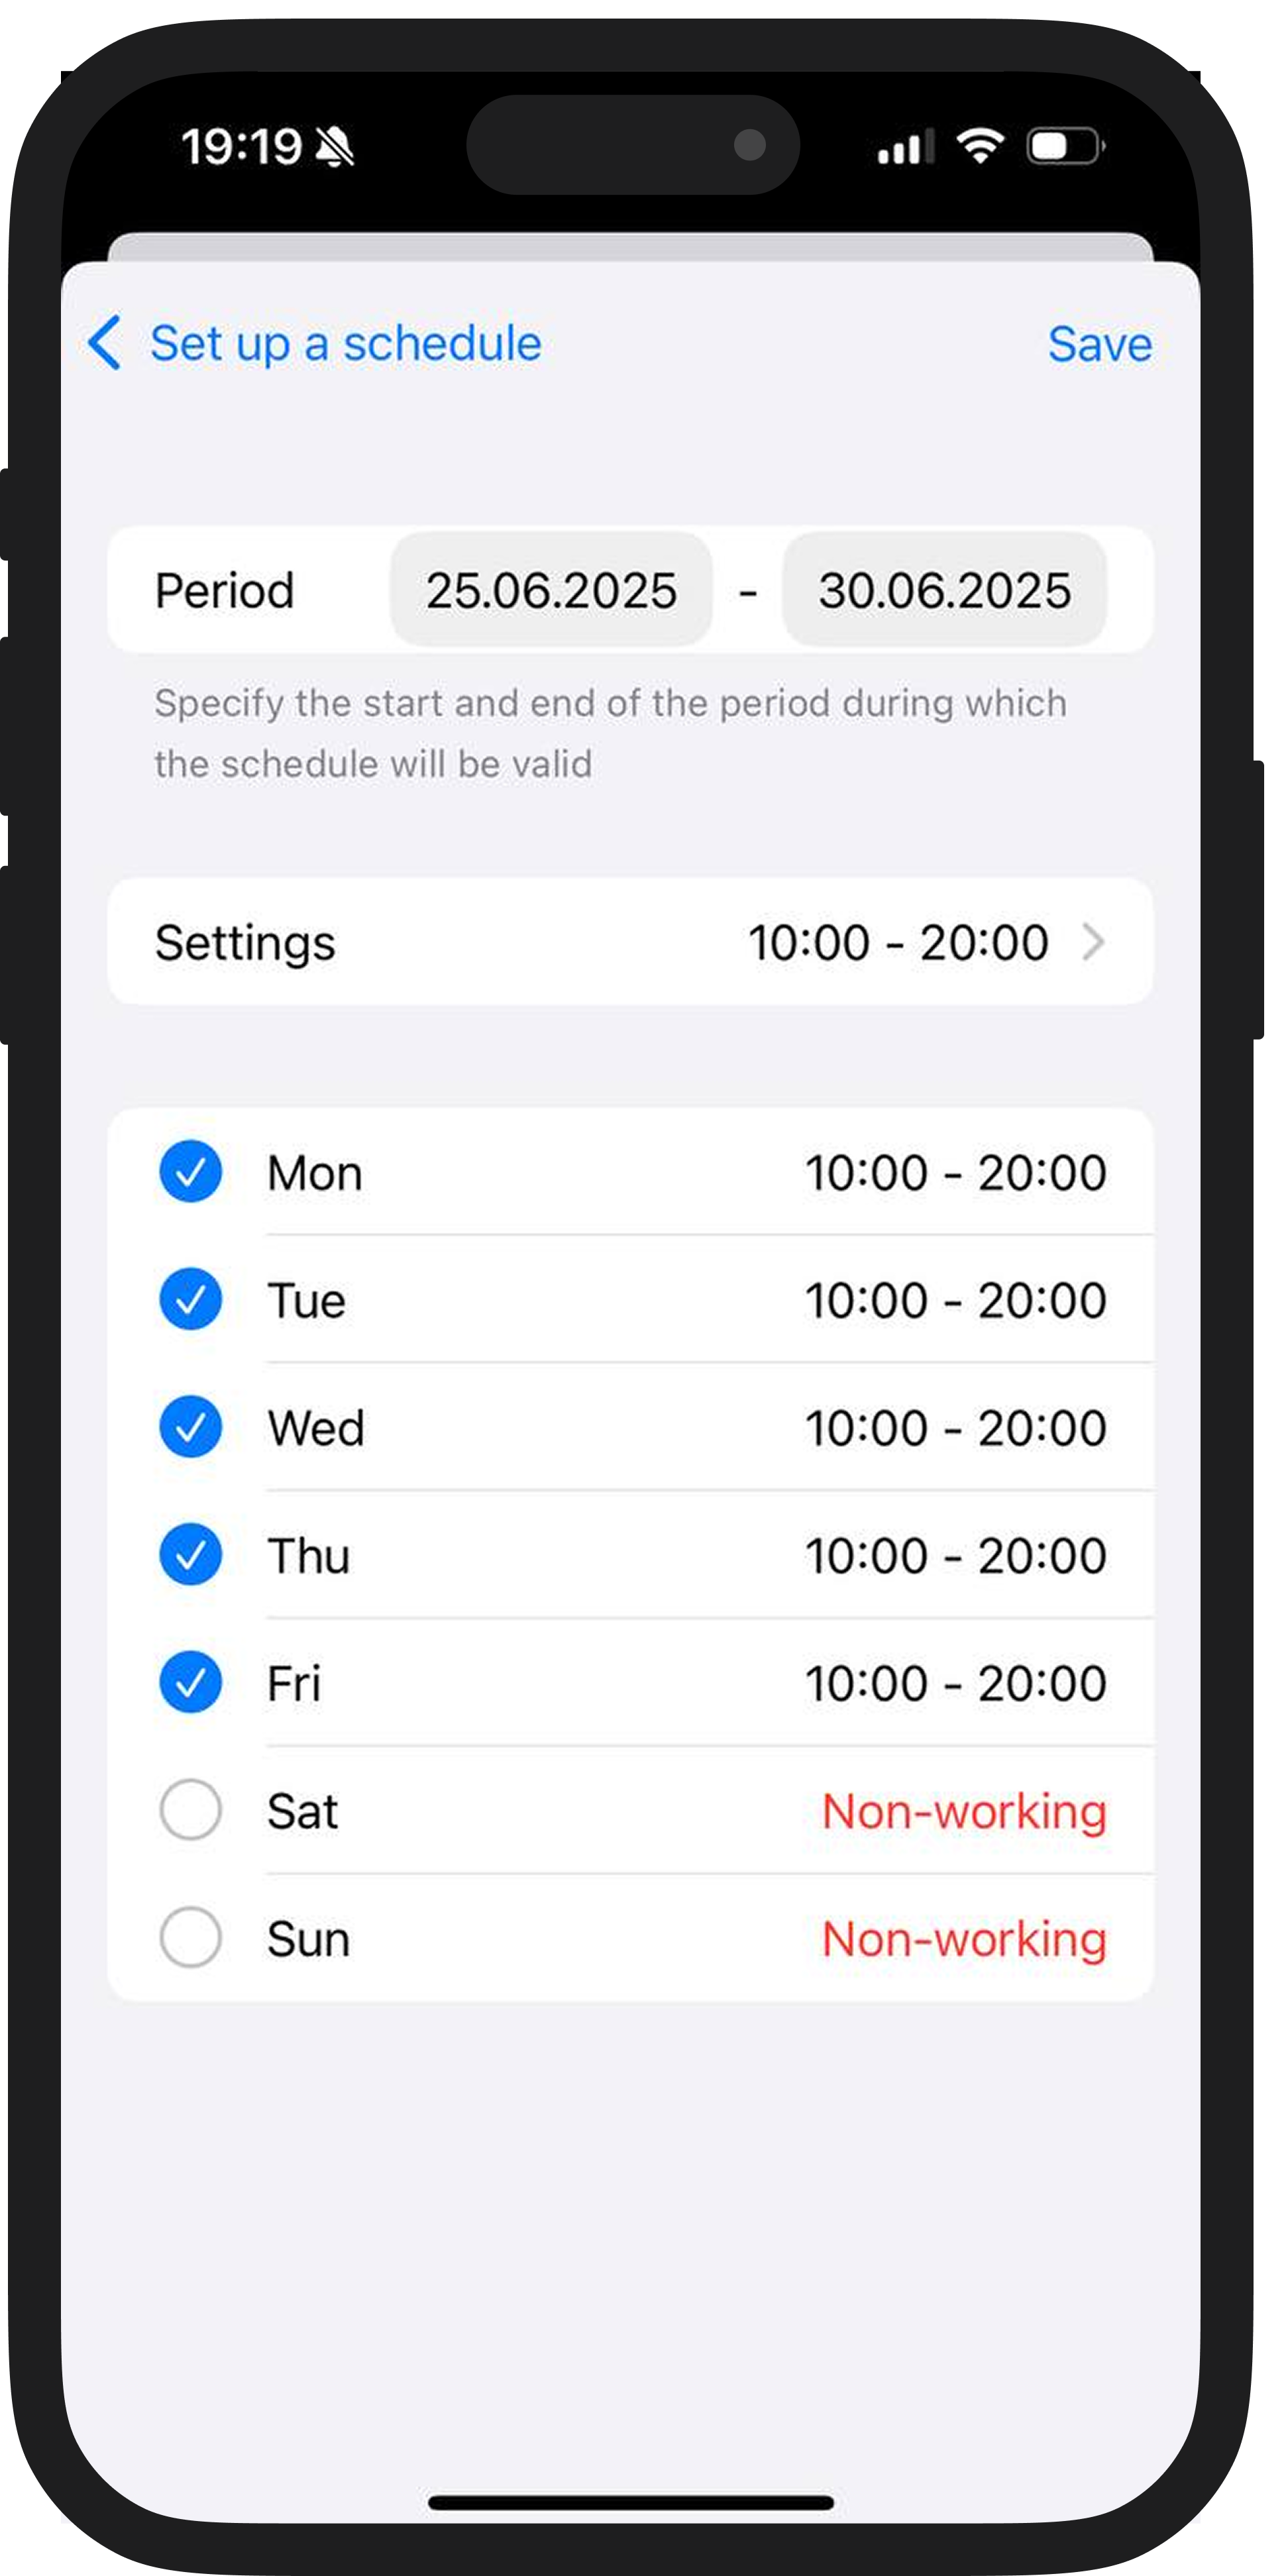
Tap "Done" in the top right corner and choose the schedule type: "By Week days" or "Cyclic Scheduling"
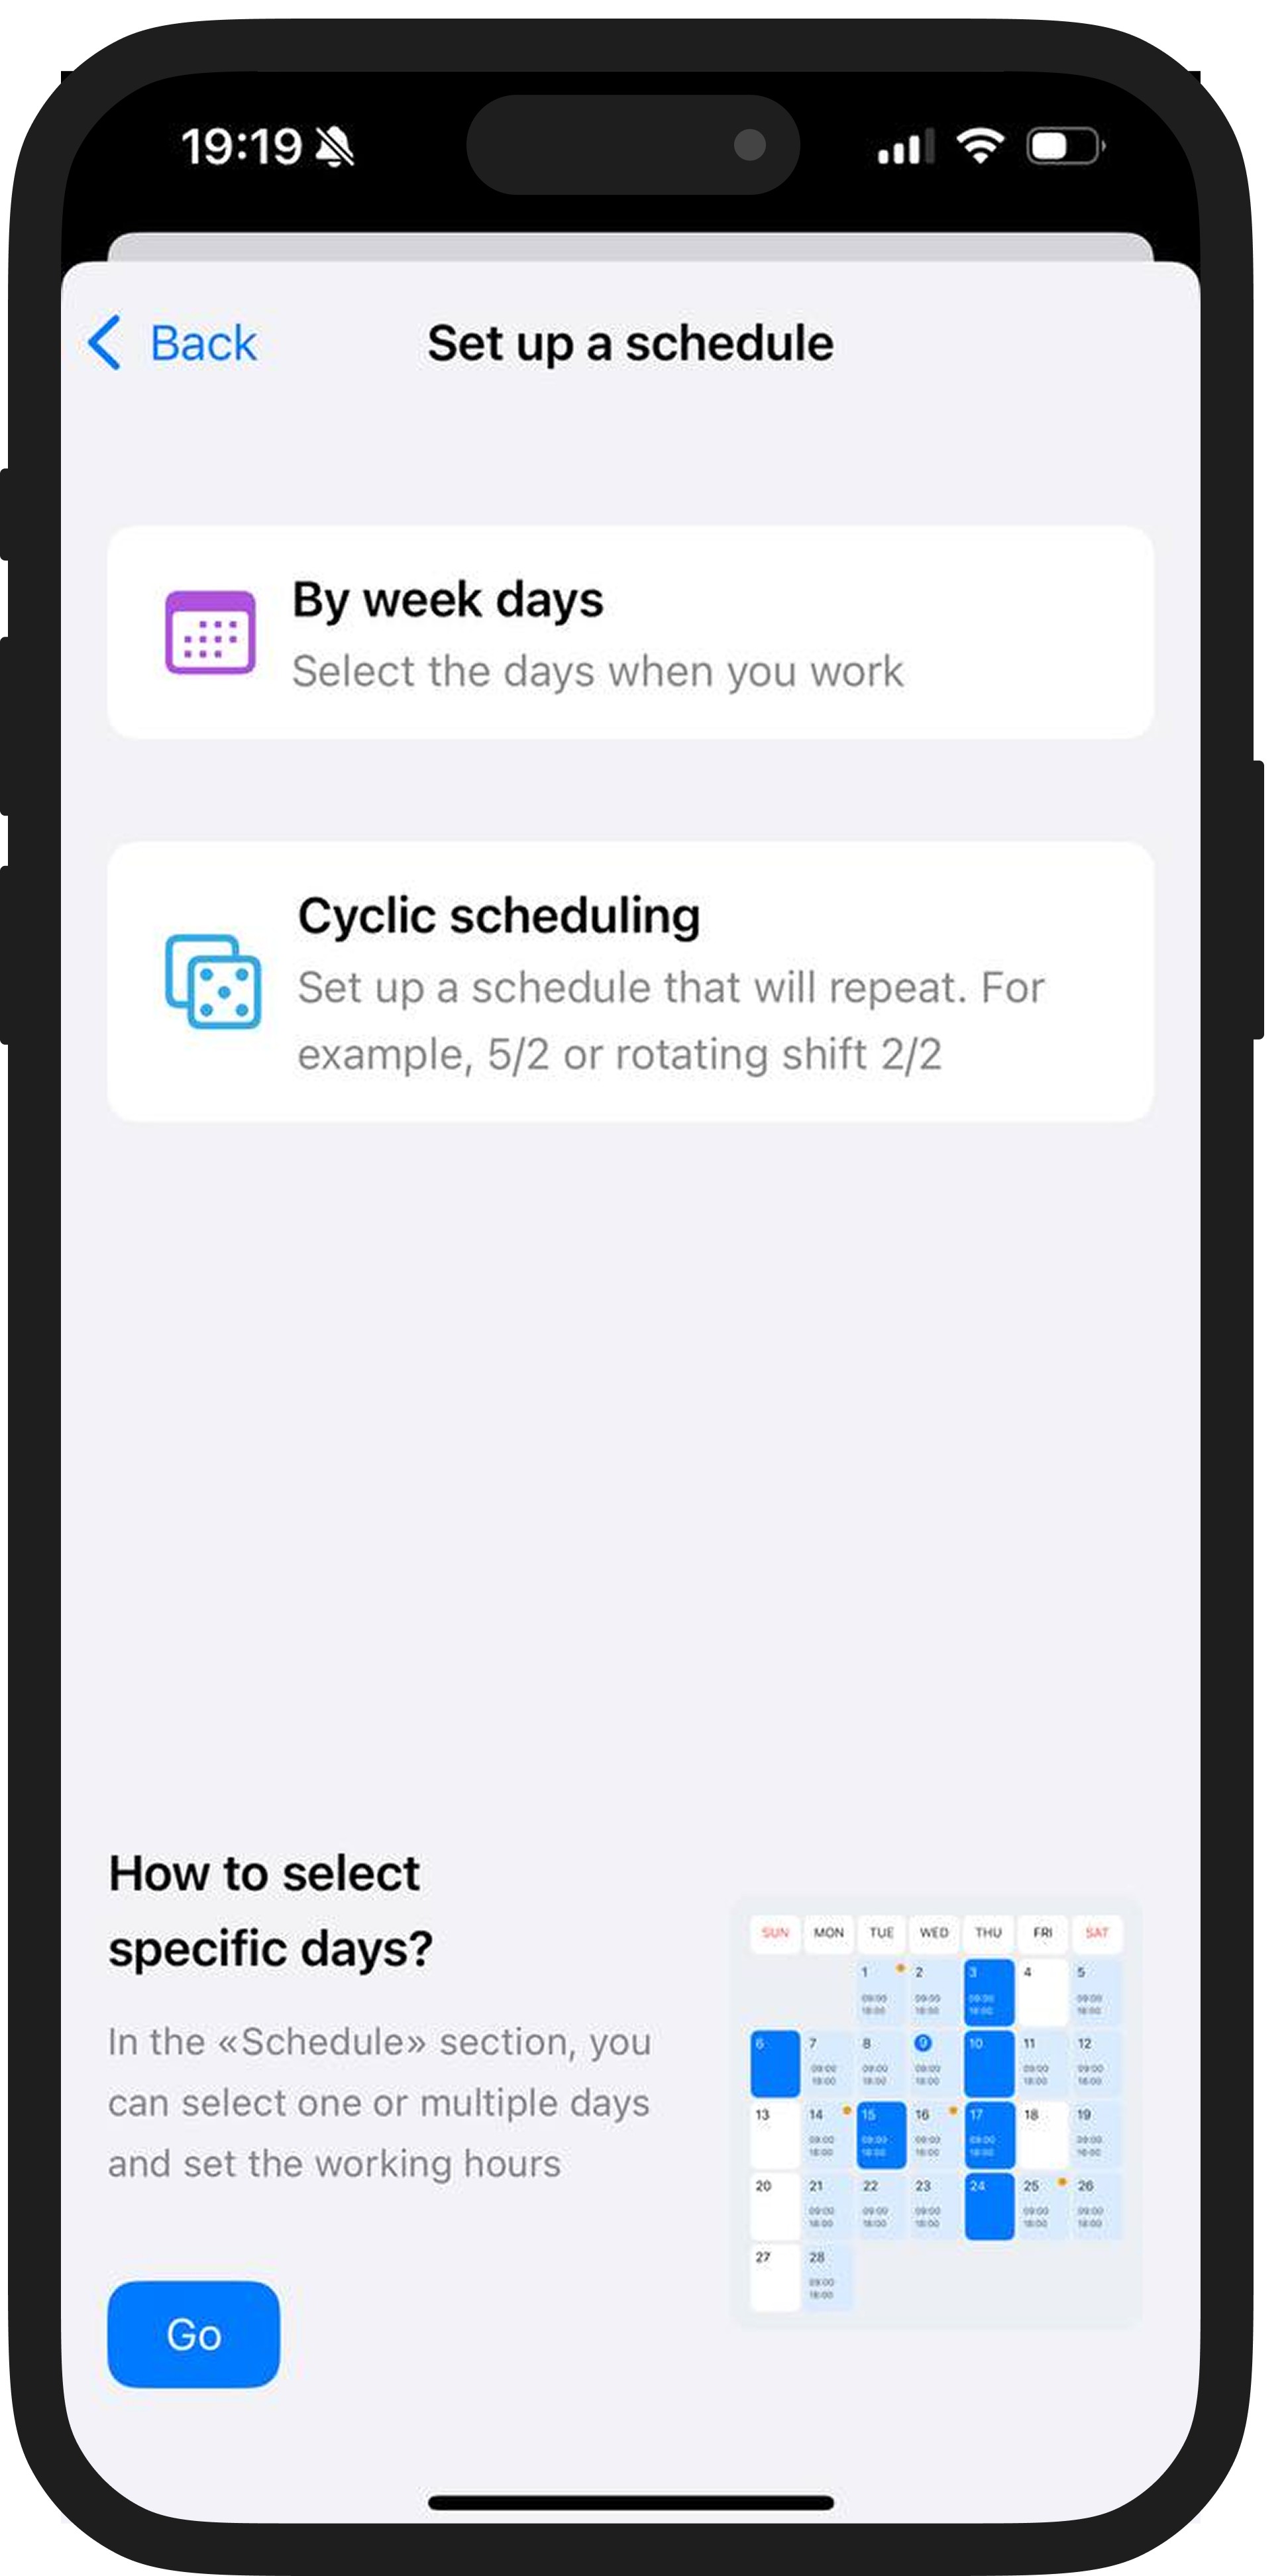
In the "By Week days" option, specify:
-
The period for which you are setting the schedule
-
Working days
-
Working hours
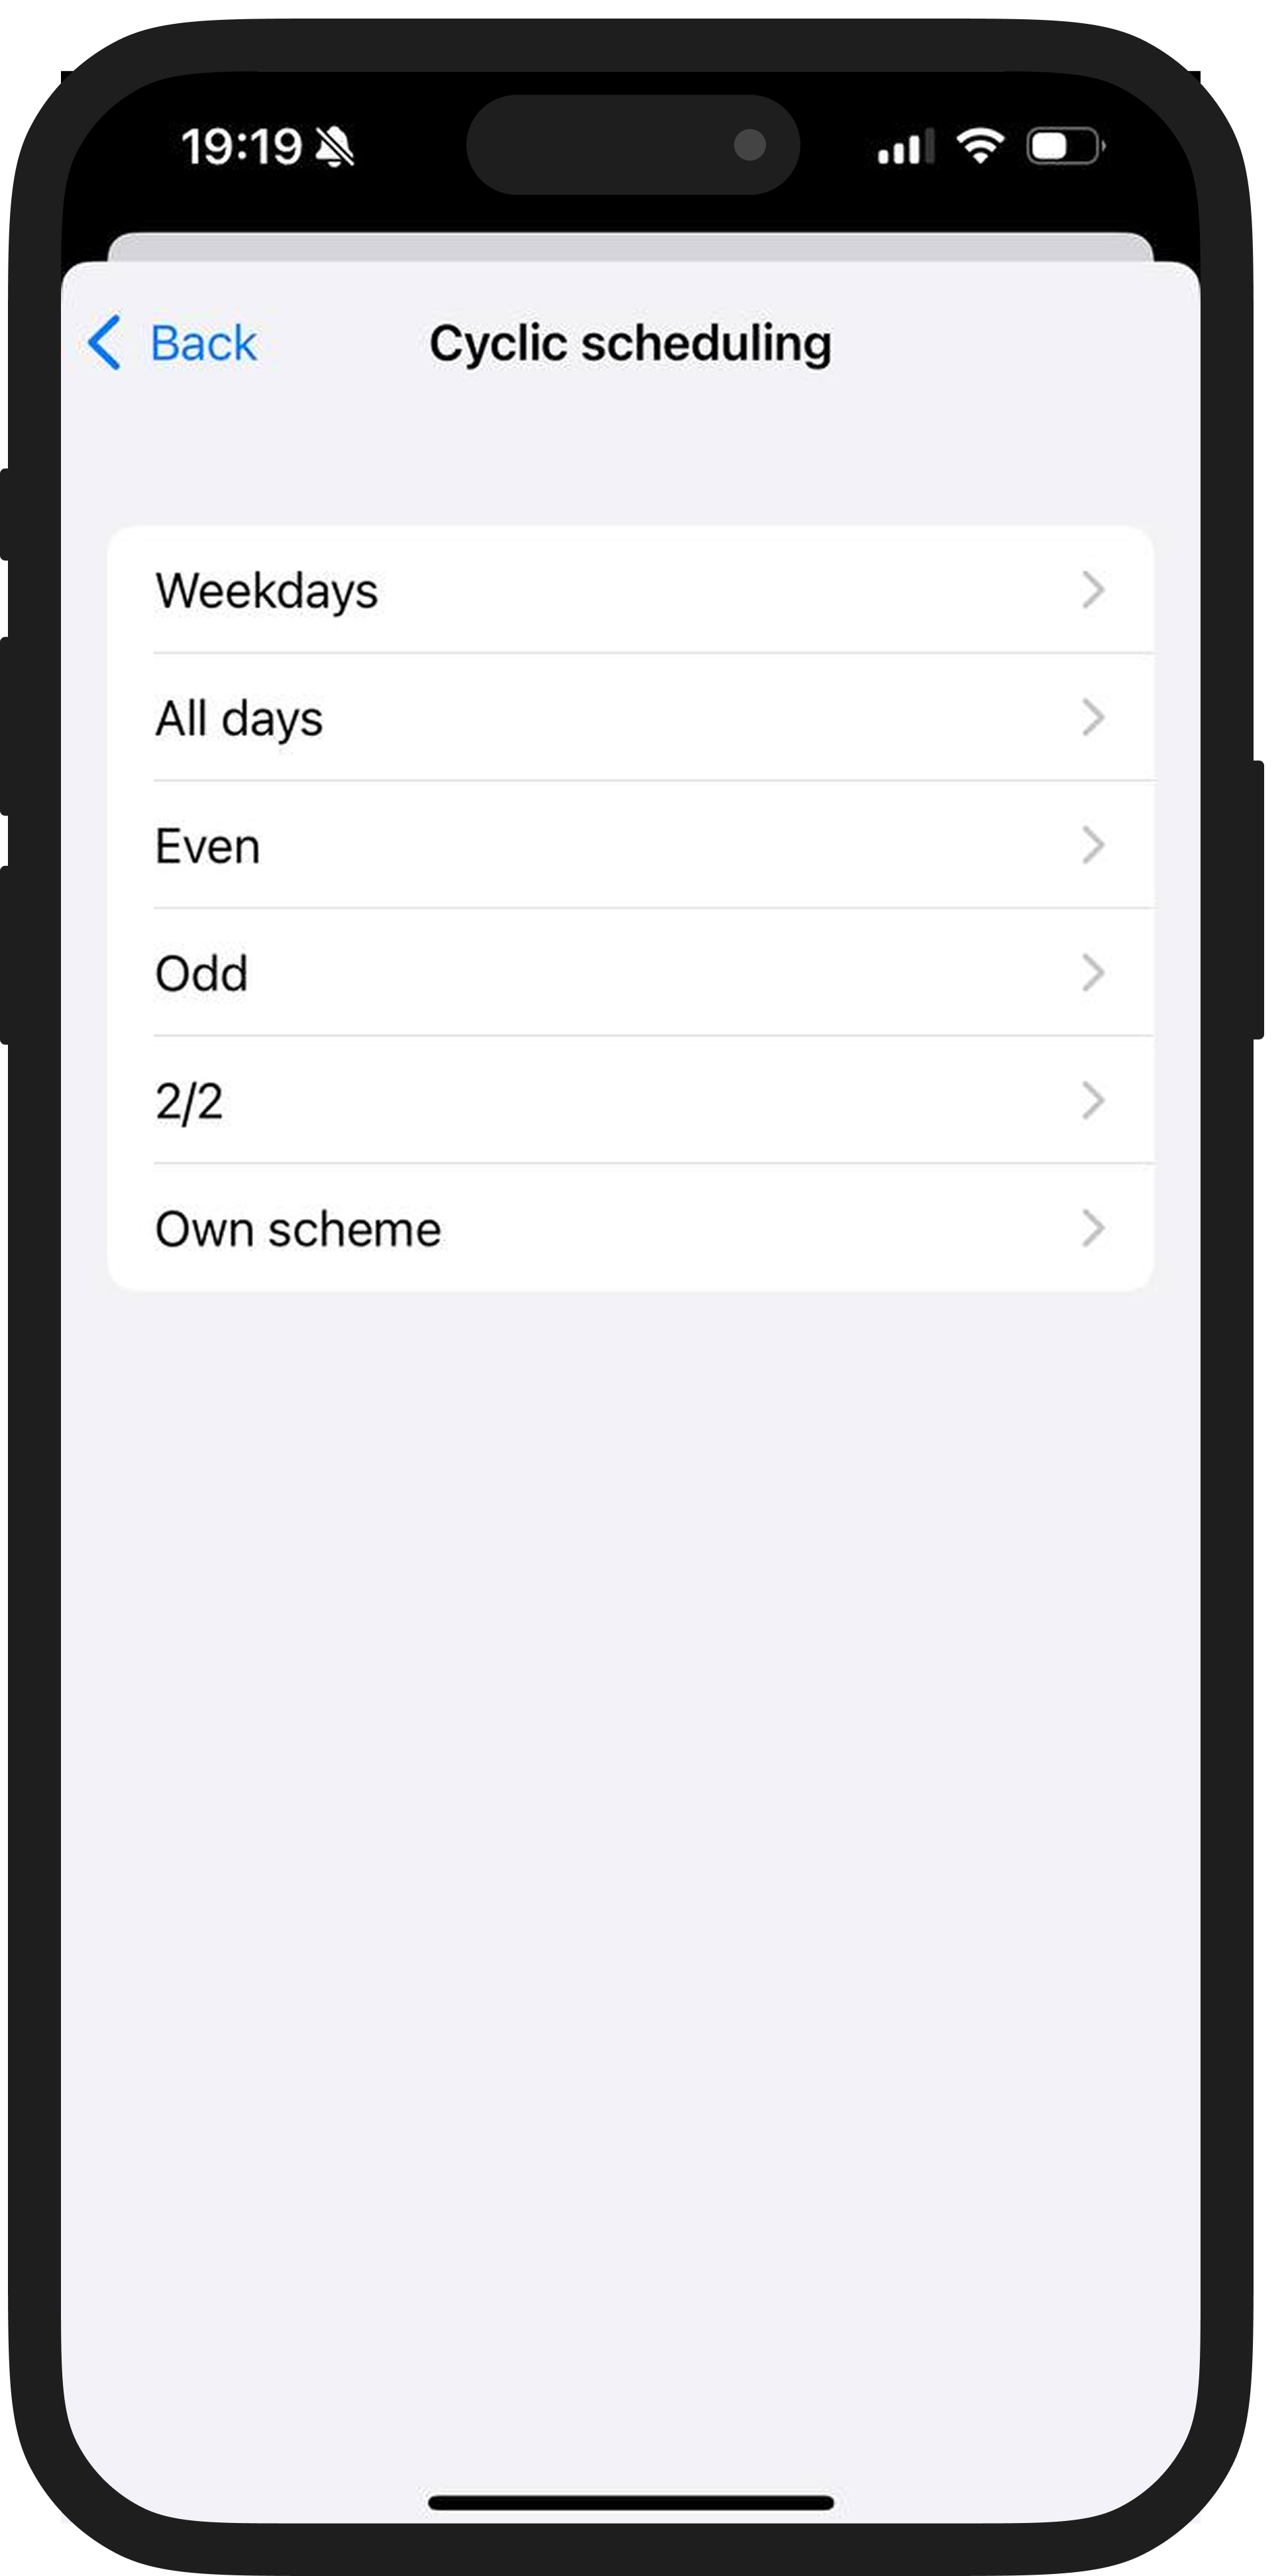
In the "Cyclic Scheduling" option, choose the cycle type:
-
All days
-
Weekdays
-
Odd Days
-
Even Days
-
Own scheme – alternating working and non-working days (e.g., 2 days on, 2 days off)

After selecting the cycle, specify the schedule period and employee working hours.
For Specialists:
You can set up your schedule in two ways: via the schedule or using the "Set up schedule" button.
1️⃣ In the schedule, you can:
-
Select all days of the month (by tapping its name)
-
Select a day of the week (by tapping its name)
-
Or manually select the necessary days
After that, tap "Set" in the bottom right corner and define your working hours.

2️⃣ If you tap the "Set Up Schedule" button, choose how you want to configure your schedule: "By Week days" or "Cyclic Scheduling."
In the "By Week days" option, specify:
- The period for which you are setting the schedule
- Working days
- Working hours

In the "Cyclic Scheduling" option, choose a cycle:
-
All Days
-
Weekdays
-
Odd Days
-
Even Days
-
Own scheme – define a rotation of working and non-working days, for example, 2 days on / 2 days off
After selecting the cycle, set the period and working hours.
⚠️ NB! Working hours сan be changed. You can always update your schedule — just select the desired day, change the time, or mark it as a non-working day.