How to Add Services in the iOS Mobile App
Last modified:
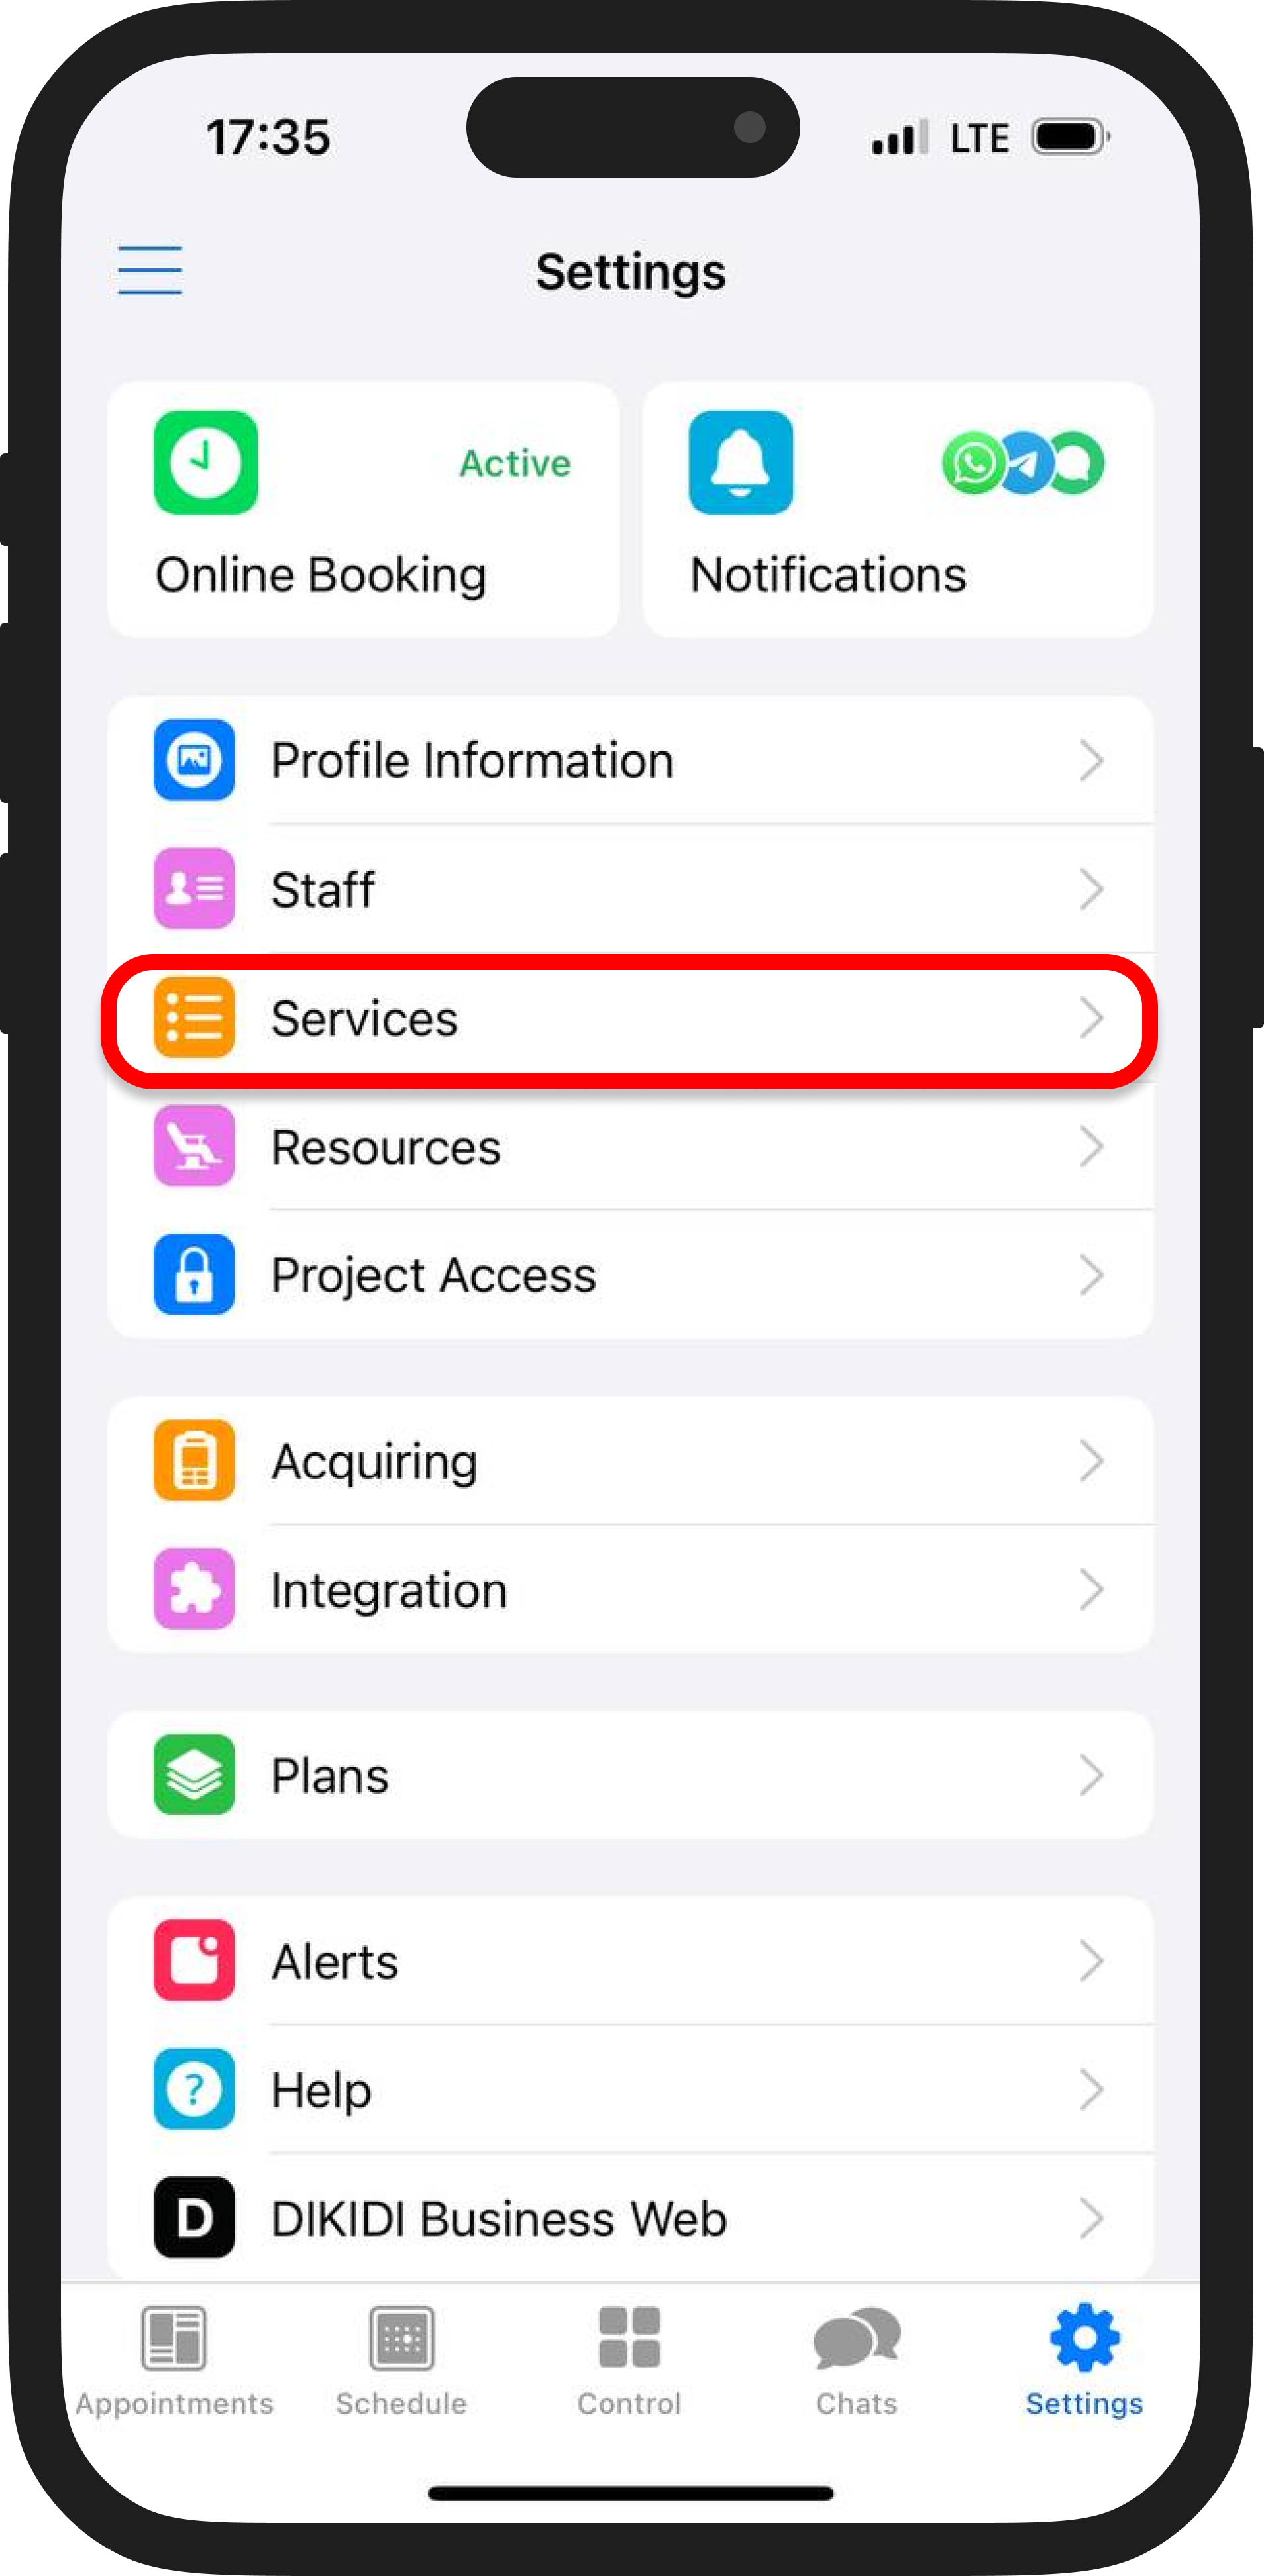
To add and set up your services click “Settings” → “Services”. Here, you can configure all the parameters related to your services.
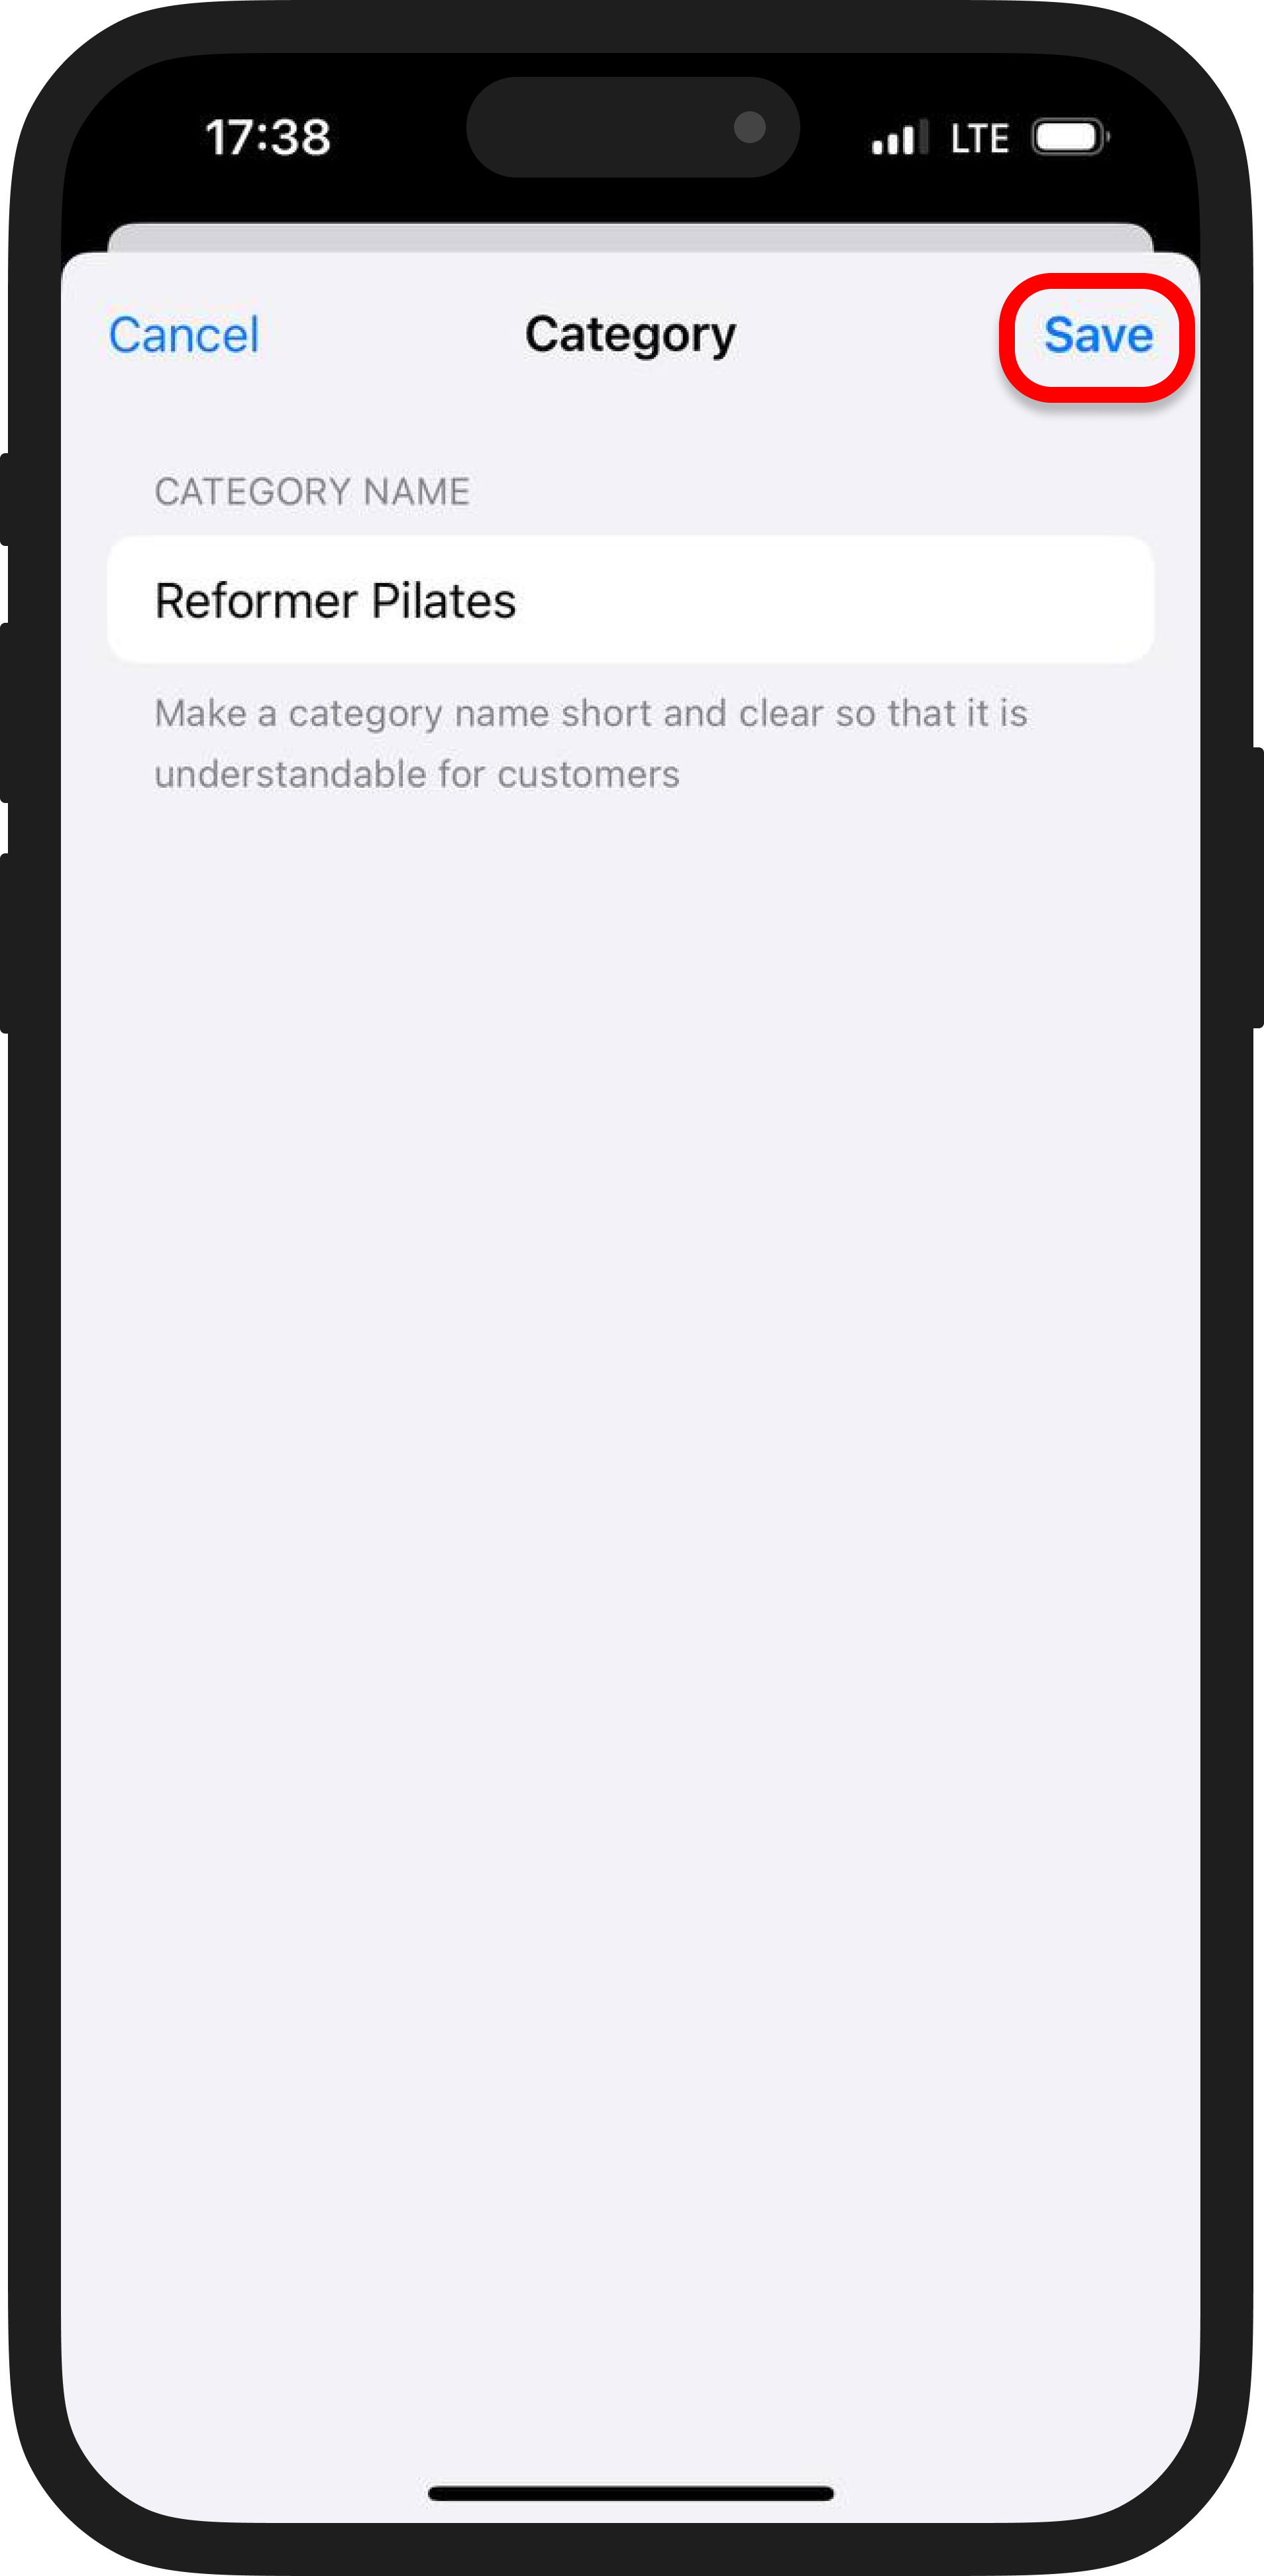
If you don’t have a service category yet, create one. Click on “Service Categories” → “Add Category” to group similar services, e.g. “Hot yoga” or “Stretching” for your yoga studio. If a suitable category already exists, you can skip this step.


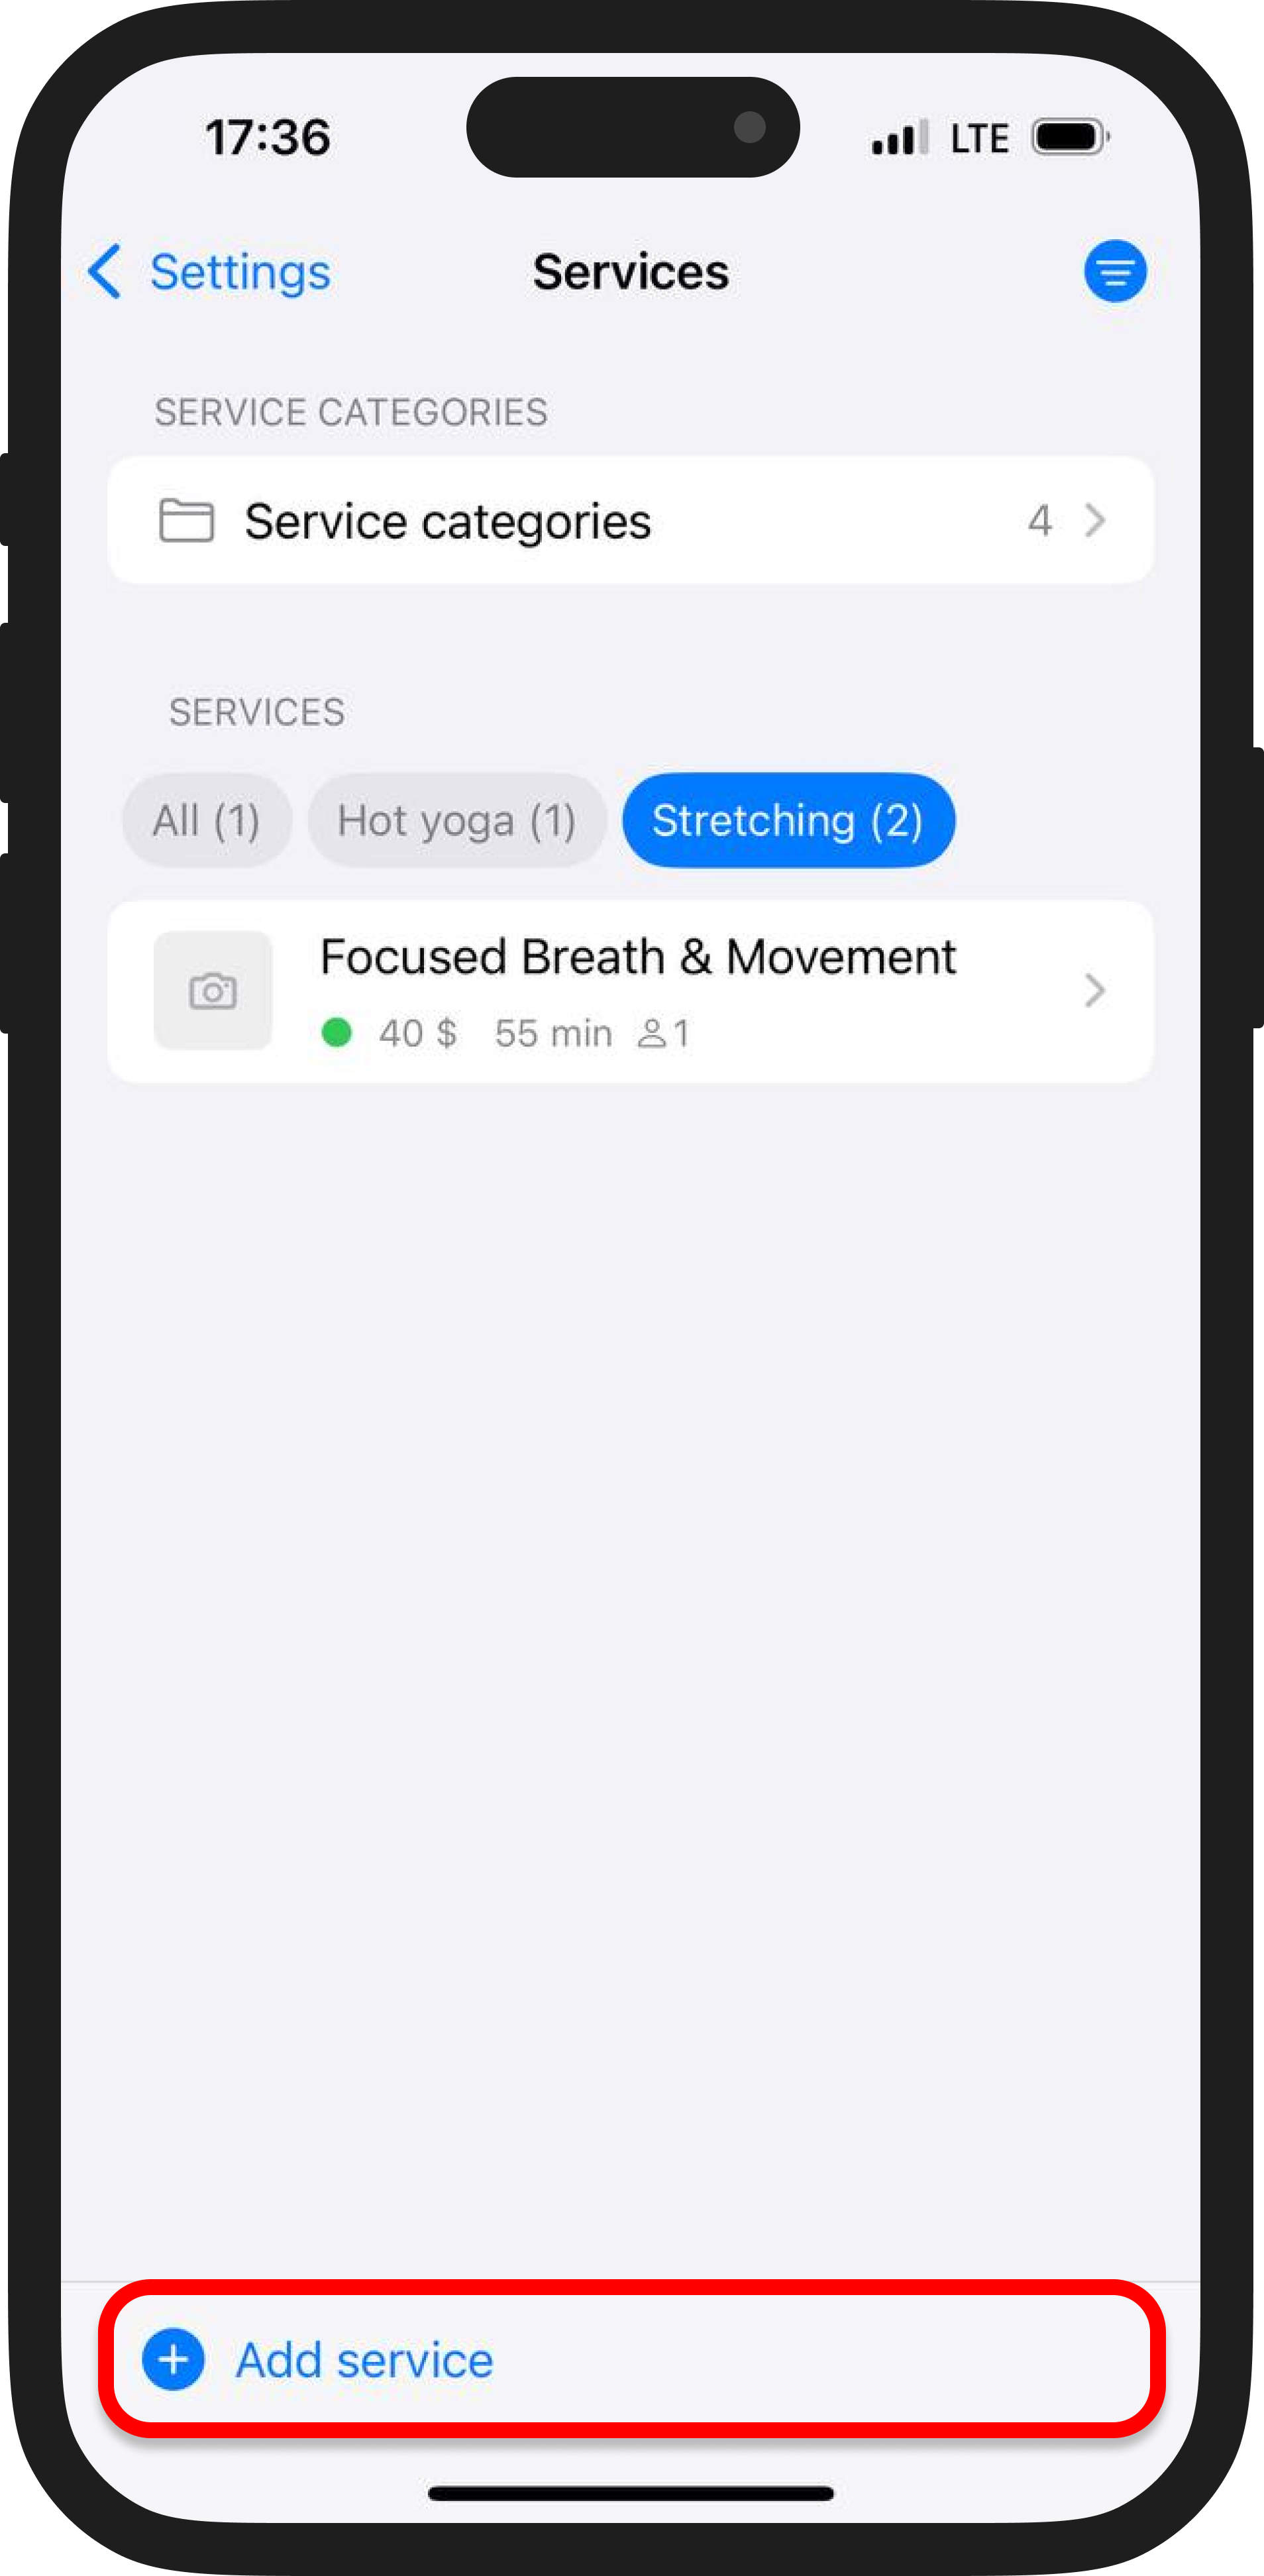
To add a service, click “Add Service”. Then a form will open where you need to specify the basic information.
Name your service and select its category. Then, upload a photo of the service.
Set the price: you can choose either a fixed amount or mark it as “from” a certain amount by clicking the corresponding button. You can also mark the service as free by activating the switch.
Next, specify the duration of the service — it can be any length.
If the service requires a break (for example, to clean the workspace), don’t forget to indicate this in the “Break after appointment” field.
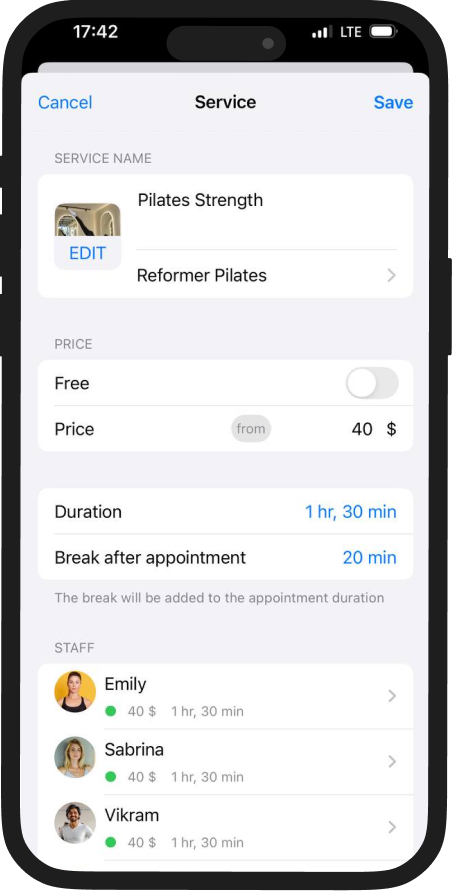
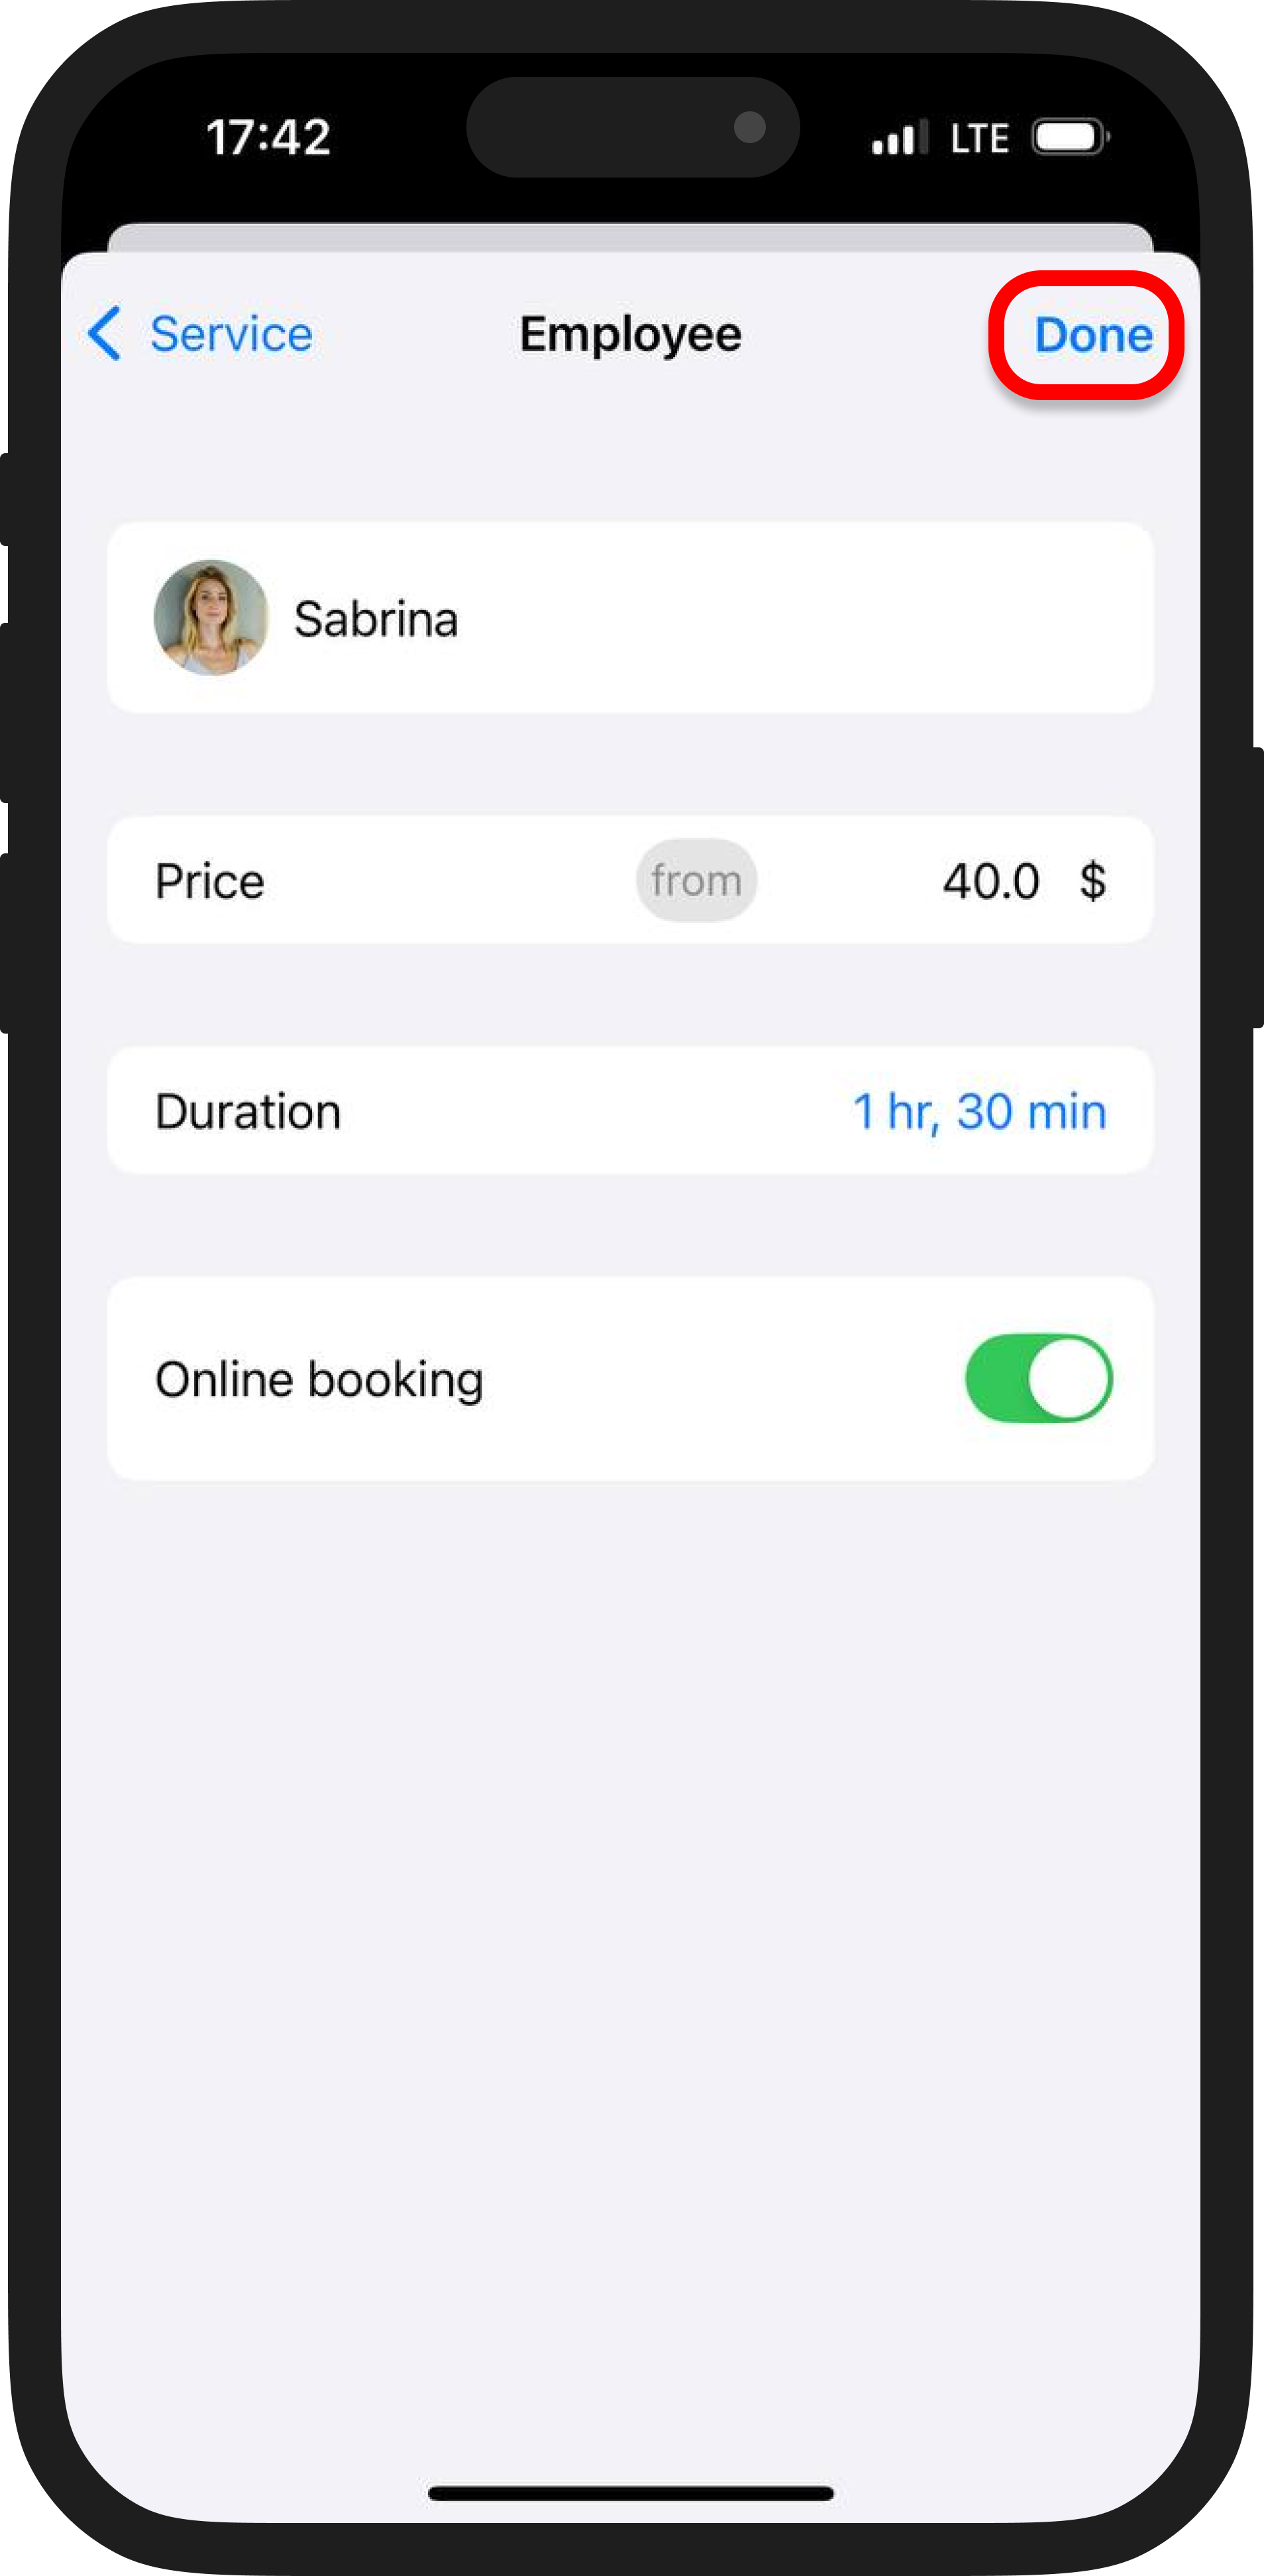
In the next step, select the employees who will provide this service. You can also click on a specialist’s name to set an individual price, duration, and configure online booking availability.
Once filled, click “Done” in the upper right corner.
Next, select the resources required for the service, e.g. a yoga mat or a fitness ball. If no resources are needed, you can skip this step. You can learn more about adding resources to your service in the article.
Then, specify whether online booking will be available for this service. If necessary, add a description to help customers better understand its features. If you have examples of your works, feel free to upload them in portfolio section.
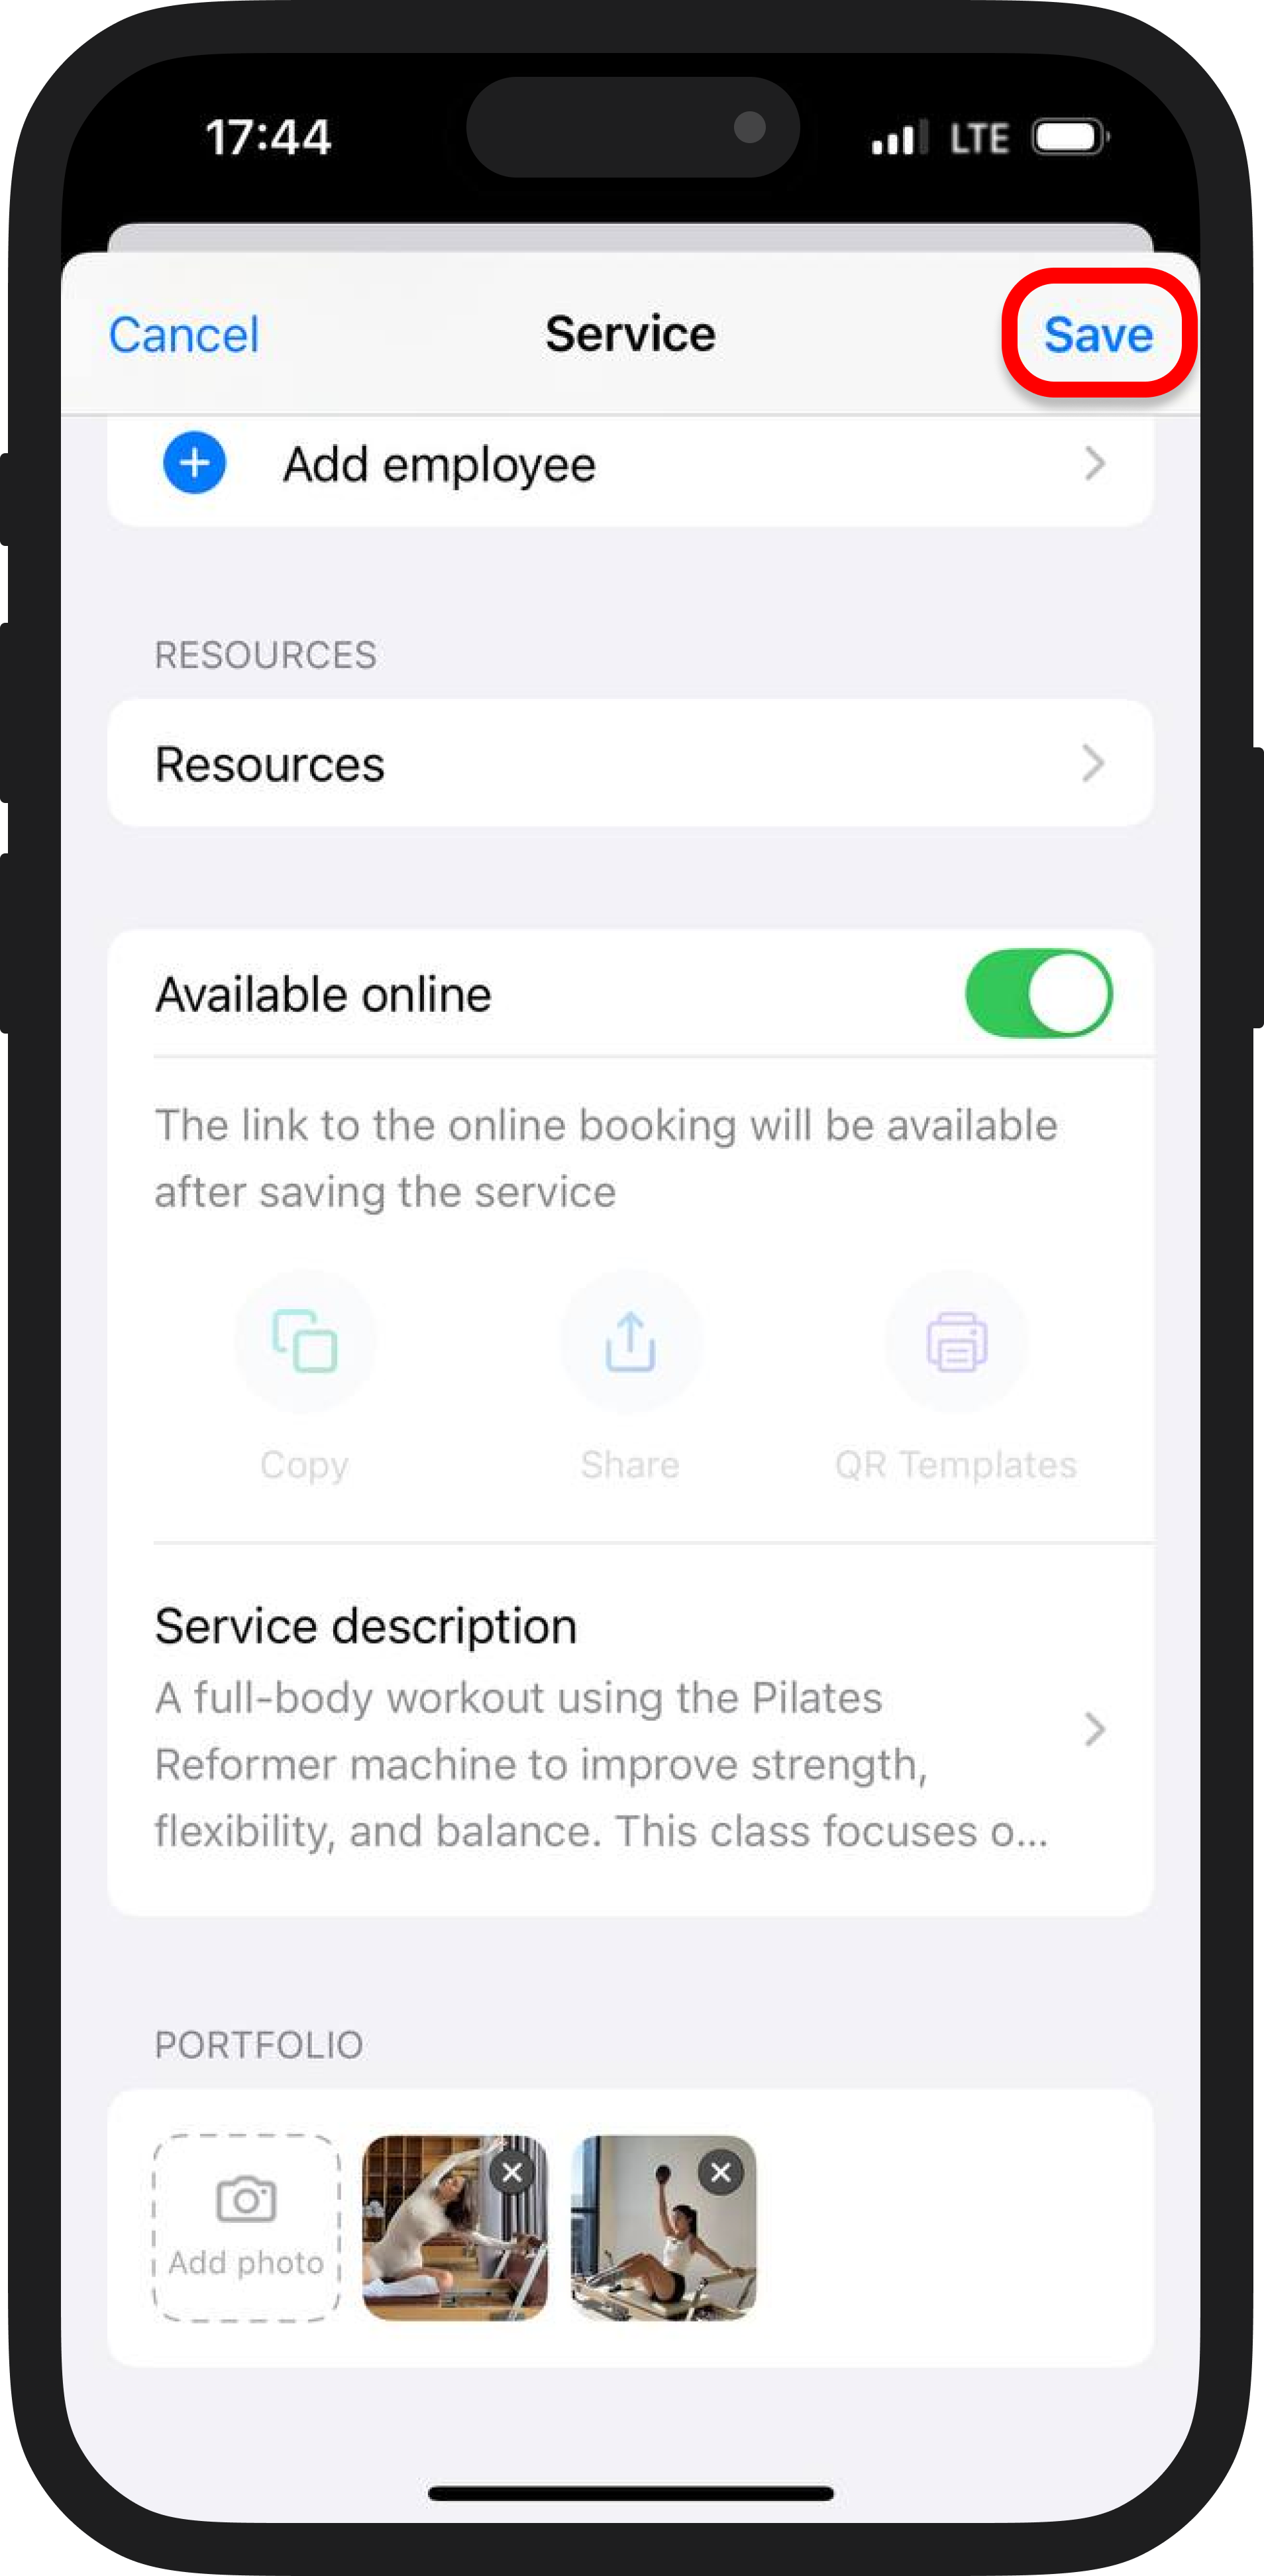
After completing all the steps, do not forget click “Save” in the upper right corner.
Your service has been added successfully!