How to Set up Access to a Project for Employees
Last modified:
To enable your employees to view and manage their appointments, as well as to set different access levels, DIKIDI allows you to add access to your project.
How to set up
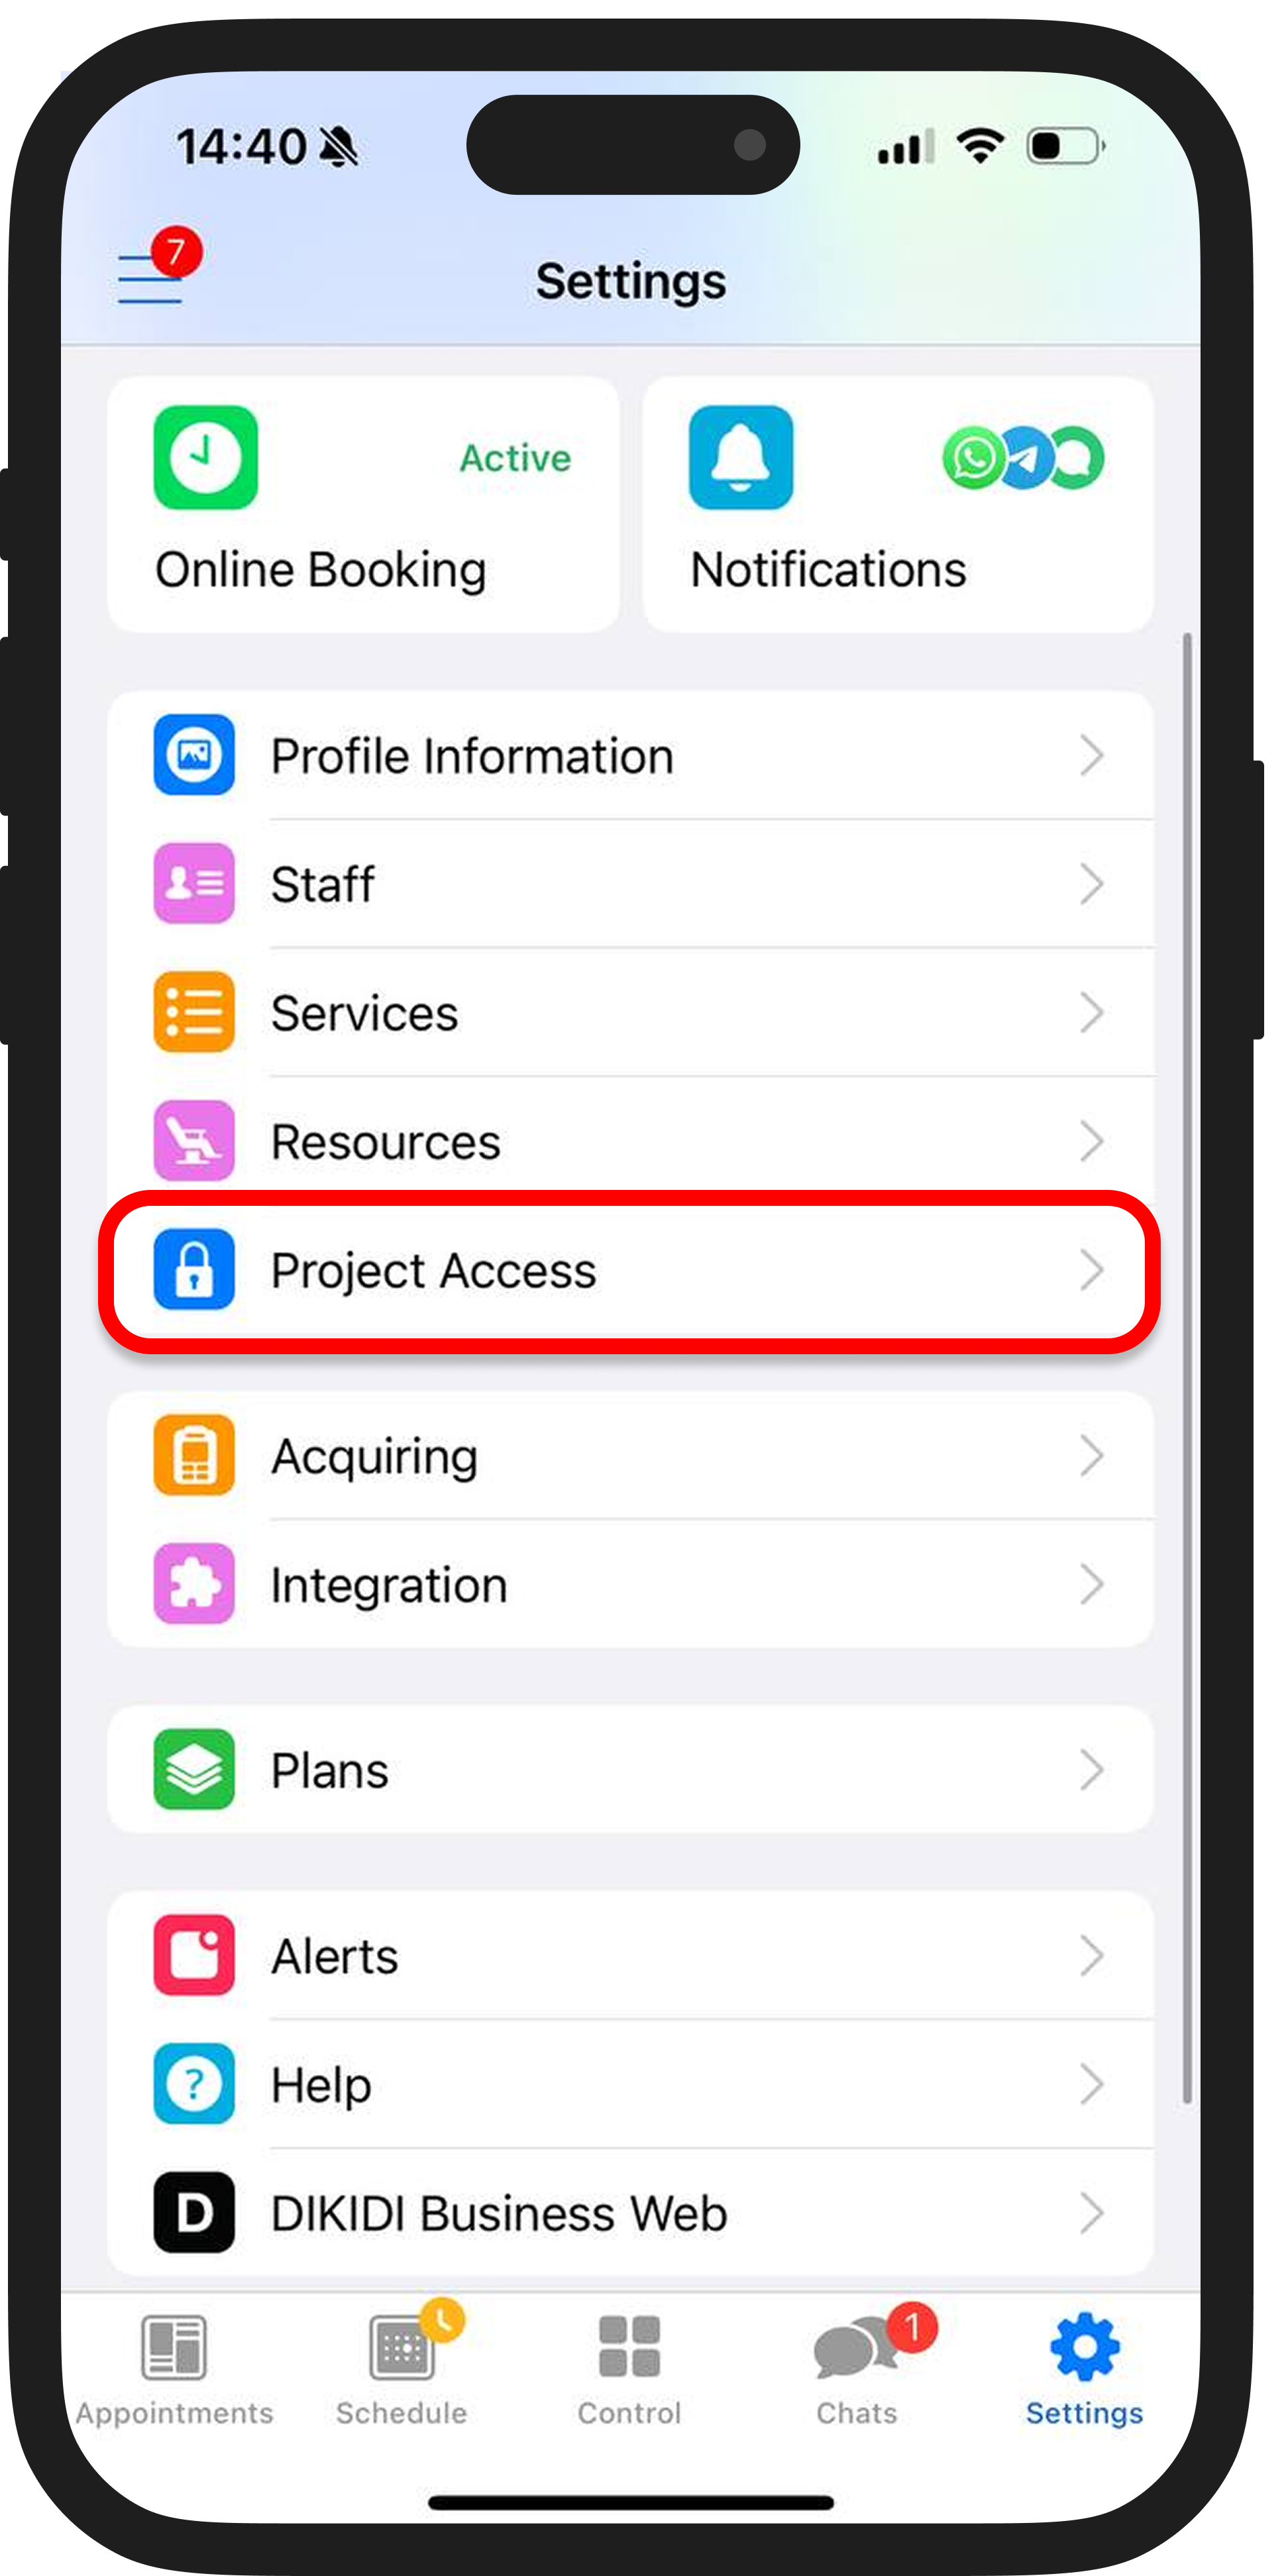
In the mobile app or the web version: Go to "Settings" — "Project Access".
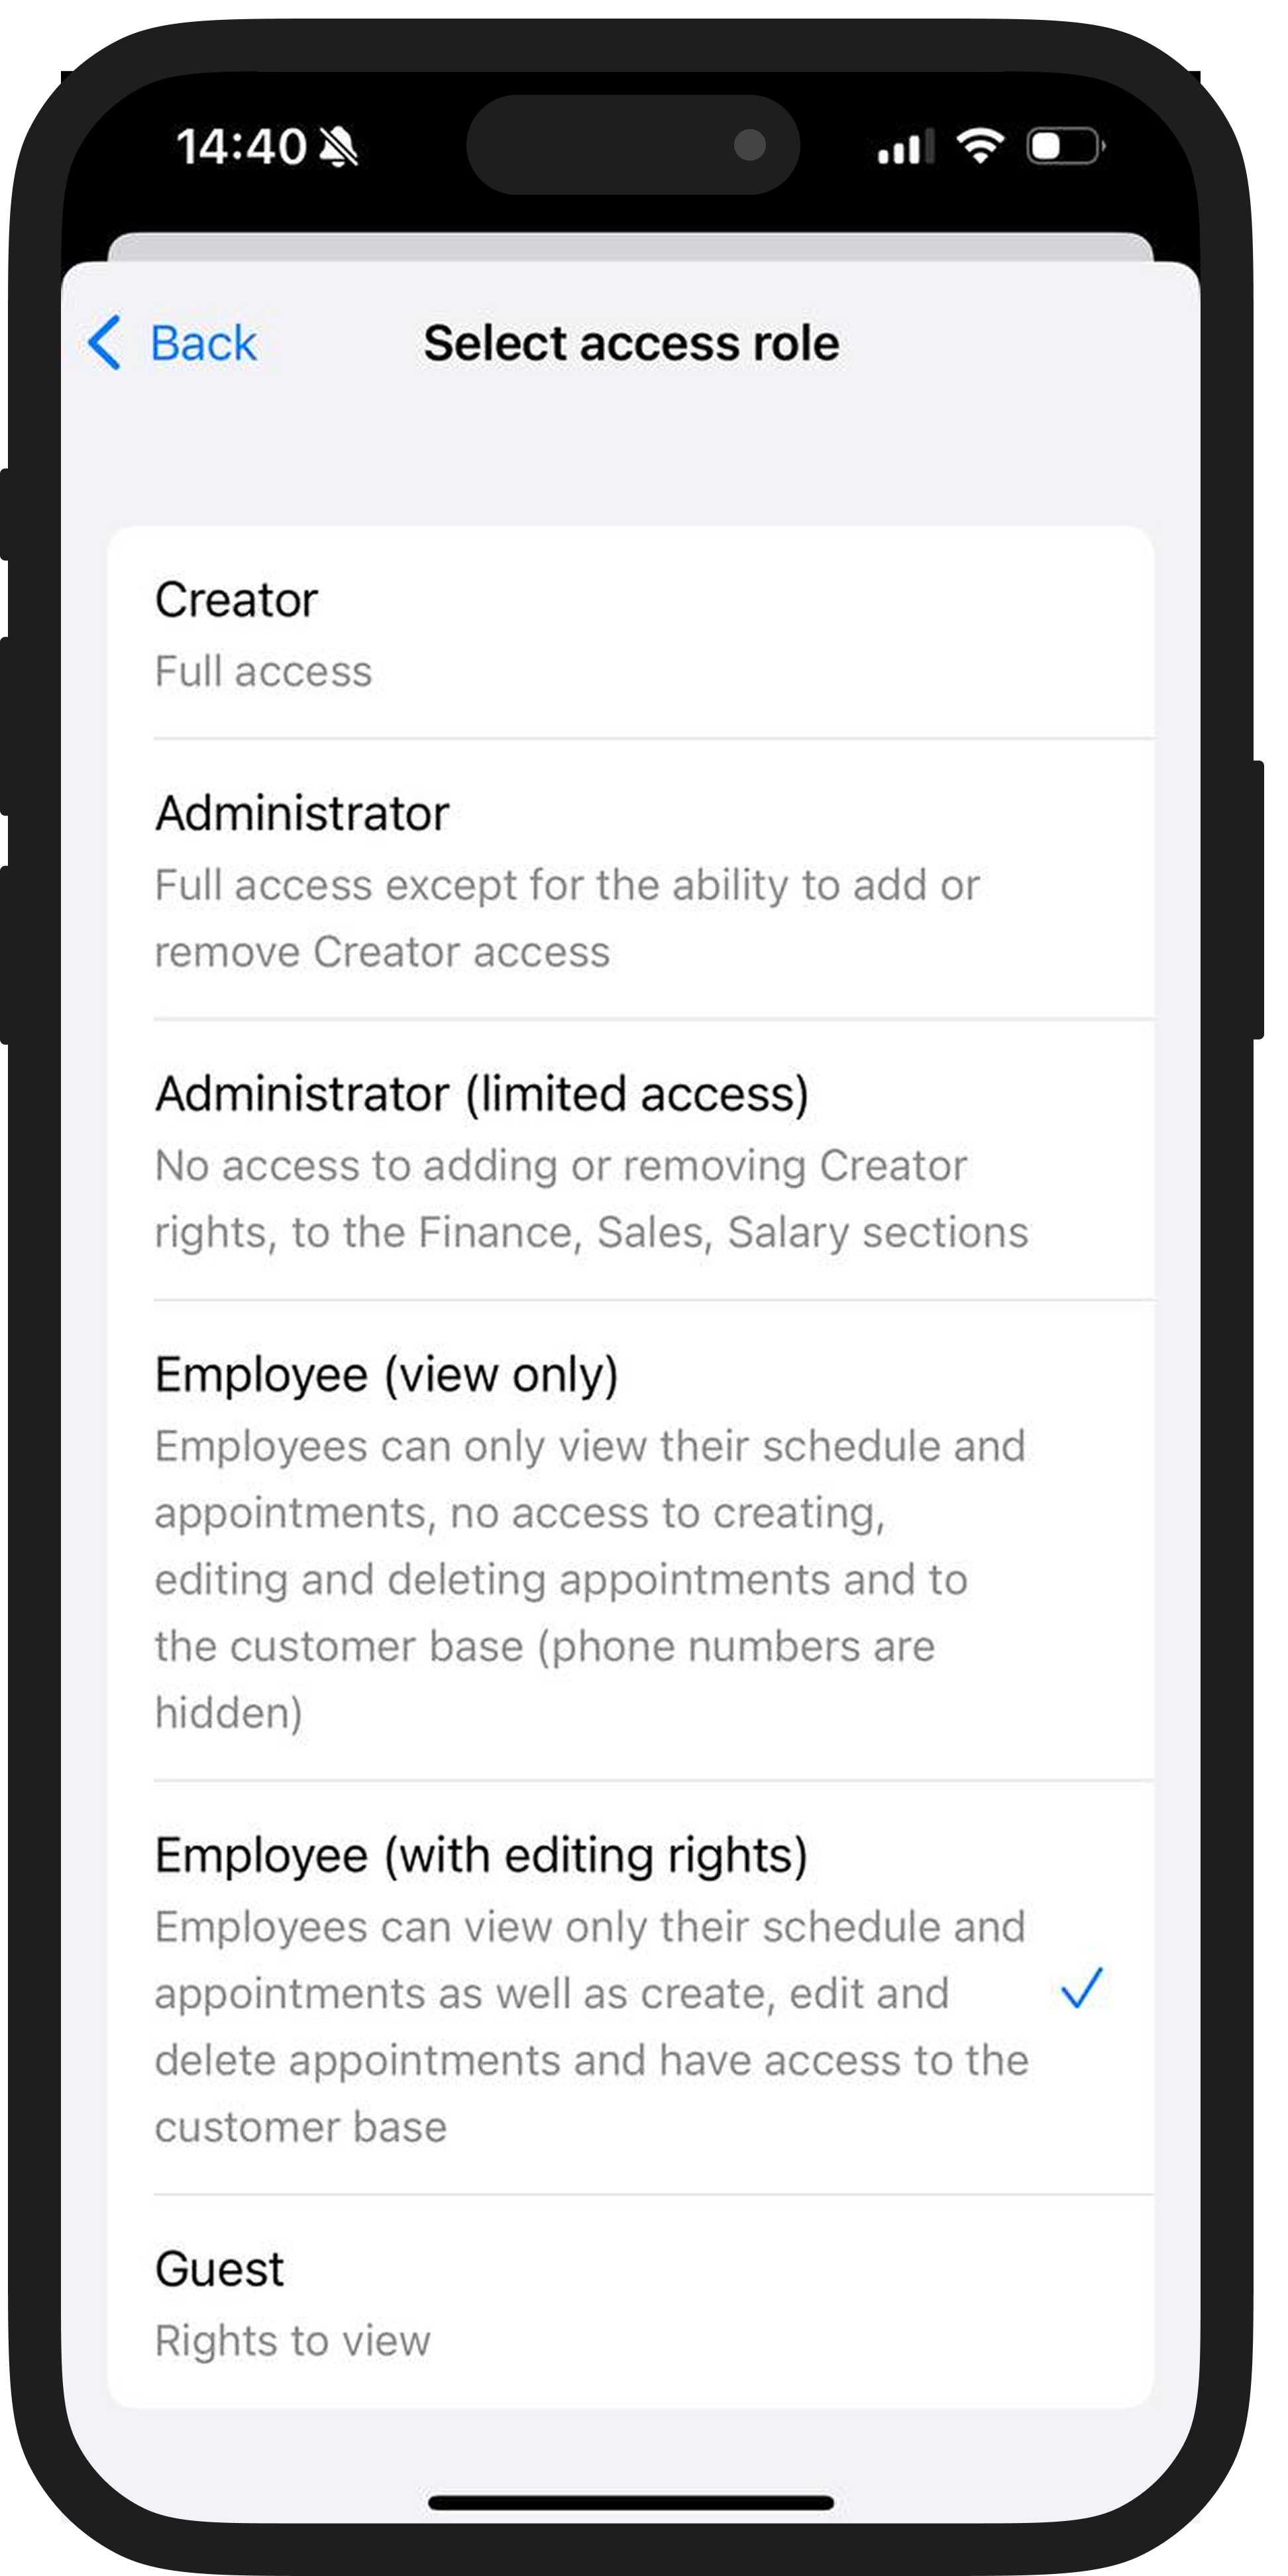
Сlick on the "Add access" button (or "+"), specify employee's phone number and select a user group. For example, "Employee (with editing rights)".
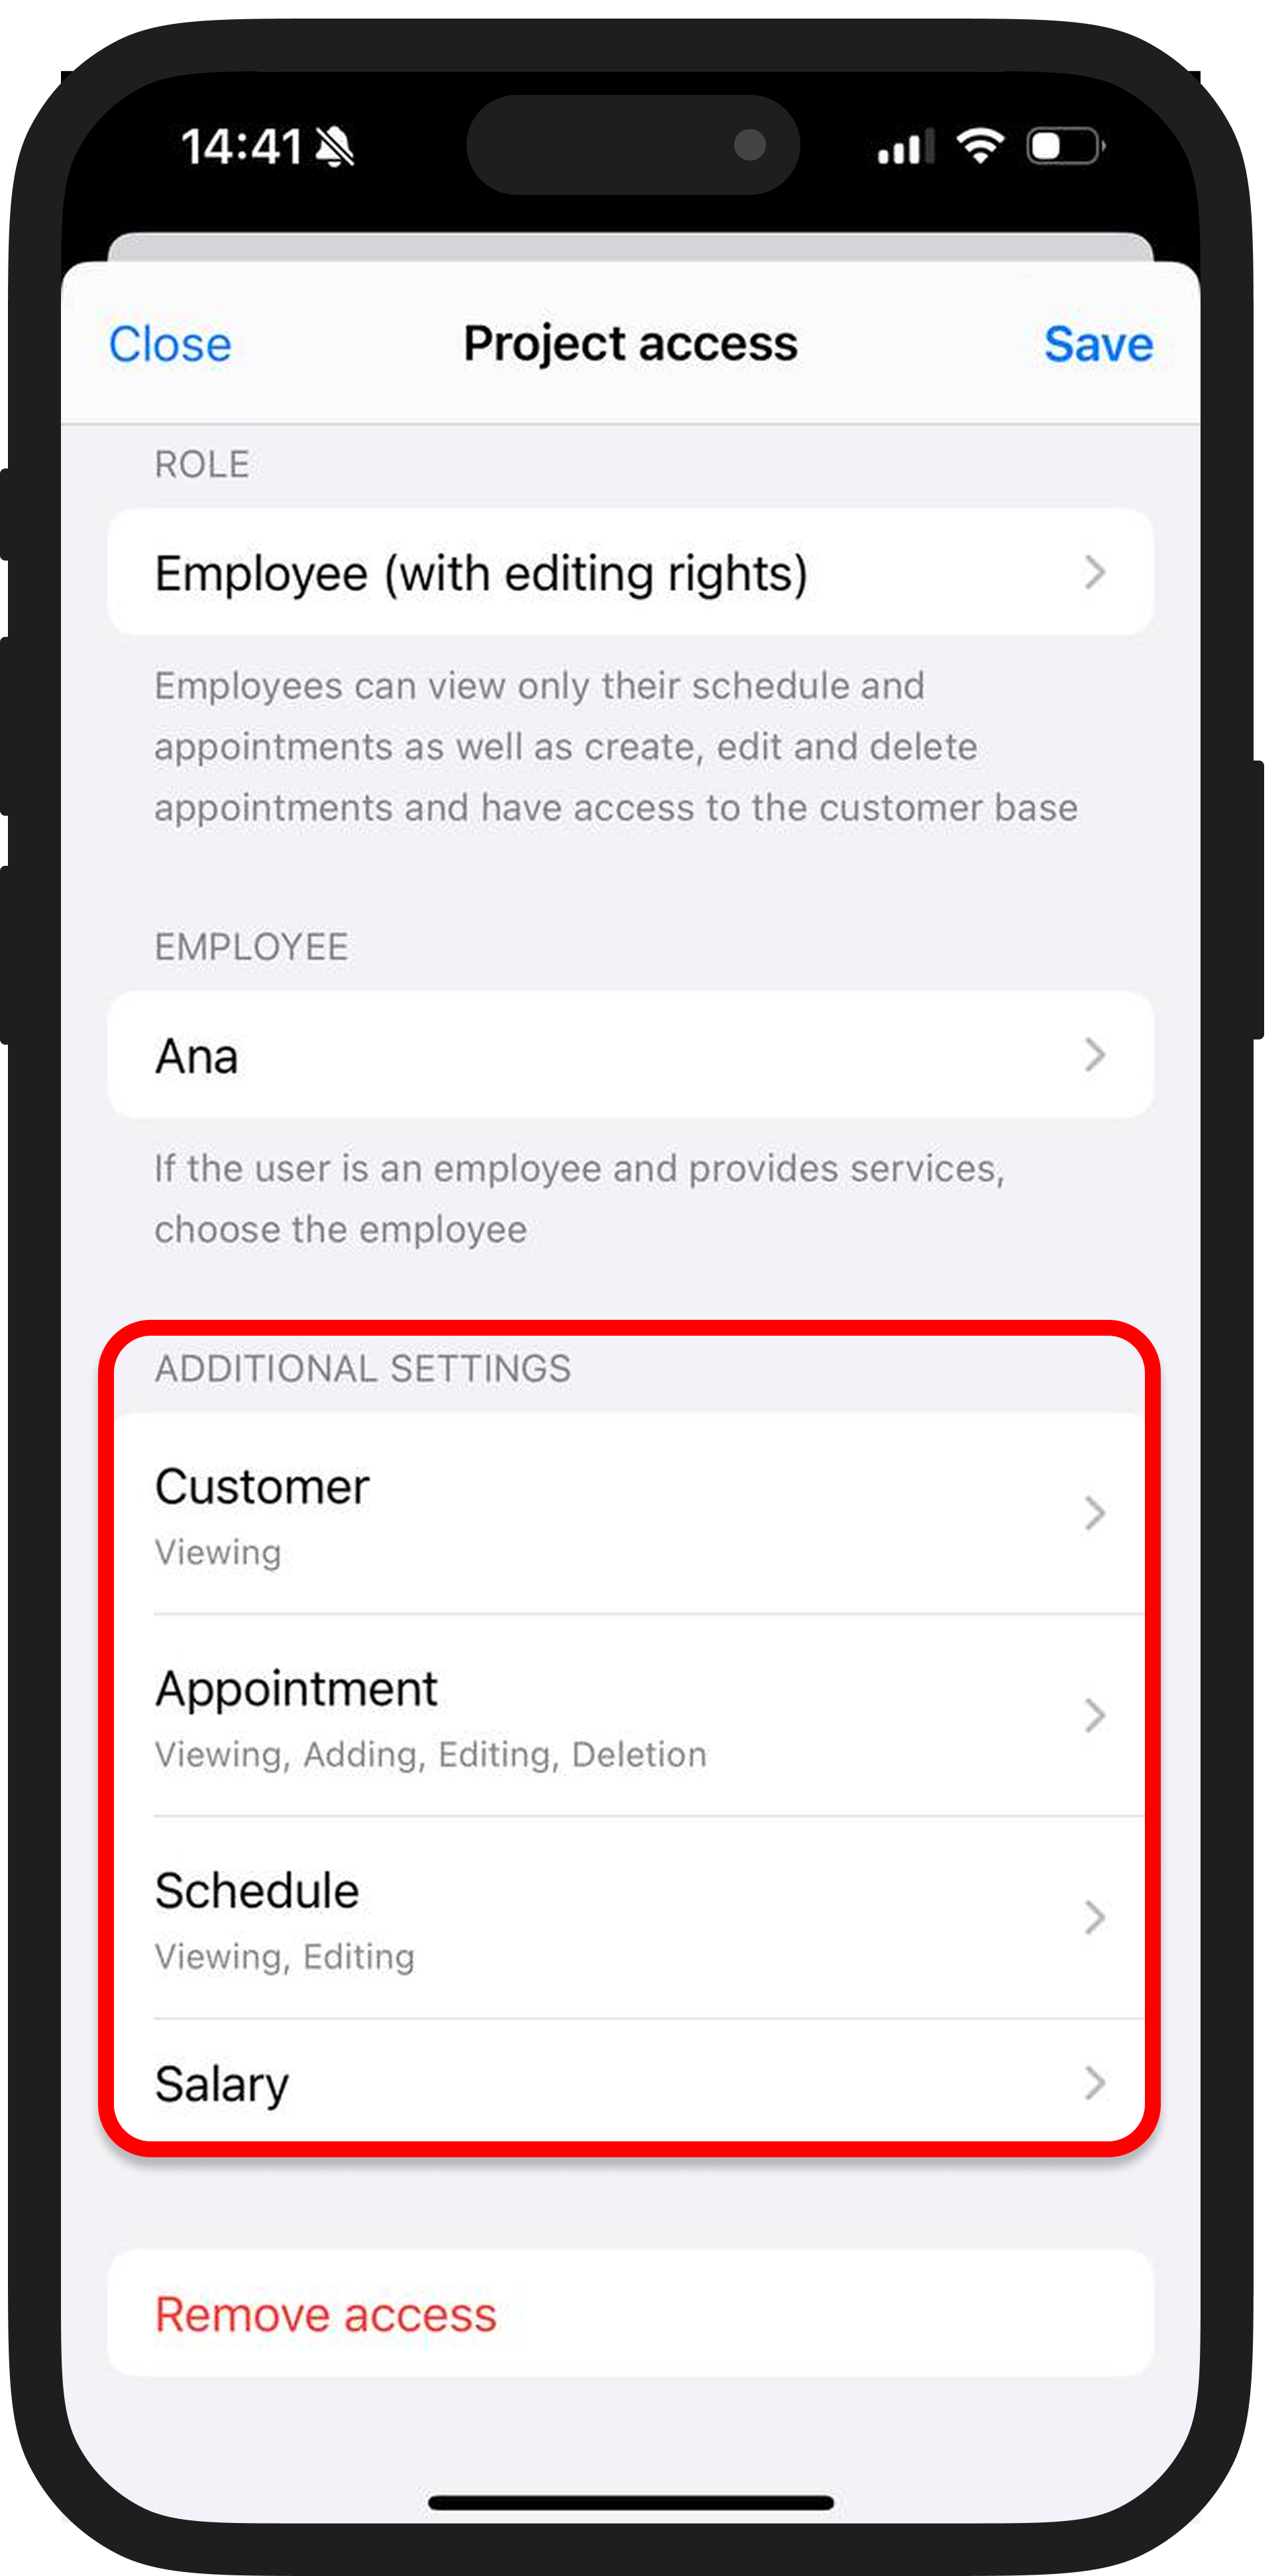
You can apply additional settings for each employee:
1) Client view — an employee will only see their own clients or all clients, and it is also possible to hide phone numbers and surnames for viewing.
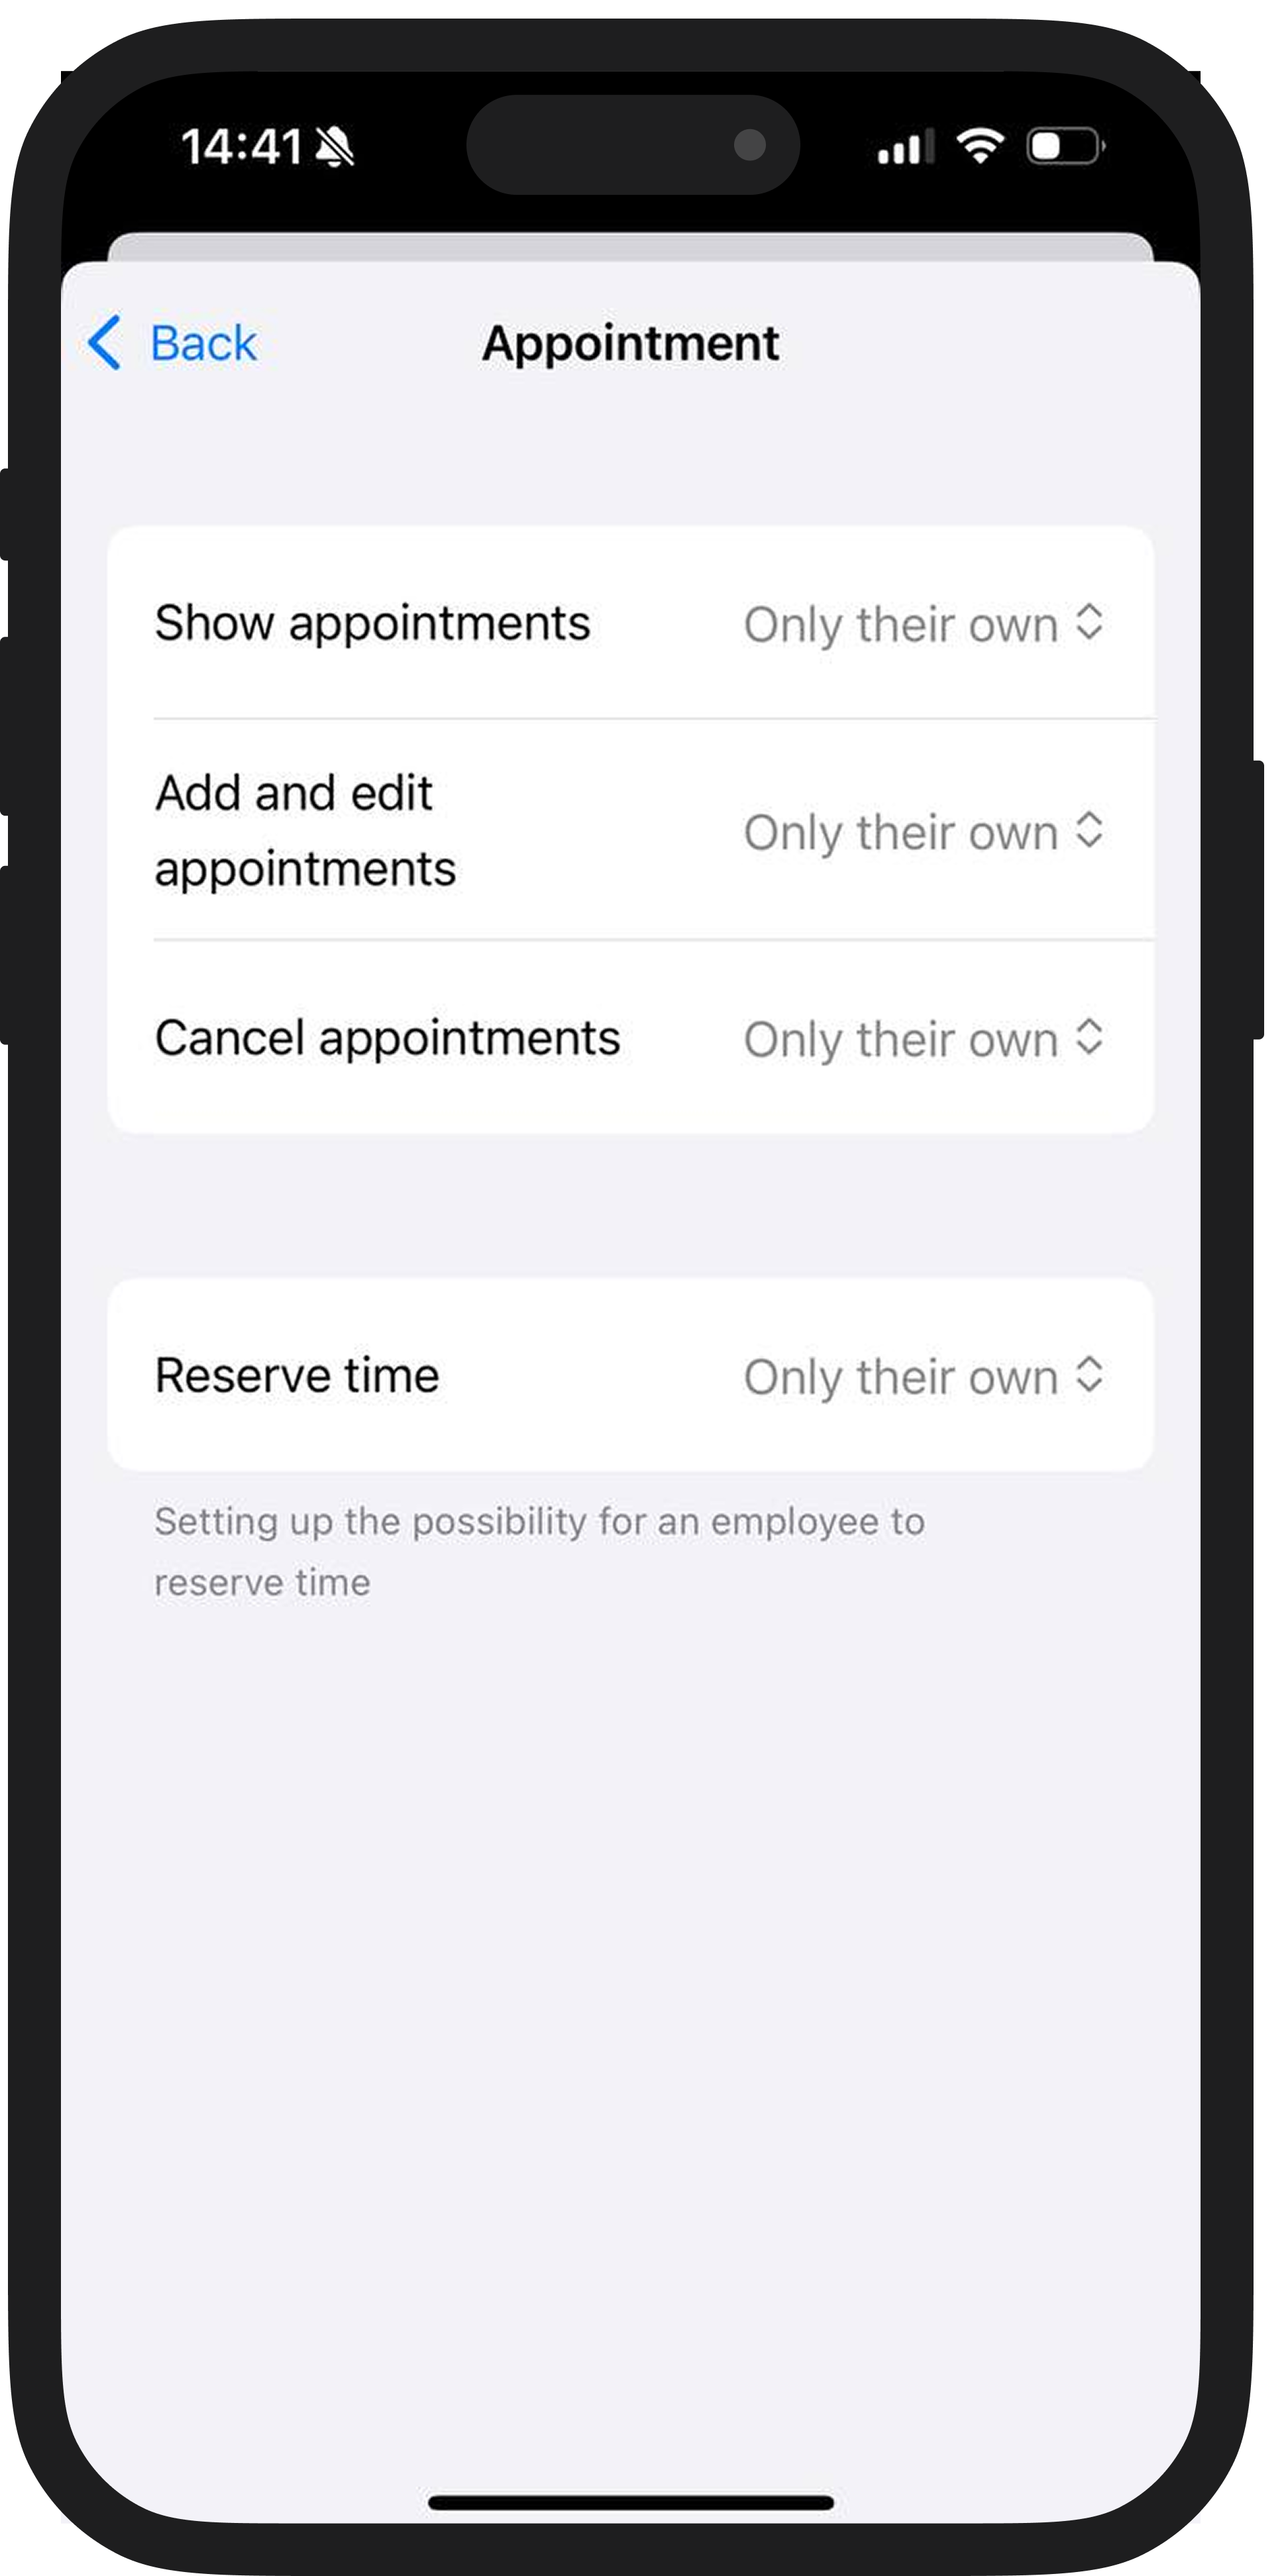
2) Appointment editing — an employee has the ability to view, edit, and delete only their own appointments or appointments of any employee, as well as reserve time in the appointment journal.
3) Schedule editing — an employee can view and edit only their own schedule or schedules of other employees.
4) Salary — an employee can view their own salary or the salaries of other employees.
Any of these actions can be completely prohibited.
This way, you can independently determine what each employee can see and edit based on their position in the company and job responsibilities.
What to do after
An employee should download the DIKIDI mobile app and sign in with his phone number, which was entered in "Project access". If he does not receive a confirmation code, then most likely he has already been previously registered to this number in the system — in this case, click "Forgot password" and you will get a new password.
Attention. Do not allow "shared access" to your project — this is when you give a login and password from one access to several employees at once for use.
In this case, if an error occurs, you will hardly be able to figure out which of your employees made it. And also with "shared access" there are cases when one of employees after dismissal harms and, for example, deletes everything. To prevent this from happening, you must immediately remove access to your project from this employee after dismissal, and for this everyone must have their own.
Read more:
Access Types